Enable Blogging Capabilities with Material for MkDocs
Overview
In this blog, we're going to discuss how to add blogging capabilities to Material for MkDocs. Here's what we refer to as blogging capabilities:
- author's GitHub avatar, name, and link to GitHub profile
- a calendar icon with a publishing date next to it
- a clock icon with a value for time to read next to it
You can also see the above mentioned capabilities under the title of this blog.
In particular, we'll look at:
- What kind of metadata key-value pairs you need to define in your
.mdfile and how. - How to override a specific block in the
main.htmlfile that MkDocs uses as a template when building the HTML output from your.mdsource, so that the metadata values provided in your.mdfile are reflected in the HTML output.
As a result, a blog author will just have to provide sufficient metadata in the frontmatter of their .md file and data about author, publishing date, and reading time will be displayed as part of their blog. Cool, right?
This can also be done manually by including a piece of HTML code in each .md file but we wanted to have everything set up for blog authors in a way that they can focus on the writing itself.
Adding Metadata to Your Blog
Metadata about an .md file (also called frontmatter) is declared within a specific block in the beginning of the .md file itself and is denoted by the triple dashes at the start and end of the block. Usually, the metadata is not processed when generating HTML output from the .md file. With MkDocs, metadata can be displayed on the page or used to control the page rendering, but only if this is supported by the theme you're using with MkDocs. For more details, checkout the MkDocs documentation.
We have to determine what metadata key-value pairs are needed for the blogging capabilities. As mentioned above, we want to have name, GitHub avatar, and link to GitHub profile of the author, as well as publishing date and reading time.
Open your .md file and add the following lines:
---
author: <Your Name>
author_gh_user: <Your GitHub User>
read_time: <Reading Time>
publish_date: <Date of Publishing>
---
It's quite self-explanatory which metadata key-value pairs are responsible for which of the blogging capabilities. You can find more details in step 5 of Overriding the Content Block. The more interesting one is author_gh_user. This value will be used for both getting the author's GitHub avatar and creating a hyperlink to their GitHub profile.
Make sure the title is also set in the metadata.
Setting the title in the metadata will help position the blogging capabilities in the right place - under the title and before the rest of your blog.
---
title: <Your Blog Title>
author: <Your Name>
author_gh_user: <Your GitHub User>
read_time: <Reading Time>
publish_date: <Date of Publishing>
---
Heading 2 level (## This is a heading 2) as the highest heading level in your blog. Otherwise, the first Heading 1 you use will overwrite the title from the frontmatter and cause formatting issues.
Overriding the Content Block
MkDocs supports theme extension out-of-the-box. Material for MkDocs leverages this feature and provides the possibility to override a partial (such as the default header or footer) or a template block. The process is described in detail in the Extending the theme section of the Material for MkDocs documentation.
Moreover, Material for MkDocs provides a ready-made content template blog, among others. Overriding Blocks provides the full details about template blogs that are provided by the theme.
Since we want to add the blogging capabilities above the content, but just under the title of our blog, we'll have to override the content block. Follow the steps below:
-
Create an
overridesdirectory on the same level where yourmkdocs.ymlresides.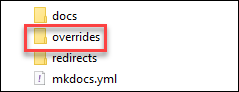
-
Open your
mkdocs.ymland add a reference to theoverridesdirectory using thecustom_dirparameter:theme: name: material custom_dir: overrides - In the
overridesdirectory, create a new filemain.html. -
Copy the original code of the
contentblock from the source files of Material for MkDocs and paste it in yourmain.html. Here's the code you need:<!-- Content --> {% block content %} <!-- Edit button --> {% if page.edit_url %} <a href="{{ page.edit_url }}" title="{{ lang.t('edit.link.title') }}" class="md-content__button md-icon" > {% include ".icons/material/pencil.svg" %} </a> {% endif %} <!-- Hack: check whether the content contains a h1 headline. If it doesn't, the page title (or respectively site name) is used as the main headline. --> {% if not "\x3ch1" in page.content %} <h1>{{ page.title | d(config.site_name, true)}}</h1> {% endif %} <!-- Markdown content --> {{ page.content }} <!-- Last update of source file --> {% if page and page.meta %} {% if page.meta.git_revision_date_localized or page.meta.revision_date %} {% include "partials/source-file.html" %} {% endif %} {% endif %} {% endblock %}Although we're overriding a template block in
main.html, the actual code resides in thebase.htmlfile thatmain.htmlextends. Openbase.htmlin your browser and scroll down to thecontentblock. -
Under
Markdown content, add the custom HTML code we need for the blogging capabilities:<!-- Markdown content --> {% if page and page.meta and page.meta.author_gh_user %} <aside class="mdx-author"> <p> <img src="https://avatars.githubusercontent.com/{{ page.meta.author_gh_user }}" alt="@{{ page.meta.author_gh_user }}"> </p> <p> <span> <b>{{ page.meta.author }}</b> · <a href="https://github.com/{{ page.meta.author_gh_user }}">@{{ page.meta.author_gh_user }}</a> </span> <span> <svg xmlns="http://www.w3.org/2000/svg" width="16" height="16" fill="currentColor" class="bi bi-calendar2" viewBox="0 0 16 16"> <path d="M3.5 0a.5.5 0 0 1 .5.5V1h8V.5a.5.5 0 0 1 1 0V1h1a2 2 0 0 1 2 2v11a2 2 0 0 1-2 2H2a2 2 0 0 1-2-2V3a2 2 0 0 1 2-2h1V.5a.5.5 0 0 1 .5-.5zM2 2a1 1 0 0 0-1 1v11a1 1 0 0 0 1 1h12a1 1 0 0 0 1-1V3a1 1 0 0 0-1-1H2z"/> <path d="M2.5 4a.5.5 0 0 1 .5-.5h10a.5.5 0 0 1 .5.5v1a.5.5 0 0 1-.5.5H3a.5.5 0 0 1-.5-.5V4z"/> </svg> {{ page.meta.publish_date }} · <svg xmlns="http://www.w3.org/2000/svg" width="16" height="16" fill="currentColor" class="bi bi-clock" viewBox="0 0 16 16"> <path d="M8 3.5a.5.5 0 0 0-1 0V9a.5.5 0 0 0 .252.434l3.5 2a.5.5 0 0 0 .496-.868L8 8.71V3.5z"/> <path d="M8 16A8 8 0 1 0 8 0a8 8 0 0 0 0 16zm7-8A7 7 0 1 1 1 8a7 7 0 0 1 14 0z"/> </svg> {{ page.meta.read_time }} read </span> </p> </aside> {% endif %} {{ page.content }}Kudos to squidfunk for providing the raw code of his own implementation as part of this discussion.
By following the steps above, you've already overriden and extended the
contentblock with information about the blog author, publishing date, and reading time. Let's have a closer look at some of the settings:{% if page and page.meta and page.meta.author_gh_user %}ensures that the blogging capabilities will be shown on the page only if the metadata keyauthor_gh_useris defined in the.mdfile metadata.https://avatars.githubusercontent.com/{{ page.meta.author_gh_user }}is the URL from which the author's avatar is extracted. It uses theauthor_gh_uservalue provided in the.mdmetadata to get the avatar from the author's GitHub profile.{{ page.meta.author }}uses theauthorvalue provided in the.mdmetadata.<a href="https://github.com/{{ page.meta.author_gh_user }}">@{{ page.meta.author_gh_user }}</a>uses theauthor_gh_uservalue provided in the.mdmetadata to create a hyperlink to the author's GitHub profile.- the
<svg>...</svg>elements provide a calendar and a clock Bootstrap Icons, while{{ page.meta.publish_date }}and{{ page.meta.read_time }}use thepublish_dateandread_timevalues, respectively, from the.mdmetadata.
-
Create a custom stylesheet file (
custom.css) in thedocs/stylesheetsdirectory and add a reference to it in themkdocs.yml:extra_css: - stylesheets/custom.cssAny additional stylesheet files should be placed in a
stylesheetsdirectory within yourdocsfolder. For more details, you can refer to Additional CSS. -
Add the following styles to
custom.css:This will provide the desired styling of our blogging capabilities. You can always play with the styles to make them more appealing./* Styles for blog-like features - author avatar & name, posting date, min to read, etc. */ .md-typeset .mdx-author img { border-radius: 100%; height: 2rem; } .md-typeset .mdx-author { display: flex; font-size: .68rem; } .md-typeset .mdx-author p>span { display: block; } p { display: block; margin-block-start: 1em; margin-block-end: 1em; margin-inline-start: 0px; margin-inline-end: 0px; } .md-typeset .mdx-author p:first-child { flex-shrink: 0; margin-right: .8rem; }
That's it. You have enabled blogging capabilities for your Material for MkDocs website. Go ahead and try it out!