Custom Domain in Google Kubernetes Engine with GCP Cloud DNS, Cloud SQL, Istio, Lets Encrypt, PostgreSQL and Keycloak
Overview
In this article we are going to setup a custom domain for a Dirigible application in a GKE cluster with GCP Cloud DNS, GCP Cloud SQL Postgre, Istio, Let's Encrypt, Keycloak.
Components:
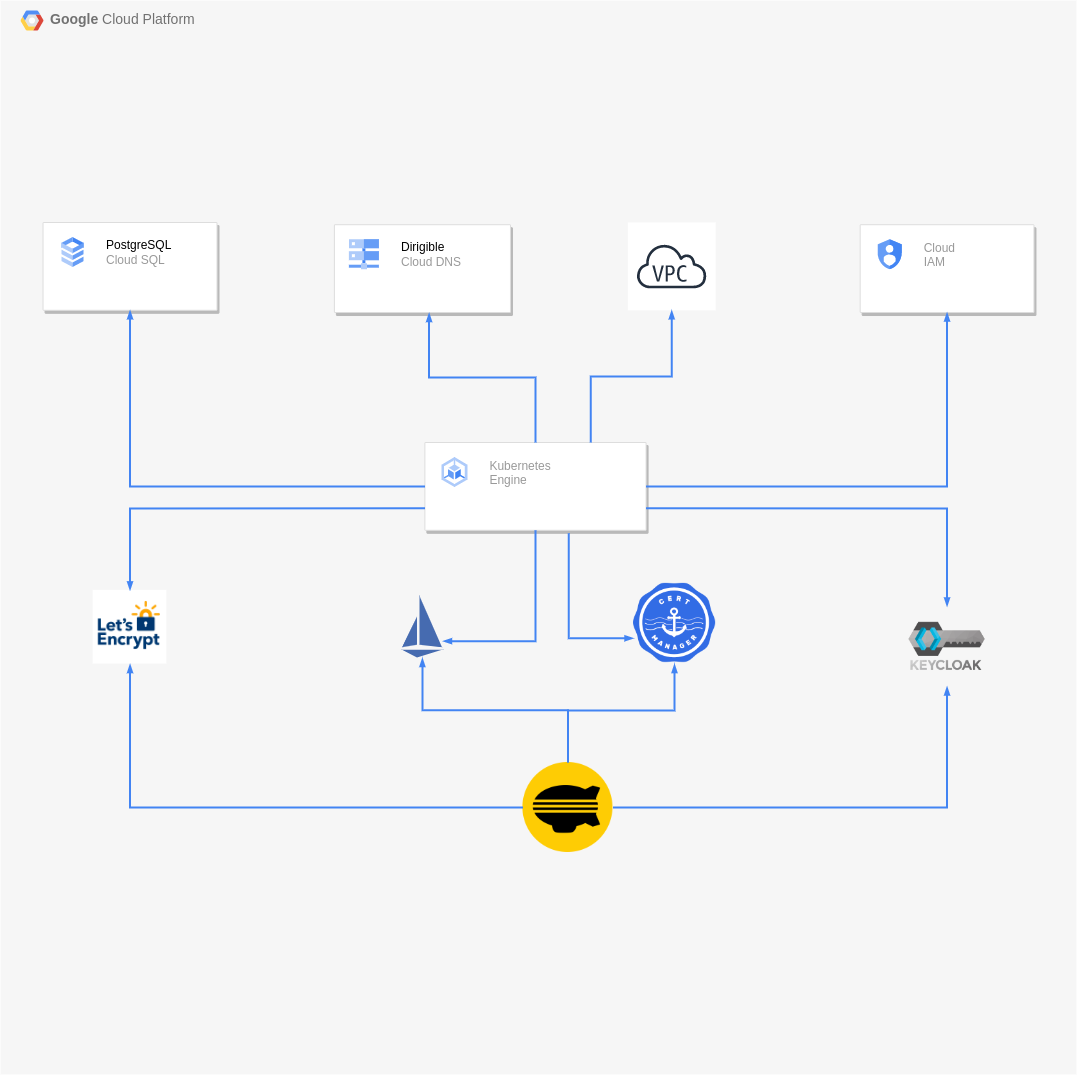
Overview
Kubernetes is an open-source system for automating deployment, scaling, and management of containerized applications in a cluster environment. You can read more about Kubernetes at www.kubernetes.io.
Overview
Reliable, resilient, low-latency DNS serving from Google's worldwide network provides you with everything you need to register, manage, and serve your domains. For more information, see Cloud DNS.
Overview
Fully managed relational database service for MySQL, PostgreSQL, and SQL Server with rich extension collections, configuration flags, and developer ecosystems. For more information, see GCP Cloud SQL Postgreere.
Overview
Istio is an open-source service mesh that layers transparently onto existing distributed applications. Istio’s powerful features provide a uniform and more efficient way to secure, connect, and monitor services. For more information, see Istio.
Overview
Istio is an open-source service mesh that layers transparently onto existing distributed applications. Istio’s powerful features provide a uniform and more efficient way to secure, connect, and monitor services. For more information, see Let's Encrypt.
Overview
Cert-manager is a powerful and extensible X.509 certificate controller for Kubernetes and OpenShift workloads. It will obtain certificates from a variety of Issuers, both popular public Issuers as well as private Issuers, and ensure the certificates are valid and up-to-date, and will attempt to renew certificates at a configured time before expiry. For more information, see Cert-manager.
Overview
Keycloak is an open source Identity and Access Management system for applications and services.For more information, see Keycloak.
Prerequisites
In this article, we assume that you already have a GCP account and added billing account.
GKE Cluster Configuration
Prerequisites
- Install the gcloud CLI
- Install kubectl and configure cluster access
- Install Helm
-
Create project
Go to create your project.
- Set name, organization and billing account.
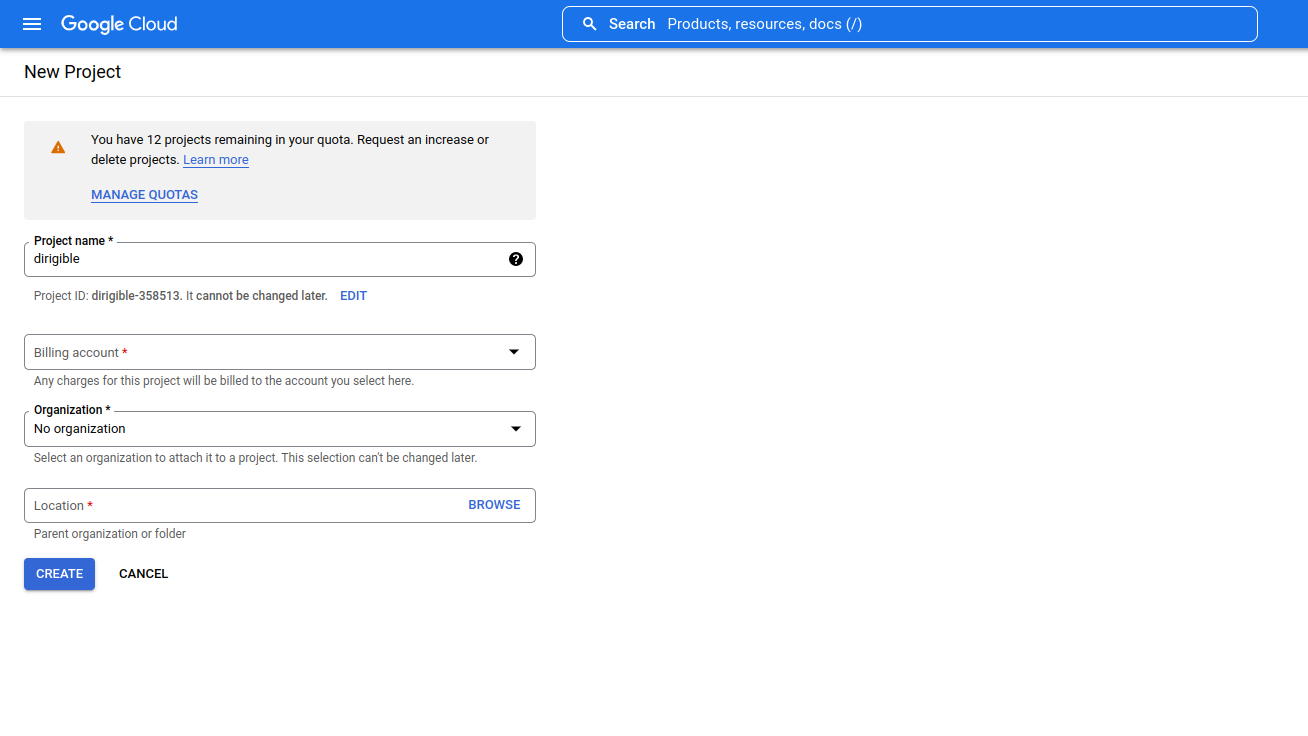
- Set name, organization and billing account.
-
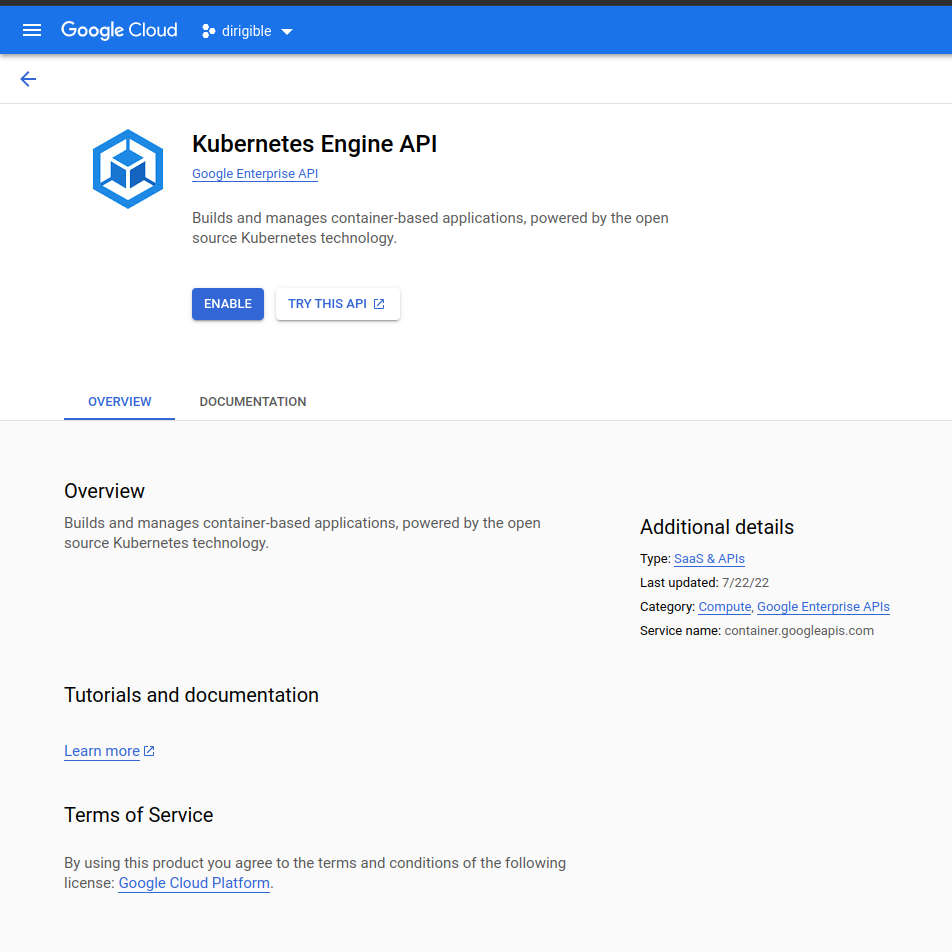
Enable Engine API
- To be able to create a cluster, we need to enable Kubernetes Api.
Go to enable Kubernetes API
-
Create GKE cluster
You can create standard and an autopilot cluster. In ths article, we will create the standard cluster.
At this time you have two options to create a cluster: manually or by Use a setup guide.
-
Manually
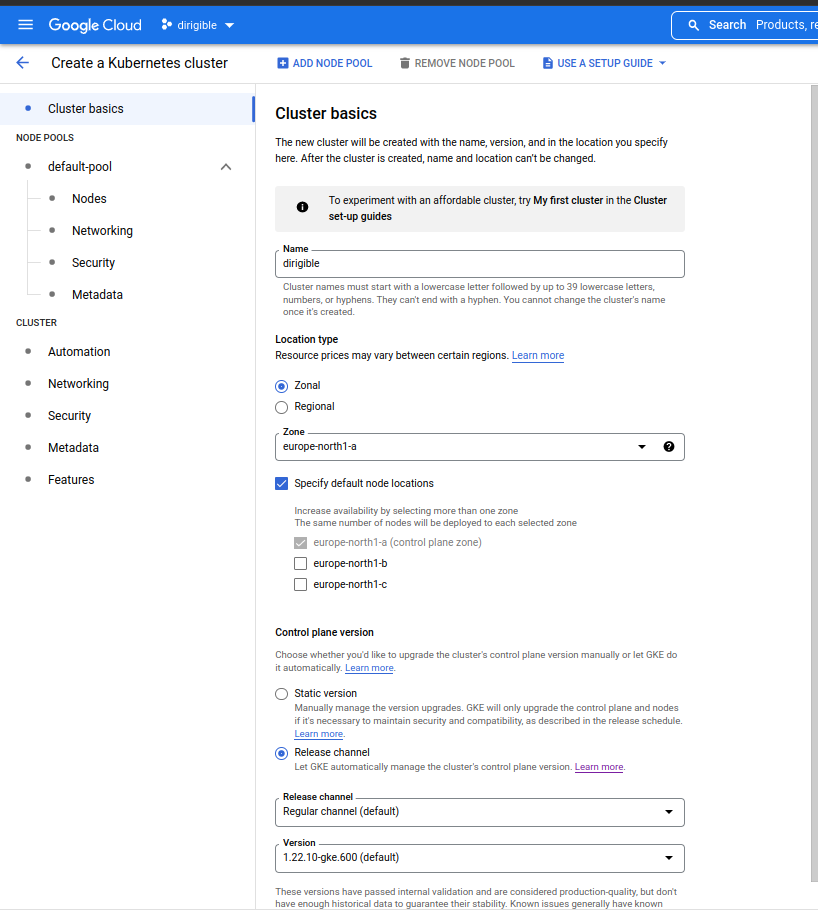
-
Use a setup guide
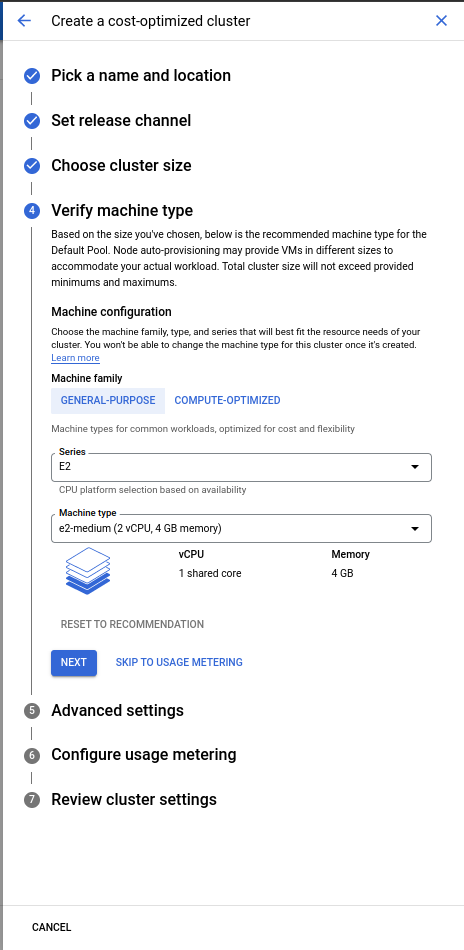
In this article we will
use a setup guideandcost-optimized cluster.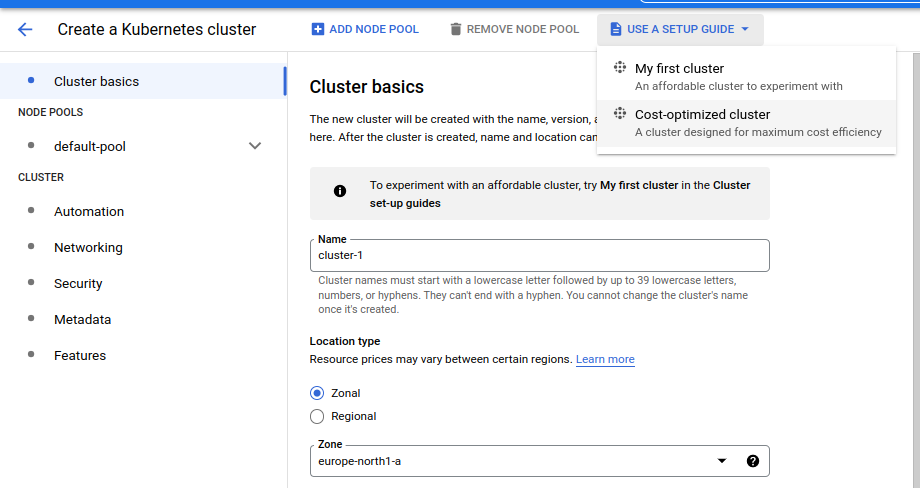
-
Choose a suitable location and name your cluster.
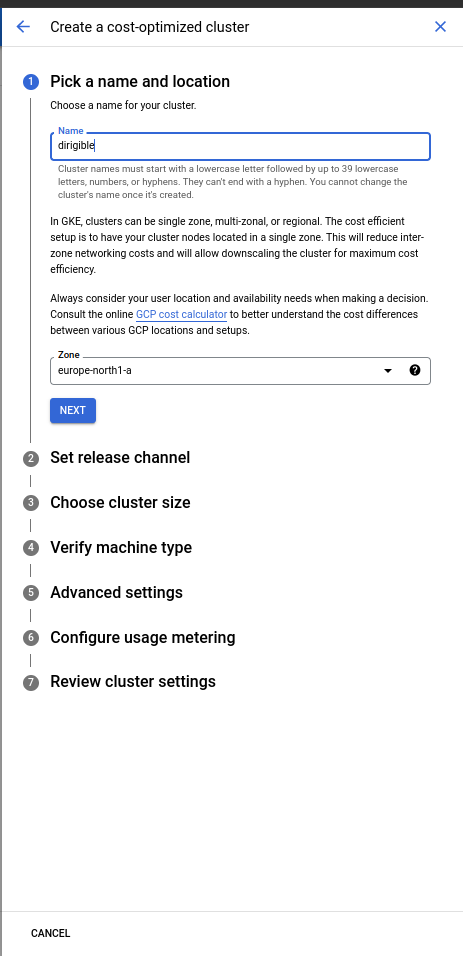
-
Set a release channel. We are going to set
Regular channel. This version have passed internal validation and are considered production-quality.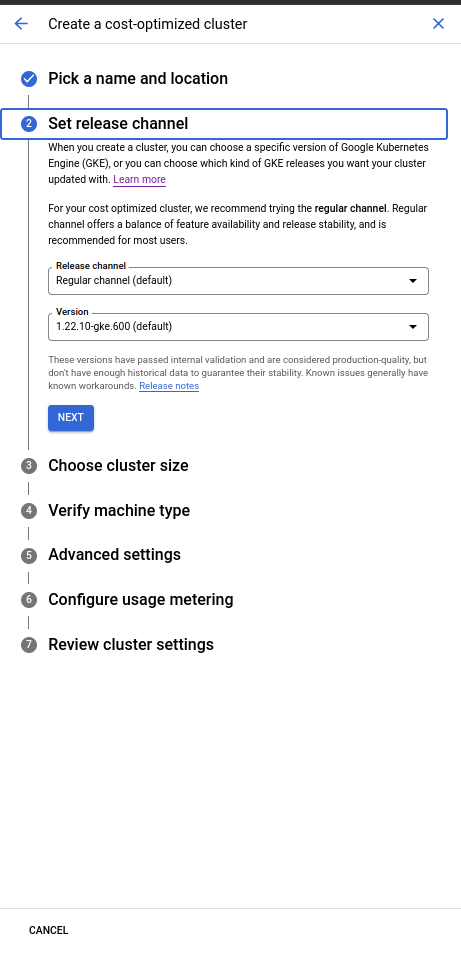
-
Choose a cluster size. In this article we are going to keep the default size.

-
Verify the machine type.
-
Advanced settings:
- In this article we will use
Optimize utilization.
Prioritize optimizing utilization over keeping spare resources in the cluster. When selected, the cluster autoscaler scales down the cluster more aggressively: it can remove more nodes, and remove nodes faster. - For cluster autoscaler you can configure how many maximum nodes to scale. It depends on your requirements. For this article we are going to keep this configuration maximum nodes
3. - Vertical Pod Autoscaling will ensure that the pods will be deployed on the right node.

- In this article we will use
-
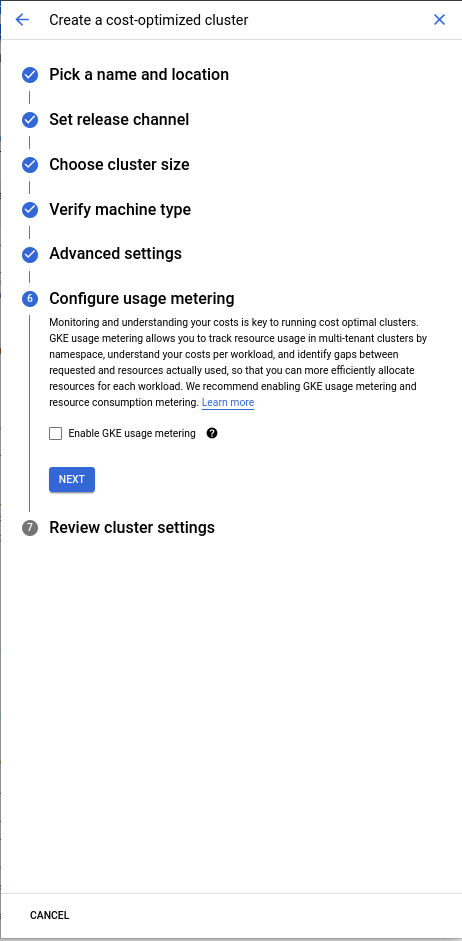
Configure usage metering.
- In this article we are not using metering.
- In this article we are not using metering.
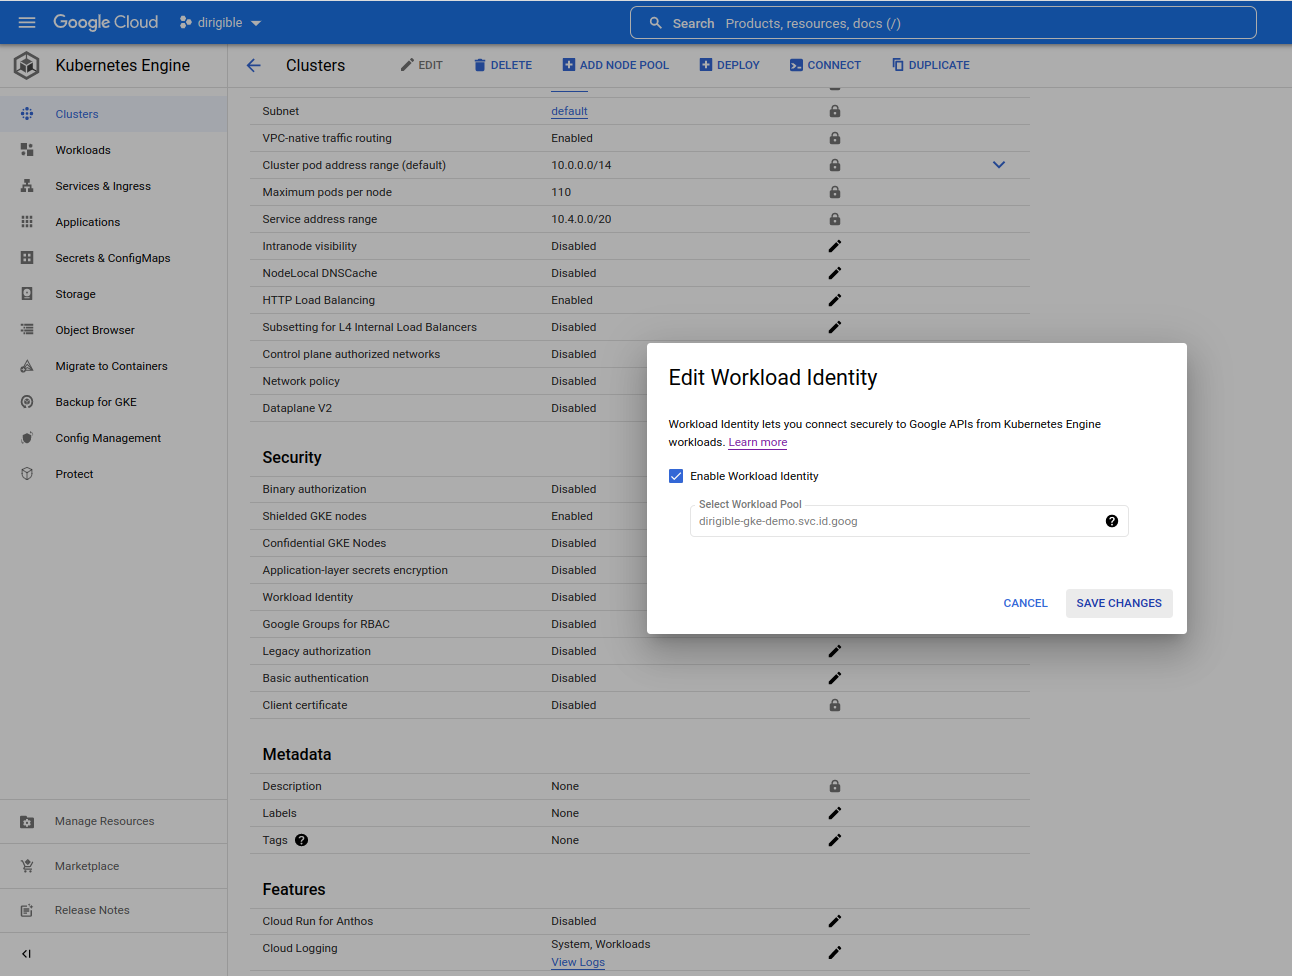
Enable Workload Identity
We need a workload identity to allow our Dirigible pod to access PostgreSQL.
-
Cluster Workload Identity
-
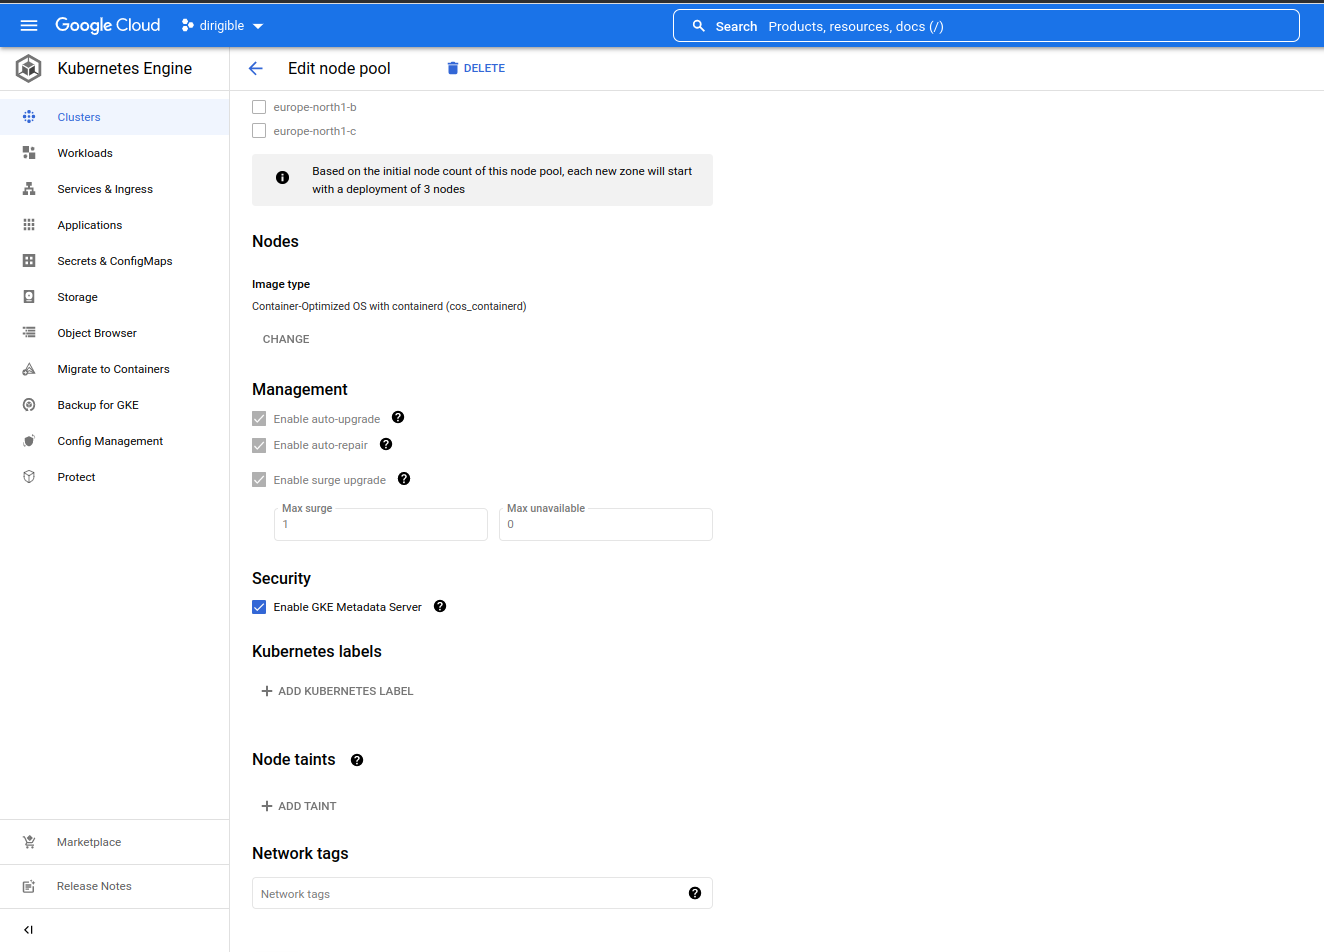
Node Workload Identity
Istio Configuration
Note
- In this article we will configure istioctl to use the configmaps from the 1-14-3 revision. We can run multiple versions of Istio concurrently and can specify exactly which revision gets applied in the tooling.
-
Initialize or reinitialize
gcloud- check this url for more information.gcloud init -
Enable the specific GKE cluster as the default cluster to be used for the remaining commands.
Note
You need to replace
dirigiblewithyour cluster nameandeurope-north1-awithyour region.gcloud container clusters get-credentials dirigible \ --region europe-north1-a -
Create istio-system namespace and add label istio-injection.
kubectl create namespace istio-systemkubectl label namespace istio-system istio-injection=enabled --overwrite -
Create Istio control plane service istiod.
kubectl apply -f - <<EOF
apiVersion: v1
kind: Service
metadata:
  labels:
    app: istiod
    istio: pilot
    release: istio
  name: istiod
  namespace: istio-system
spec:
  type: ClusterIP
  ports:
  - name: grpc-xds
    port: 15010
  - name: https-dns
    port: 15012
  - name: https-webhook
    port: 443
    targetPort: 15017
  - name: http-monitoring
    port: 15014
  selector:
    app: istiod
EOF
- Install minimal control plane.
istioctl install -y -n istio-system --revision 1-14-3 -f - <<EOF
apiVersion: install.istio.io/v1alpha1
kind: IstioOperator
metadata:
  name: control-plane
spec:
  profile: minimal
  values:
    gateways:
      istio-ingressgateway:
        autoscaleEnabled: true
  components:
    pilot:
      k8s:
        env:
        - name: PILOT_FILTER_GATEWAY_CLUSTER_CONFIG
          value: "true"
  meshConfig:
    defaultConfig:
      proxyMetadata:
        ISTIO_META_DNS_CAPTURE: "true"
    enablePrometheusMerge: true
EOF
-
Enable the istio-ingressgateway component.
- Install the istio-ingress gateway in a namespace that is different from
istiodand add theistio-injectiontag.
kubectl create namespace istio-ingresskubectl label namespace istio-ingress istio-injection=enabled --overwrite- Install it with a revision that matches the control plane in the istio-system namespace.
- Install the istio-ingress gateway in a namespace that is different from
istioctl install -y -n istio-ingress --revision 1-14-3 -f - <<EOF
apiVersion: install.istio.io/v1alpha1
kind: IstioOperator
metadata:
  name: istio-ingress-gw-install
spec:
  profile: empty
  values:
    gateways:
      istio-ingressgateway:
        autoscaleEnabled: true
  components:
    ingressGateways:
    - name: istio-ingressgateway
      namespace: istio-ingress
      enabled: true
      k8s:
        overlays:
        - apiVersion: apps/v1
          kind: Deployment
          name: istio-ingressgateway
          patches:
          - path: spec.template.spec.containers[name:istio-proxy].lifecycle
            value:
              preStop:
                exec:
                  command: ["sh", "-c", "sleep 5"]
EOF
-
Apply Strict mTLS
- Encrypt the traffic between services in the mesh with mutual TLS.
kubectl apply --namespace istio-system -f - <<EOF
apiVersion: security.istio.io/v1beta1
kind: PeerAuthentication
metadata:
  name: default
spec:
  mtls:
    mode: STRICT
EOF
GCP Cloud DNS Configuration
-
Enable Cloud DNS API.
Go to page and choose
Enableto enable the API.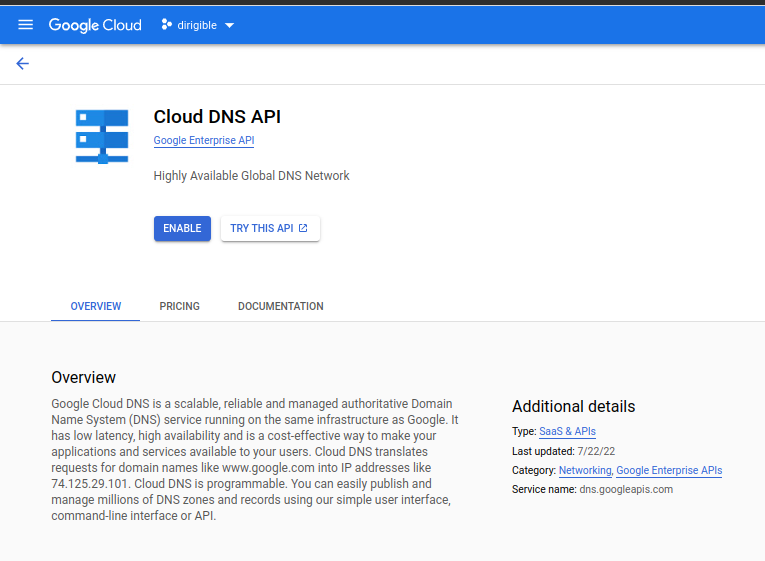
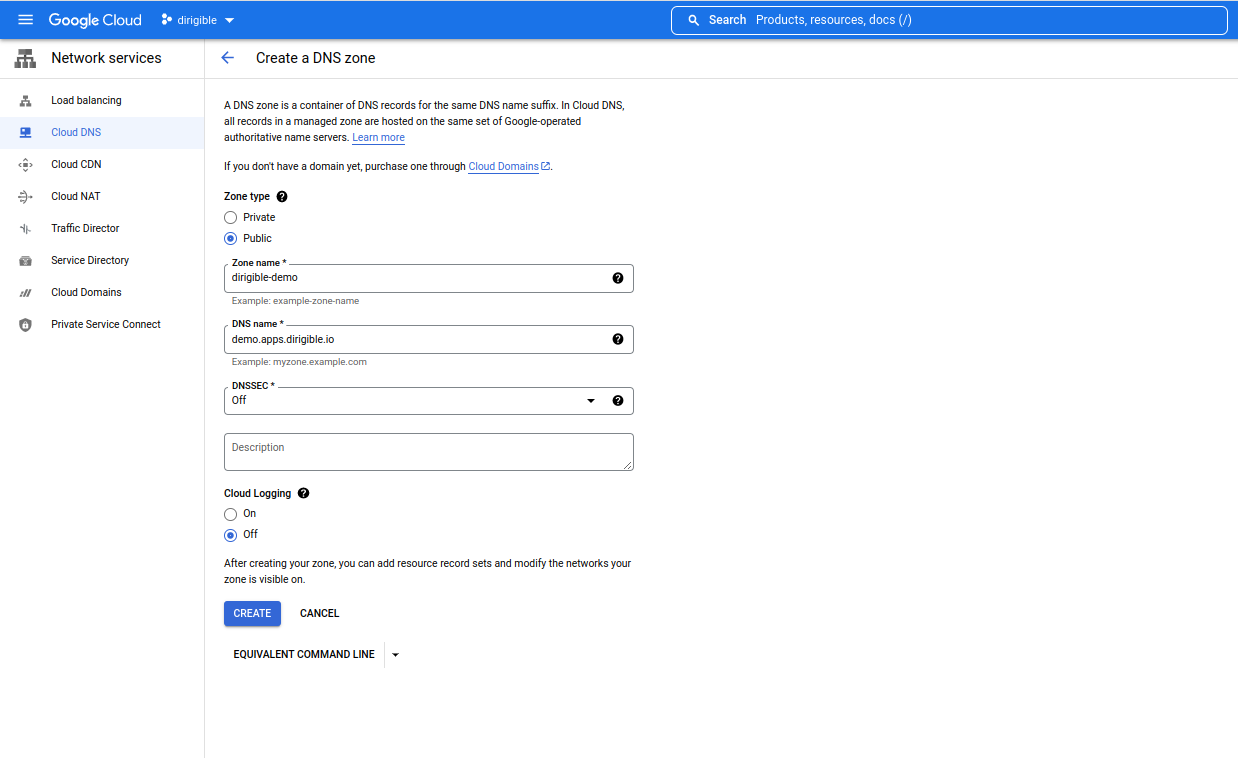
-
Create Cloud DNS Zone.
Go to page
-
Copy the generated DNS name servers for your zone and add them to your domain, if your control is not in Google Clod DNS.
The generated DNS name servers should look like this:
ns-cloud-e1.googledomains.com.
ns-cloud-e2.googledomains.com.
ns-cloud-e3.googledomains.com.
ns-cloud-e4.googledomains.com.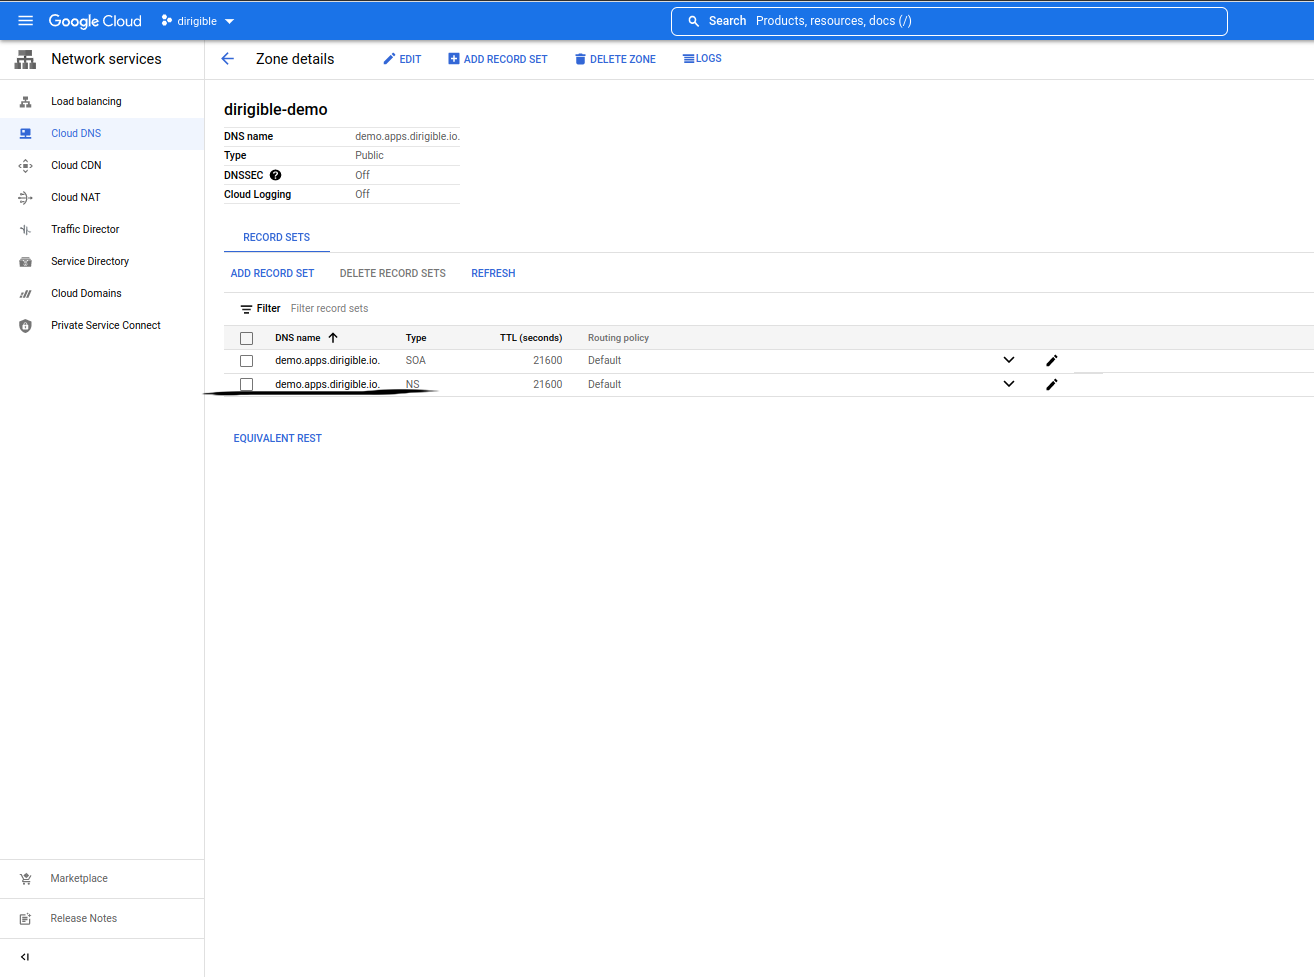
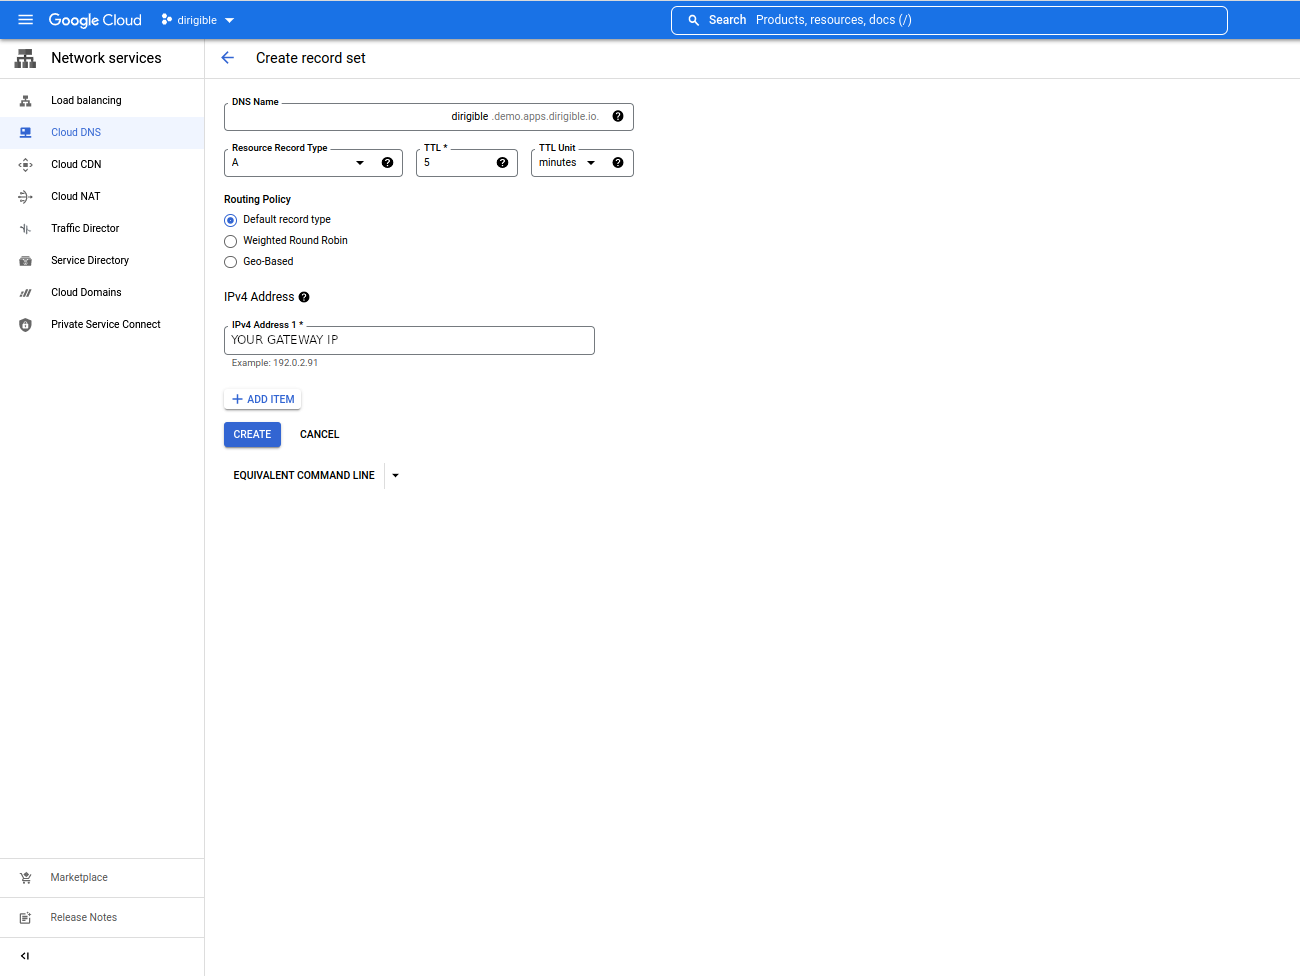
-
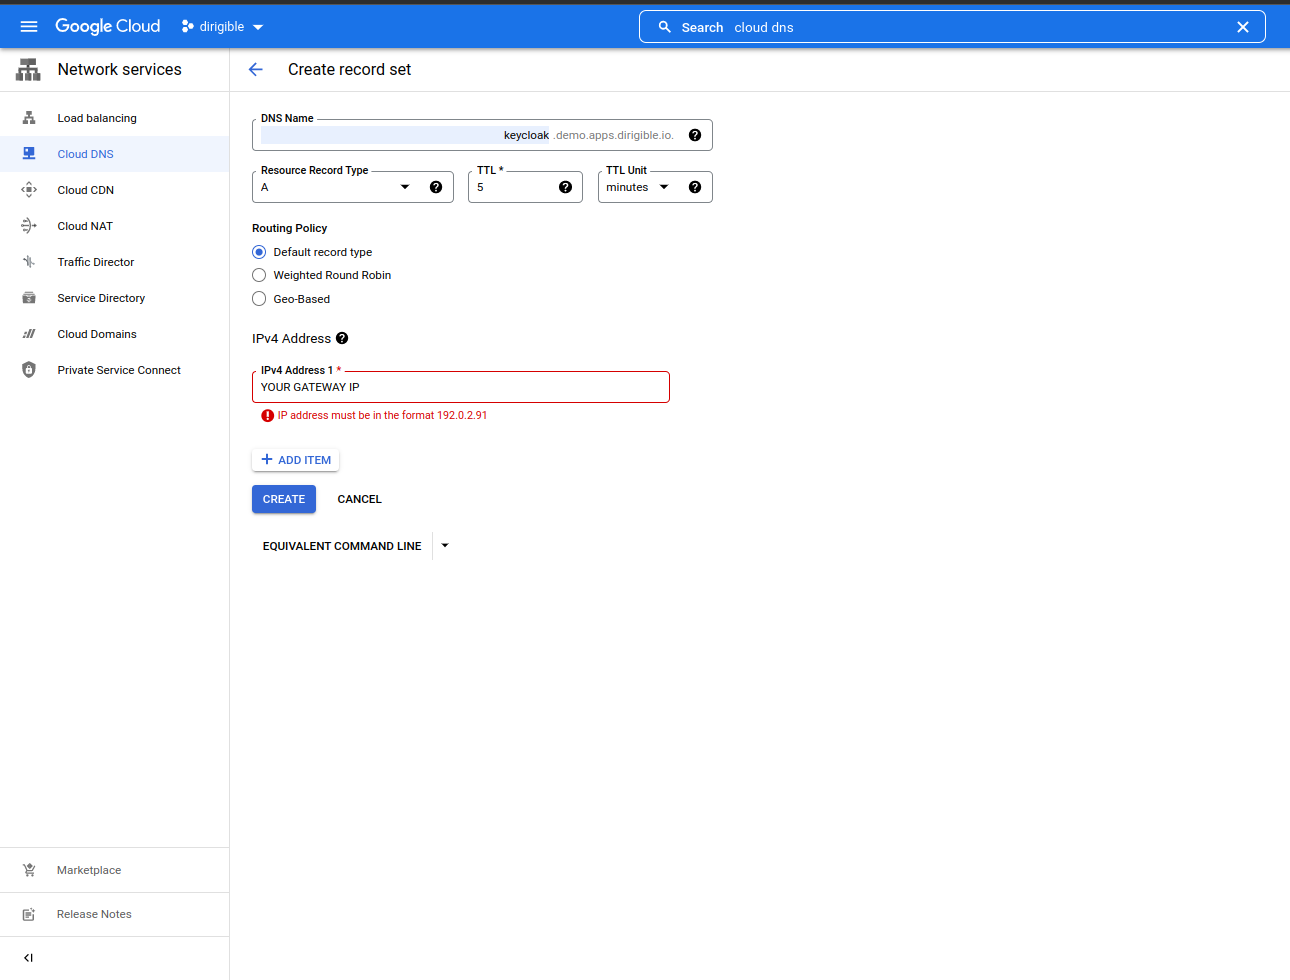
Create an A record for Dirigible and Keycloak.
-
We need Istio Gateway IP .
kubectl get svc -n istio-ingress istio-ingressgateway -o jsonpath="{.status.loadBalancer.ingress[0].ip}" -
A static external IP address is the IP address that is reserved for your project until you decide to release it.
You need to create the IP address in your region.gcloud compute addresses create demo --addresses=<YOUR-GATEWAY-IP> \ --region=europe-north1 -
Set the IP for Dirigible.
-
Set the IP for Keycloak.
-
Let's Encrypt Configuration
-
Install Cert-manager.
- Check for last version
-
Add cert-manager helm repo.
helm repo add jetstack https://charts.jetstack.io helm repo update -
Install Cert-Manager.
helm install \ cert-manager jetstack/cert-manager \ --namespace cert-manager \ --create-namespace \ --version v1.9.1 \ --set installCRDs=true -
Create ClusterIssuer.
Note
You need to replace
<YOUR-EMAIL-ADDRESS>with your valid email address.
kubectl apply -f - <<EOF
apiVersion: cert-manager.io/v1
kind: ClusterIssuer
metadata:
  name: letsencrypt
  namespace: cert-manager
spec:
  acme:
    server: https://acme-v02.api.letsencrypt.org/directory
    email: <YOUR-EMAIL-ADDRESS>
    privateKeySecretRef:
      name: letsencrypt
    solvers:
    - selector: {}
      http01:
        ingress:
          class: istio
EOF
GCP Cloud SQL Postgre Configuration
-
Enable Cloud SQL API and create an instance. Go to page
-
Enable Cloud SQL Admin API. Go to page
-
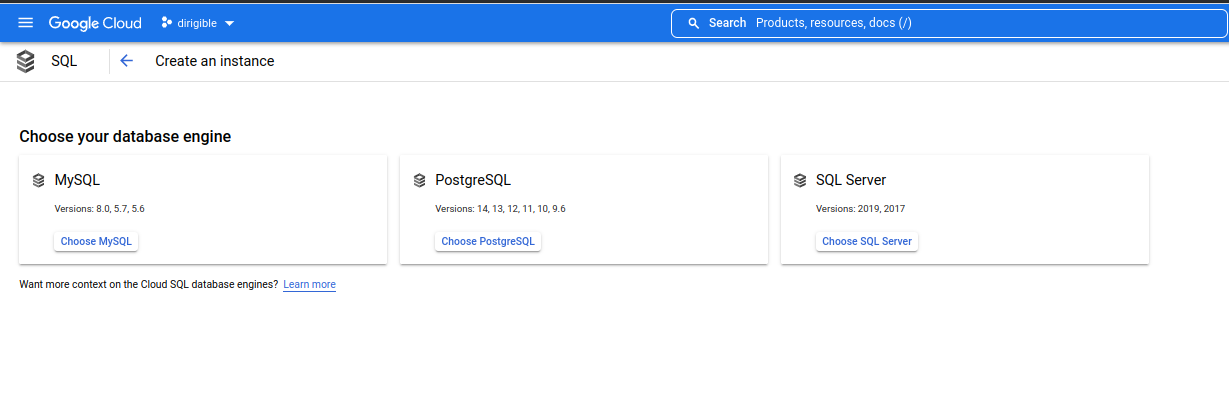
Choose PostgreSQL database engine.
Note
- For this article we will create separate instances for Dirigible and Keycloak. You can follow these steps for Dirigible and Keycloak.
-
Create an instance.
-
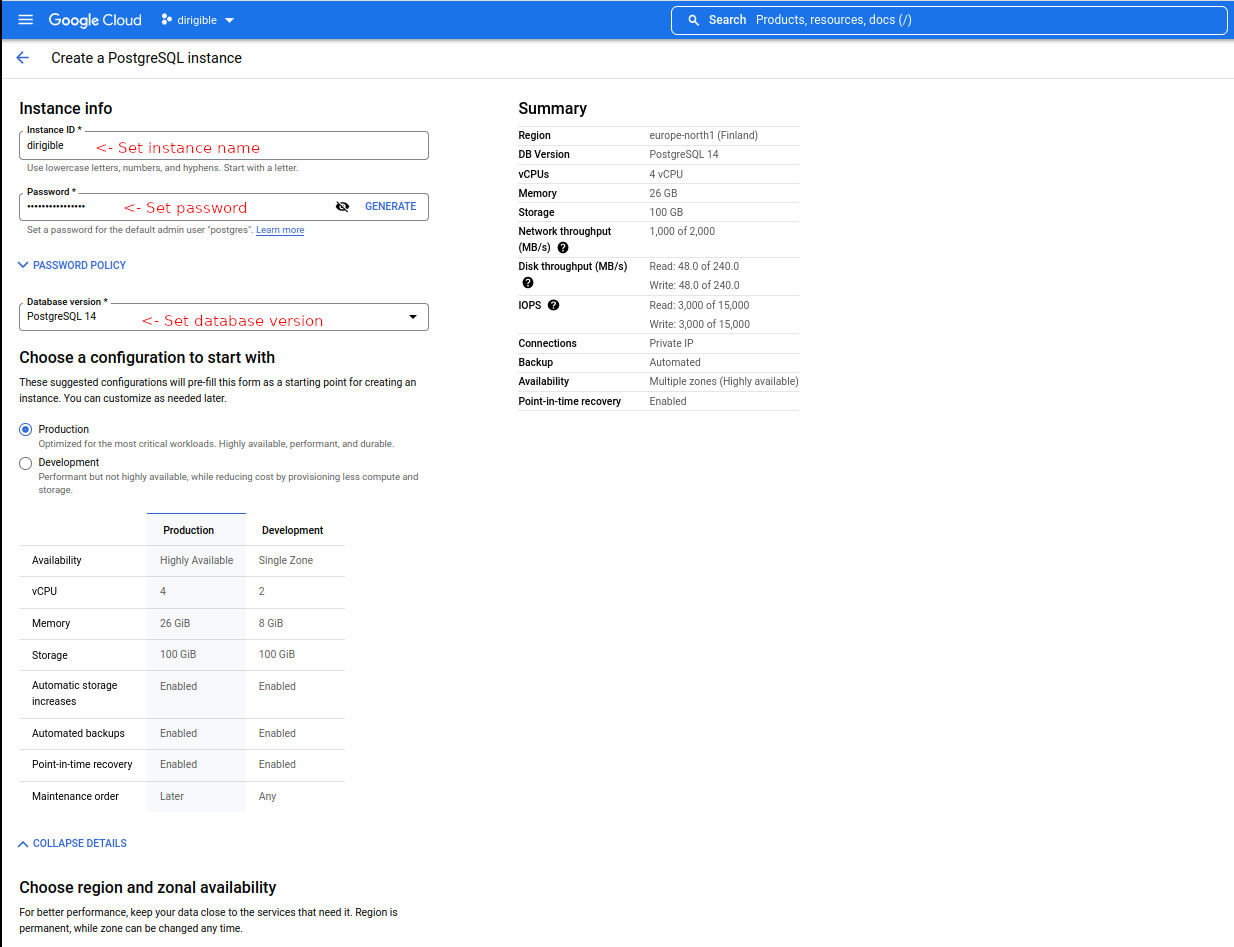
Set instance info, production.
-
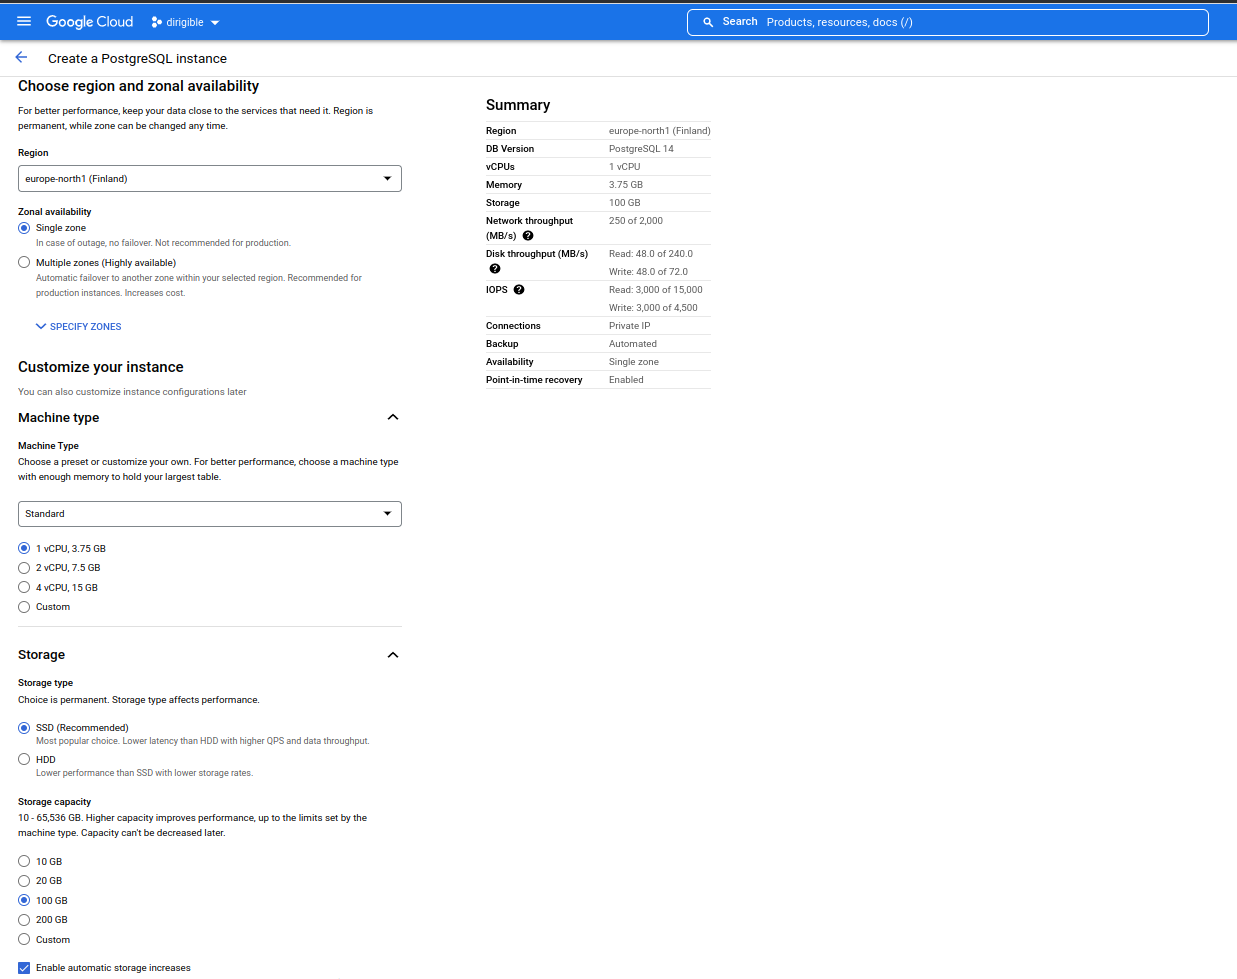
Set region, machine type, storage.
-
Set connections.
We need to Enable Service Networking API
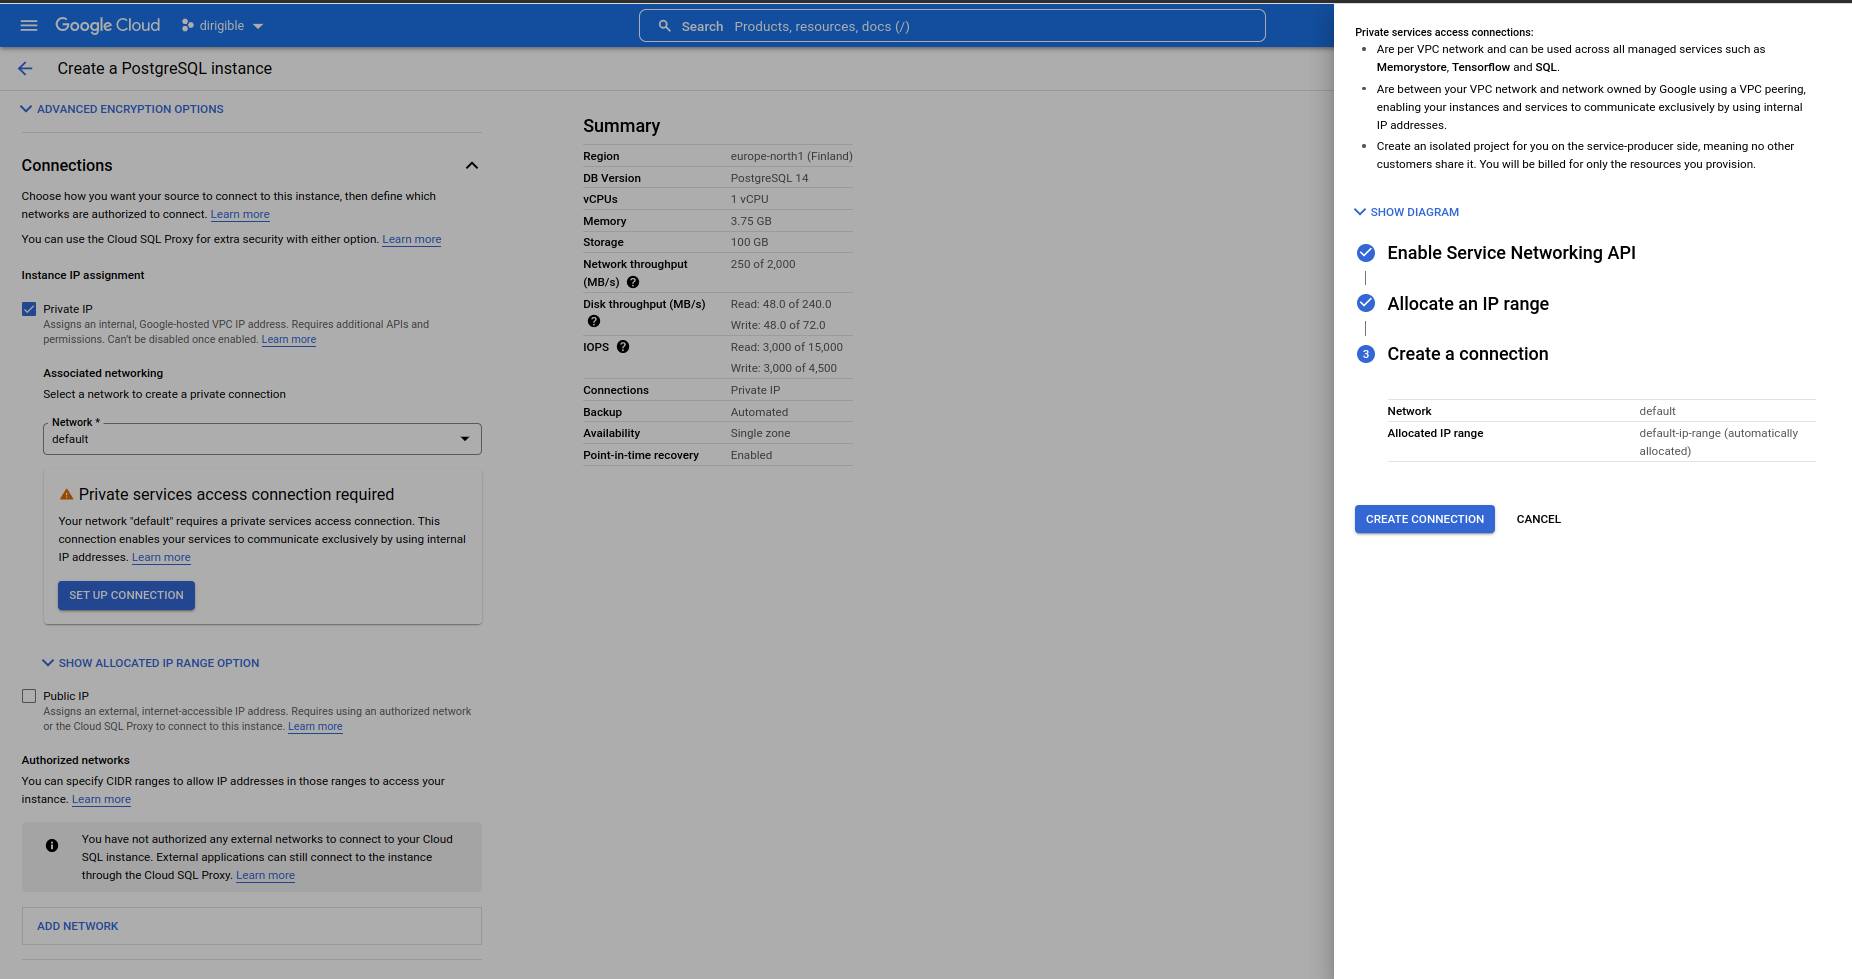
-
Set automatically allocated IP range.

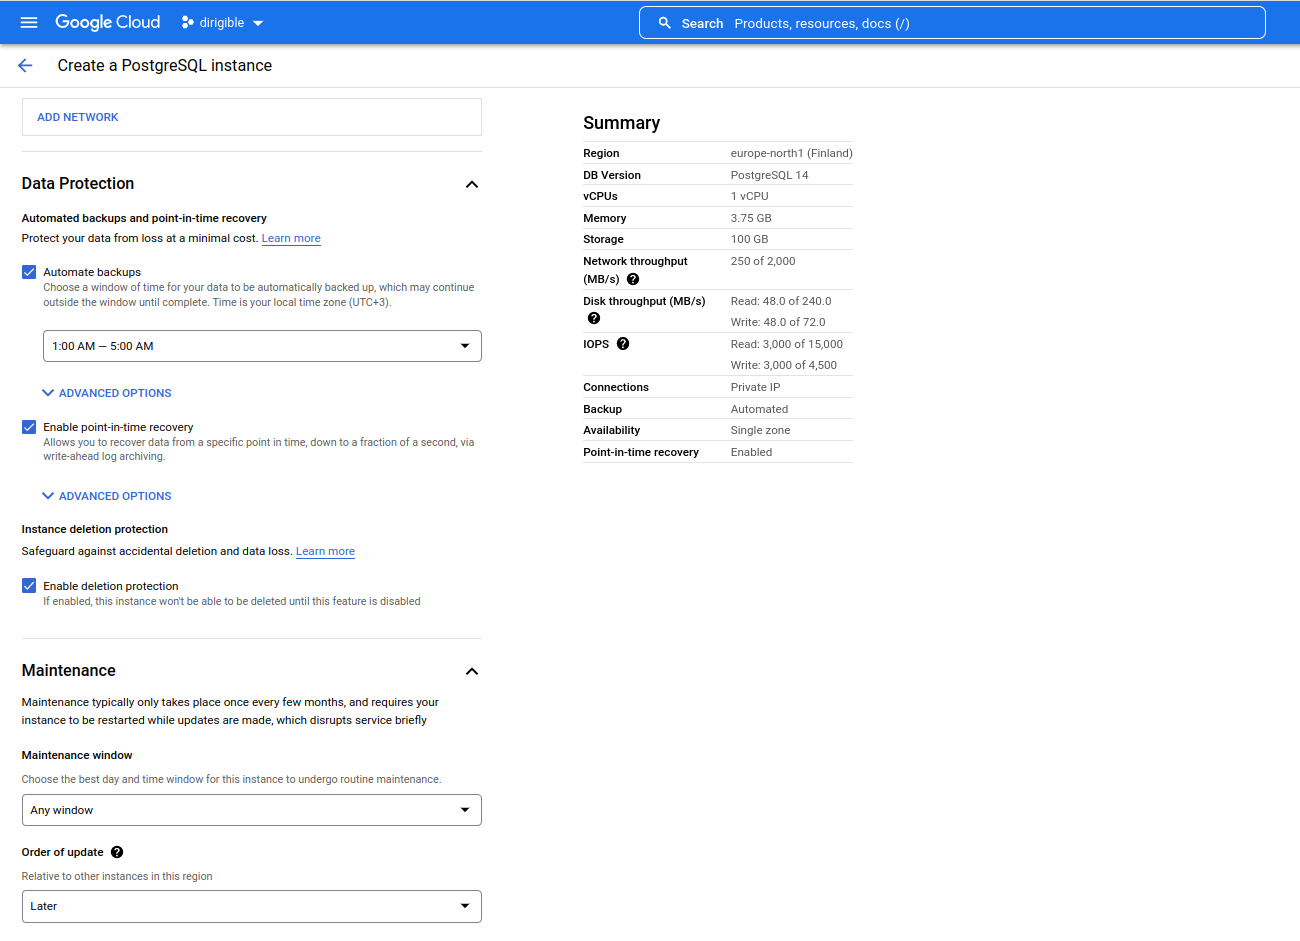
-
Set data protection and maintenance.
-
After you create the instance update the configuration for connections to allow only SSL connection.
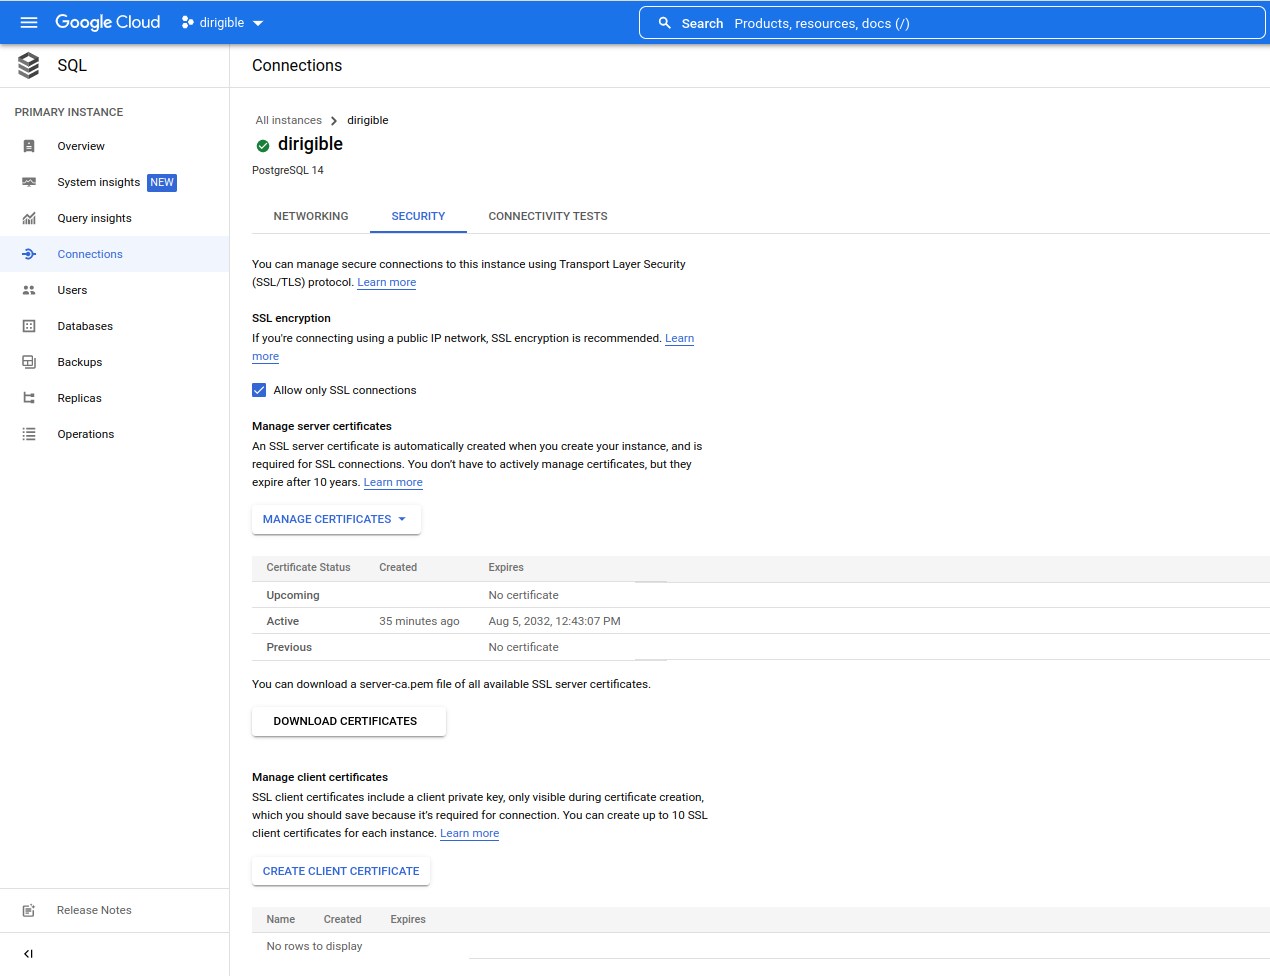
-
Set Up a Dirigible Database
Note
Create the same way a database and a user for Keycloak.
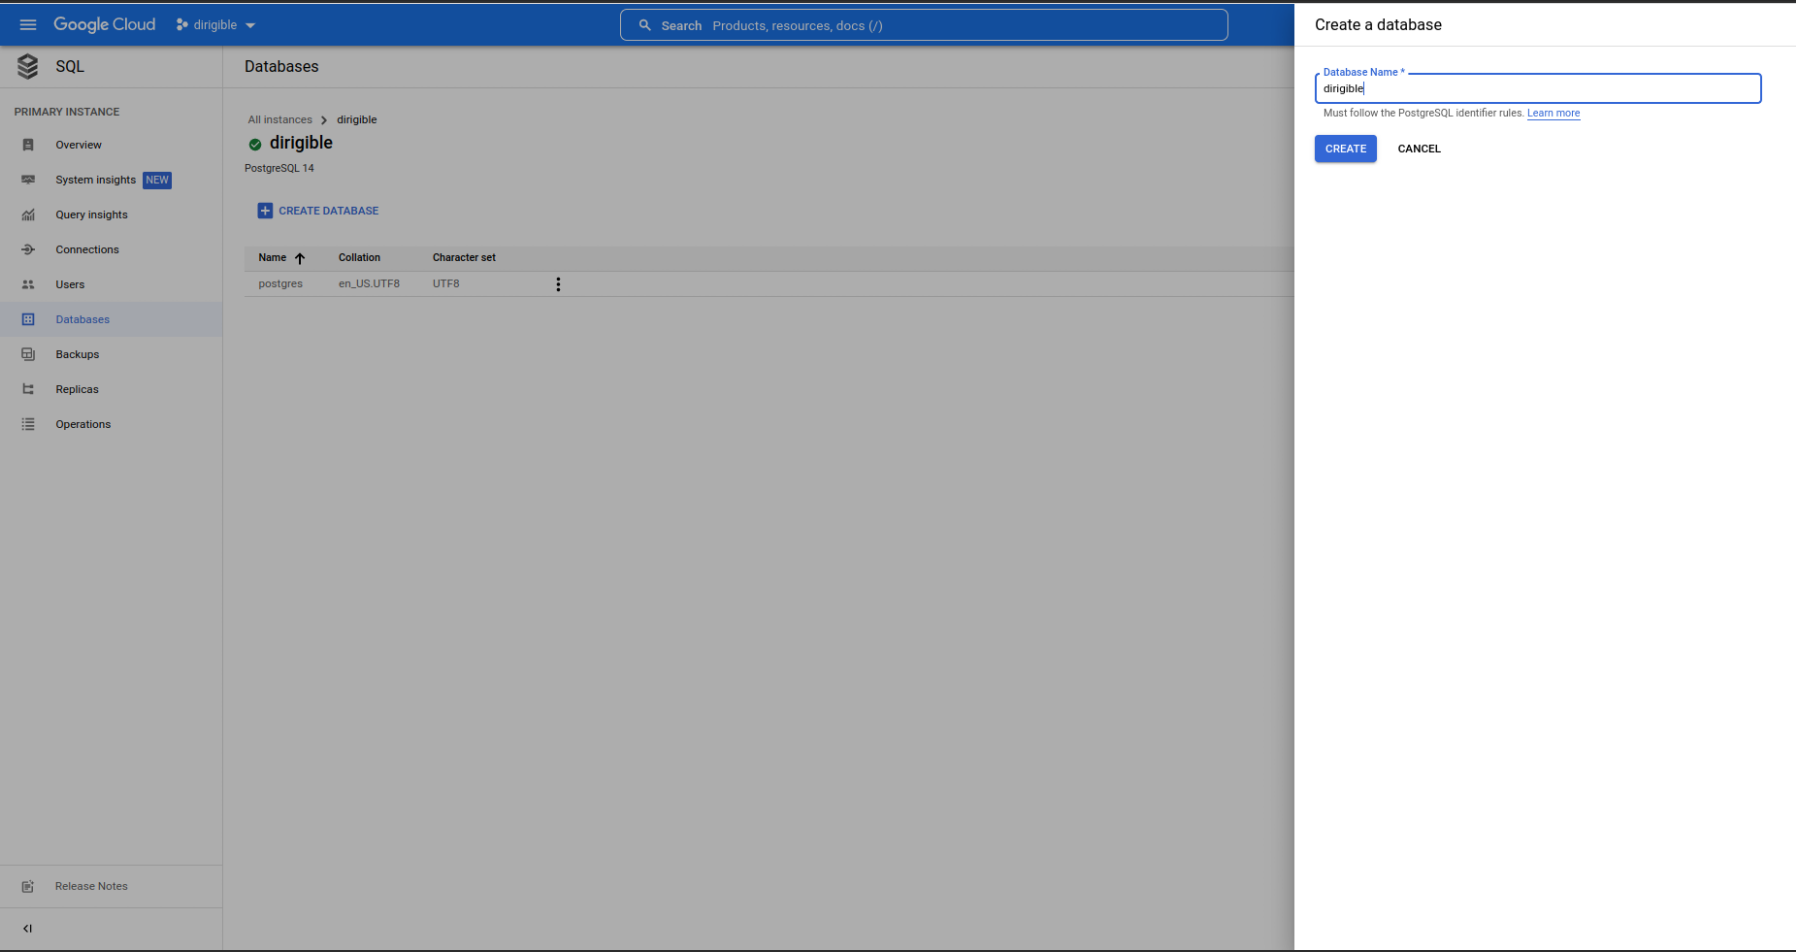
-
Create a database
Go to your PostgreSQL instance and create the database.
-
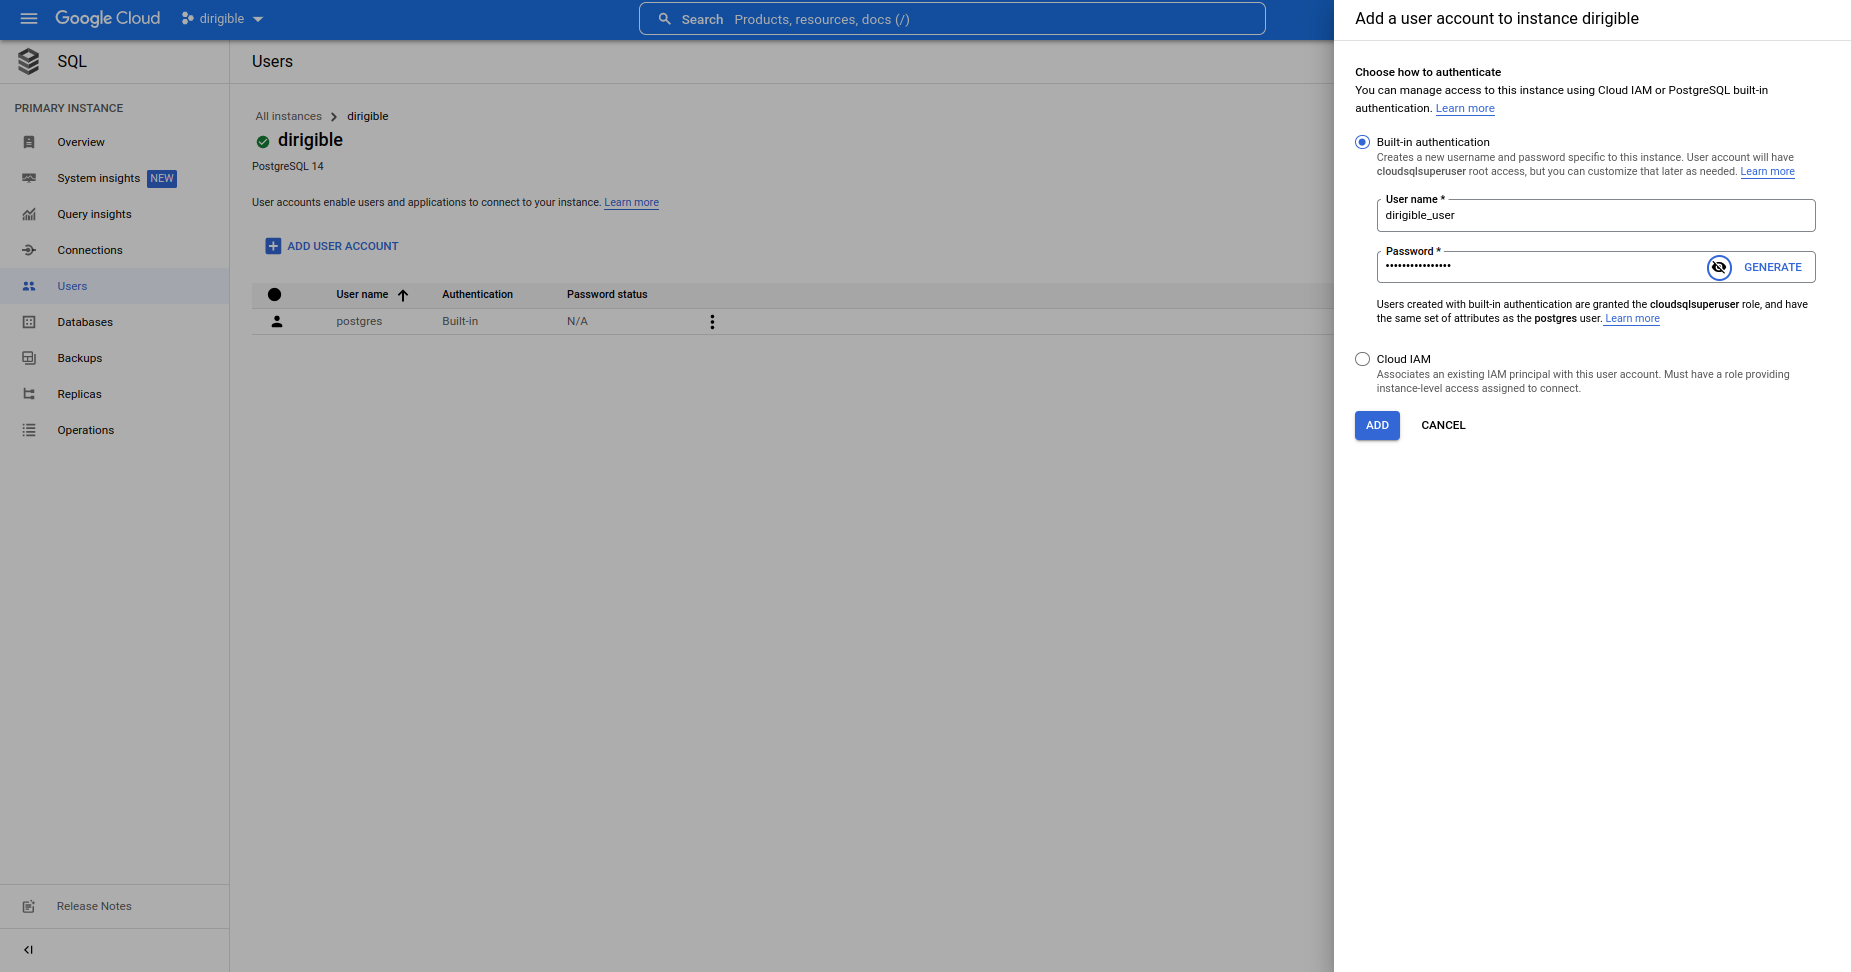
Create a user
Go to your PostgreSQL instance and create the user.
-
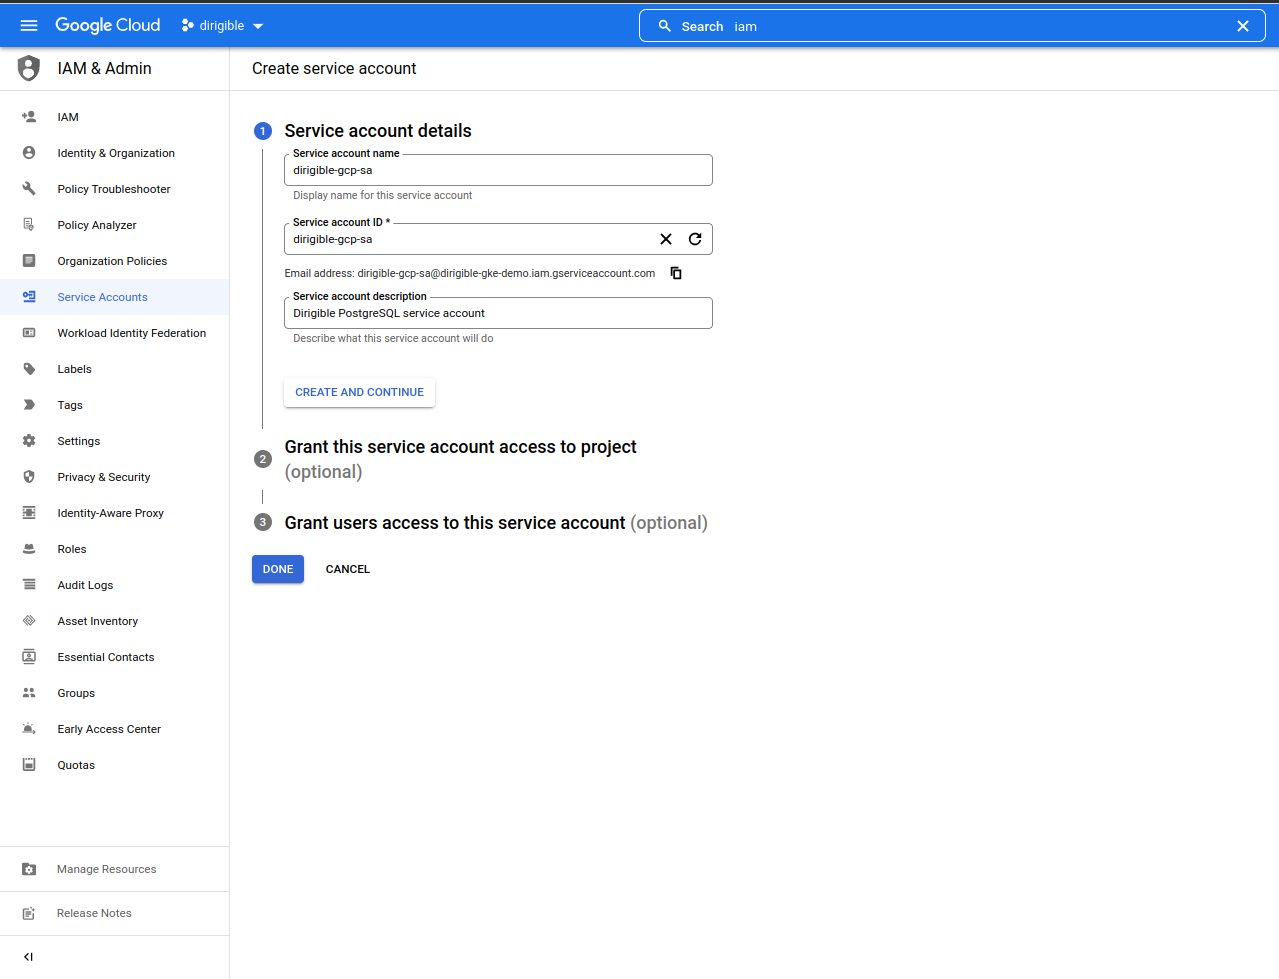
Create a service account for Dirigible and Keycloak.
-
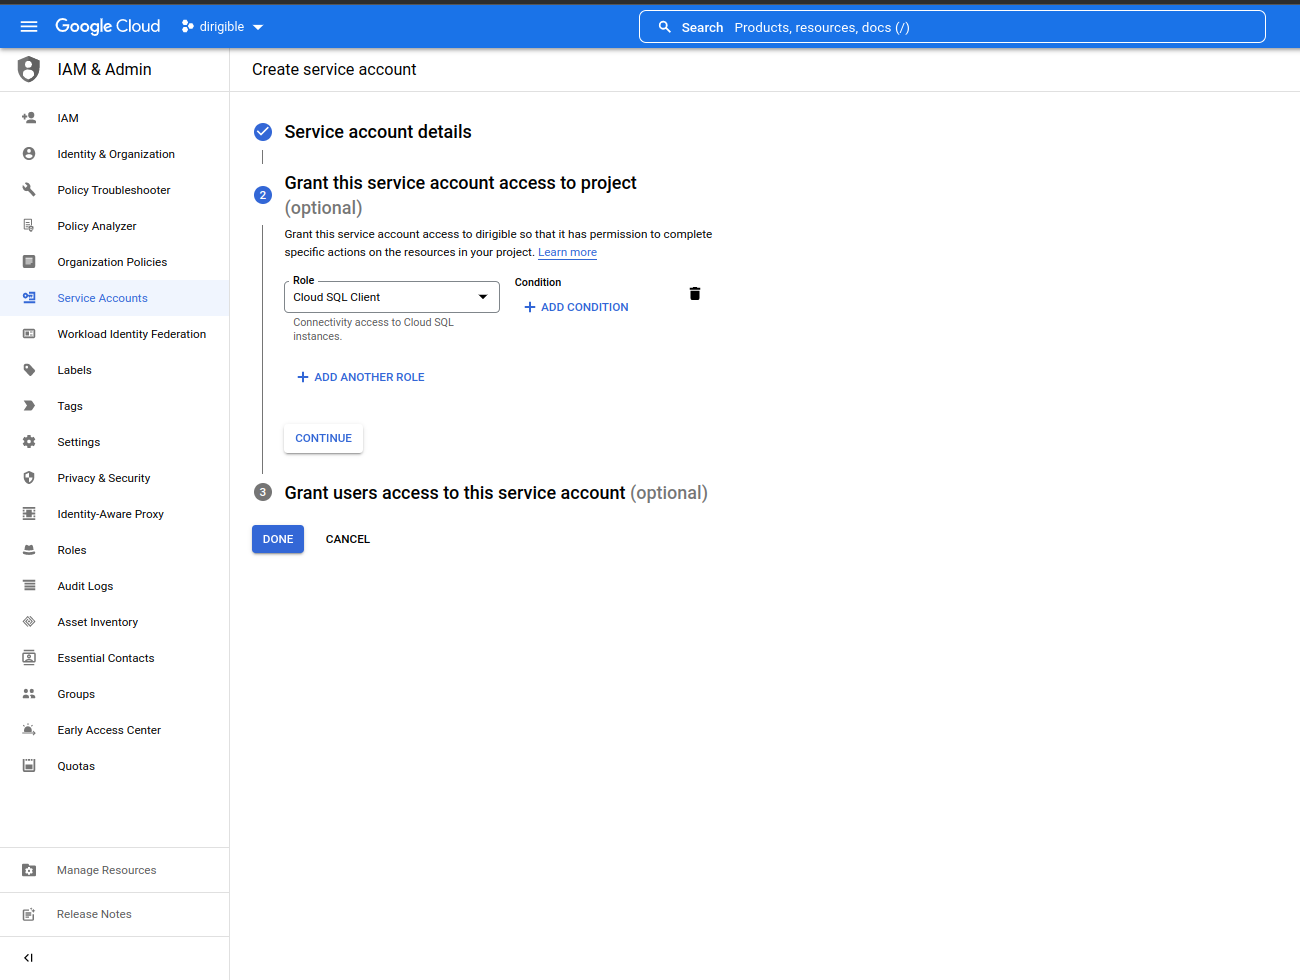
Add a role for the service account.
Create a Dirigible and Keycloak Kubernetes Service Account
-
Create the namespace
dirigible-demo.kubectl create namespace dirigible-demo -
Add an Istio injection.
kubectl label namespace dirigible-demo istio-injection=enabled --overwrite -
Configure a Kubernetes service account binding to the Google Cloud service account using Workload Identity.
kubectl create sa dirigible-sa -n dirigible-demokubectl create sa keycloak-sa -n dirigible-demo -
Add a new binding between your gcp service account and kubernetes service account
Note
You need to replace
dirigible-gke-demowithyour project id.- Dirigible
gcloud iam service-accounts add-iam-policy-binding \ --role="roles/iam.workloadIdentityUser" \ --member="serviceAccount:dirigible-gke-demo.svc.id.goog[dirigible-demo/dirigible-sa]" \ dirigible-gcp-sa@dirigible-gke-demo.iam.gserviceaccount.com- Keycloak
gcloud iam service-accounts add-iam-policy-binding \ --role="roles/iam.workloadIdentityUser" \ --member="serviceAccount:dirigible-gke-demo.svc.id.goog[dirigible-demo/keycloak-sa]" \ keycloak-gcp-sa@dirigible-gke-demo.iam.gserviceaccount.com -
Annotate the Kubernetes Service Account with the new binding.
Note
You need to replace
dirigible-gke-demowithyour project id.- Dirigible
kubectl annotate serviceaccount -n dirigible-demo \ dirigible-sa \ iam.gke.io/gcp-service-account=dirigible-gcp-sa@dirigible-gke-demo.iam.gserviceaccount.com- Keycloak
kubectl annotate serviceaccount -n dirigible-demo \ keycloak-sa \ iam.gke.io/gcp-service-account=keycloak-gcp-sa@dirigible-gke-demo.iam.gserviceaccount.com -
Create secrets for Kubernetes service accounts.
- Dirigible
kubectl create secret generic dirigible-db -n dirigible-demo \ --from-literal=username=dirigible_user \ --from-literal=password=<your-password> \ --from-literal=database=dirigible \ --from-literal=postgre_url=jdbc:postgresql://127.0.0.1:5432/dirigible- Keycloak
kubectl create secret generic keycloak-db -n dirigible-demo \
--from-literal=username=keycloak_user \
--from-literal=password=<your-password> \
--from-literal=database=keycloak \
--from-literal=postgre_url=jdbc:postgresql://127.0.0.1:5432/keycloak
Dirigible Deployment
- When you run this Dirigible helm chart with these sets, it will create
volume, enablehttps, installKeycloak, createIstio gateway and virtualservice, enable usages forGCP Cloud SQL. You don't need to create a service account for Dirigible annd Keycloak, because it was already created in the previous steps. You need to providegke.projectId,gke.region,ingress.host.
helm repo add dirigible https://eclipse.github.io/dirigible
helm repo update
Note
- You need to replace:
dirigible-gke-demowithyour-project-id.europe-north1withyour-region.demo.apps.dirigible.iowithyour domain.dirigible-demowithyour namespace.
helm upgrade --install dirigible dirigible/dirigible -n dirigible-demo \
--set volume.enabled=true \
--set serviceAccount.create=false \
--set keycloak.serviceAccountCreate=false \
--set ingress.tls=true \
--set keycloak.enabled=true \
--set keycloak.install=true \
--set istio.enabled=true \
--set istio.enableHttps=true \
--set gke.cloudSQL=true \
--set gke.projectId=dirigible-gke-demo \
--set gke.region=europe-north1 \
--set ingress.host=demo.apps.dirigible.io \
--set dirigible.image=dirigiblelabs/dirigible-keycloak:latest
Check the Logs on the Cert-Manager Pod
Wait for 3-5 minutes and check the logs.
kubectl logs -n cert-manager -lapp=cert-manager | grep -i "READY"
You should see something telling you that the certificate is ready and you can redirect http traffic to https.
I0809 13:58:22.750528       1 conditions.go:190] Found status change for Certificate "keycloak" condition "Ready": "False" -> "True"; setting lastTransitionTime to 2022-08-09 13:58:22.750516762 +0000 UTC m=+18939.377721330
I0809 13:58:22.781247       1 conditions.go:190] Found status change for Certificate "keycloak" condition "Ready": "False" -> "True"; setting lastTransitionTime to 2022-08-09 13:58:22.781230149 +0000 UTC m=+18939.408434691
I0809 13:58:23.193897       1 conditions.go:250] Found status change for CertificateRequest "dirigible-spnjm" condition "Ready": "False" -> "True"; setting lastTransitionTime to 2022-08-09 13:58:23.193882791 +0000 UTC m=+18939.821087330
I0809 13:58:23.347574       1 conditions.go:190] Found status change for Certificate "dirigible" condition "Ready": "False" -> "True"; setting lastTransitionTime to 2022-08-09 13:58:23.347561322 +0000 UTC m=+18939.974765874
httpsRedirect: true to redirect HTTP traffic to HTTPS.
--set istio.httpsRedirect=true
Keycloak Configuration
Note
You need to replace demo.apps.dirigible.io with your domain.
When you first open https://dirigible.demo.apps.dirigible.io, you will see
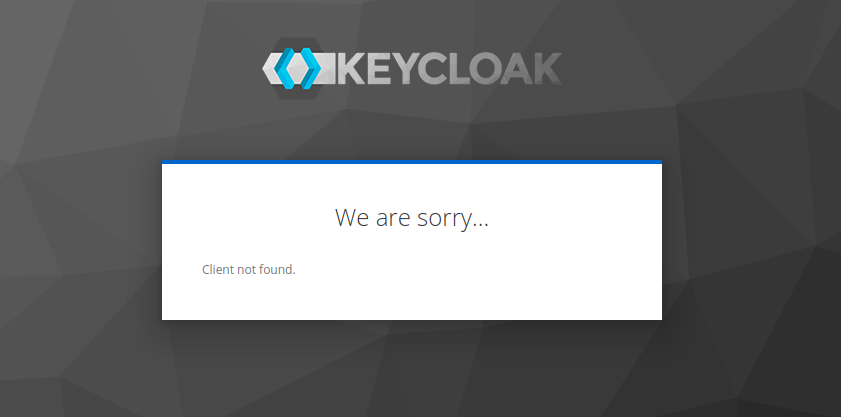 .
.
-
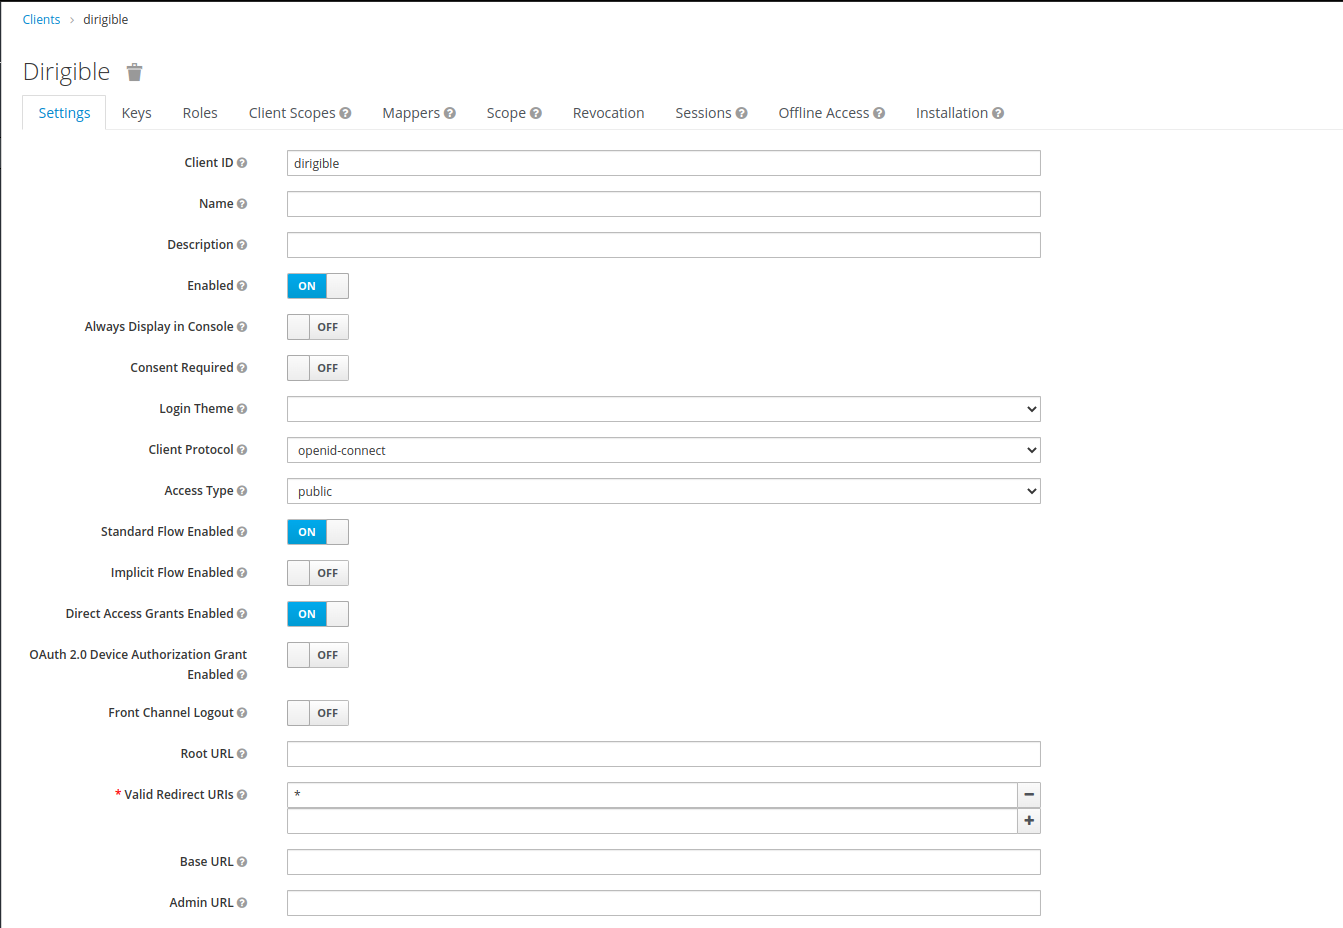
We need to create clientId
dirigiblethat's why go tohttps://keycloak.demo.apps.dirigible.io/auth/admin/master/console/#/realms/master/clientsand login with usernameadminand passwordadmin.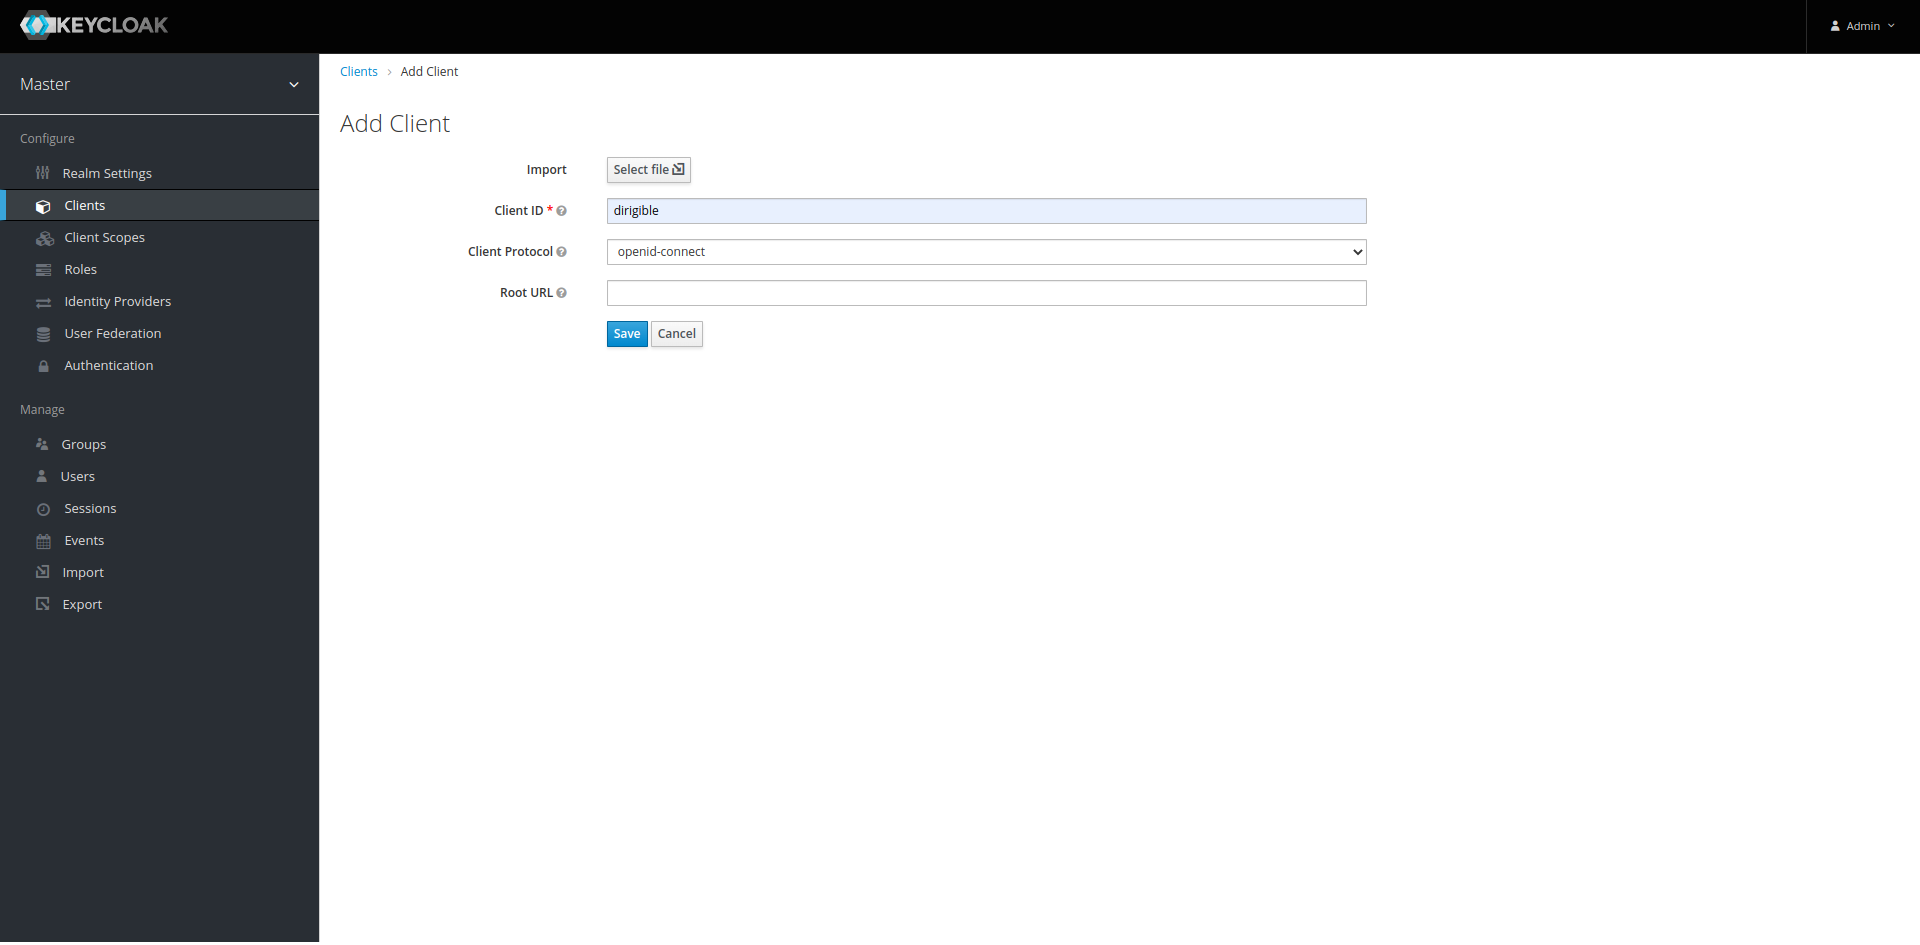
-
Add Role – Open a new client and add the new roles Developer, Operator, Everyone.

-
Add Default Roles –
Roles->Default Rolesadd all roles from the previous step.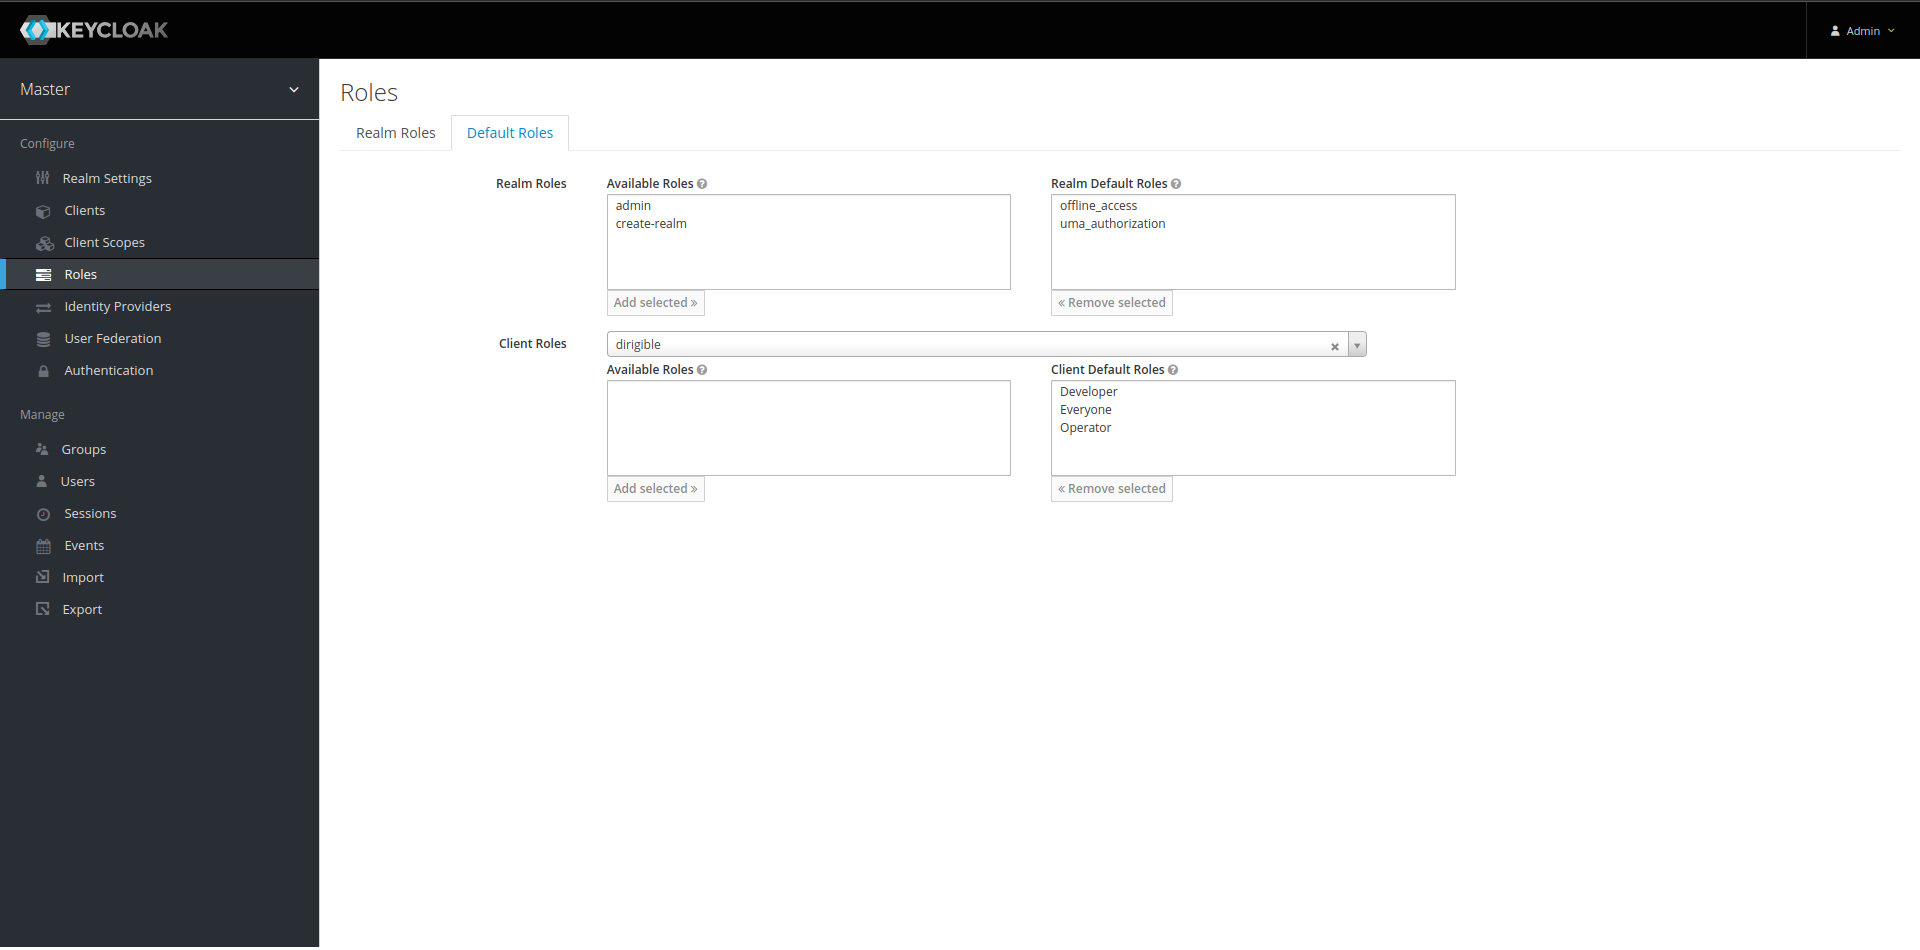
-
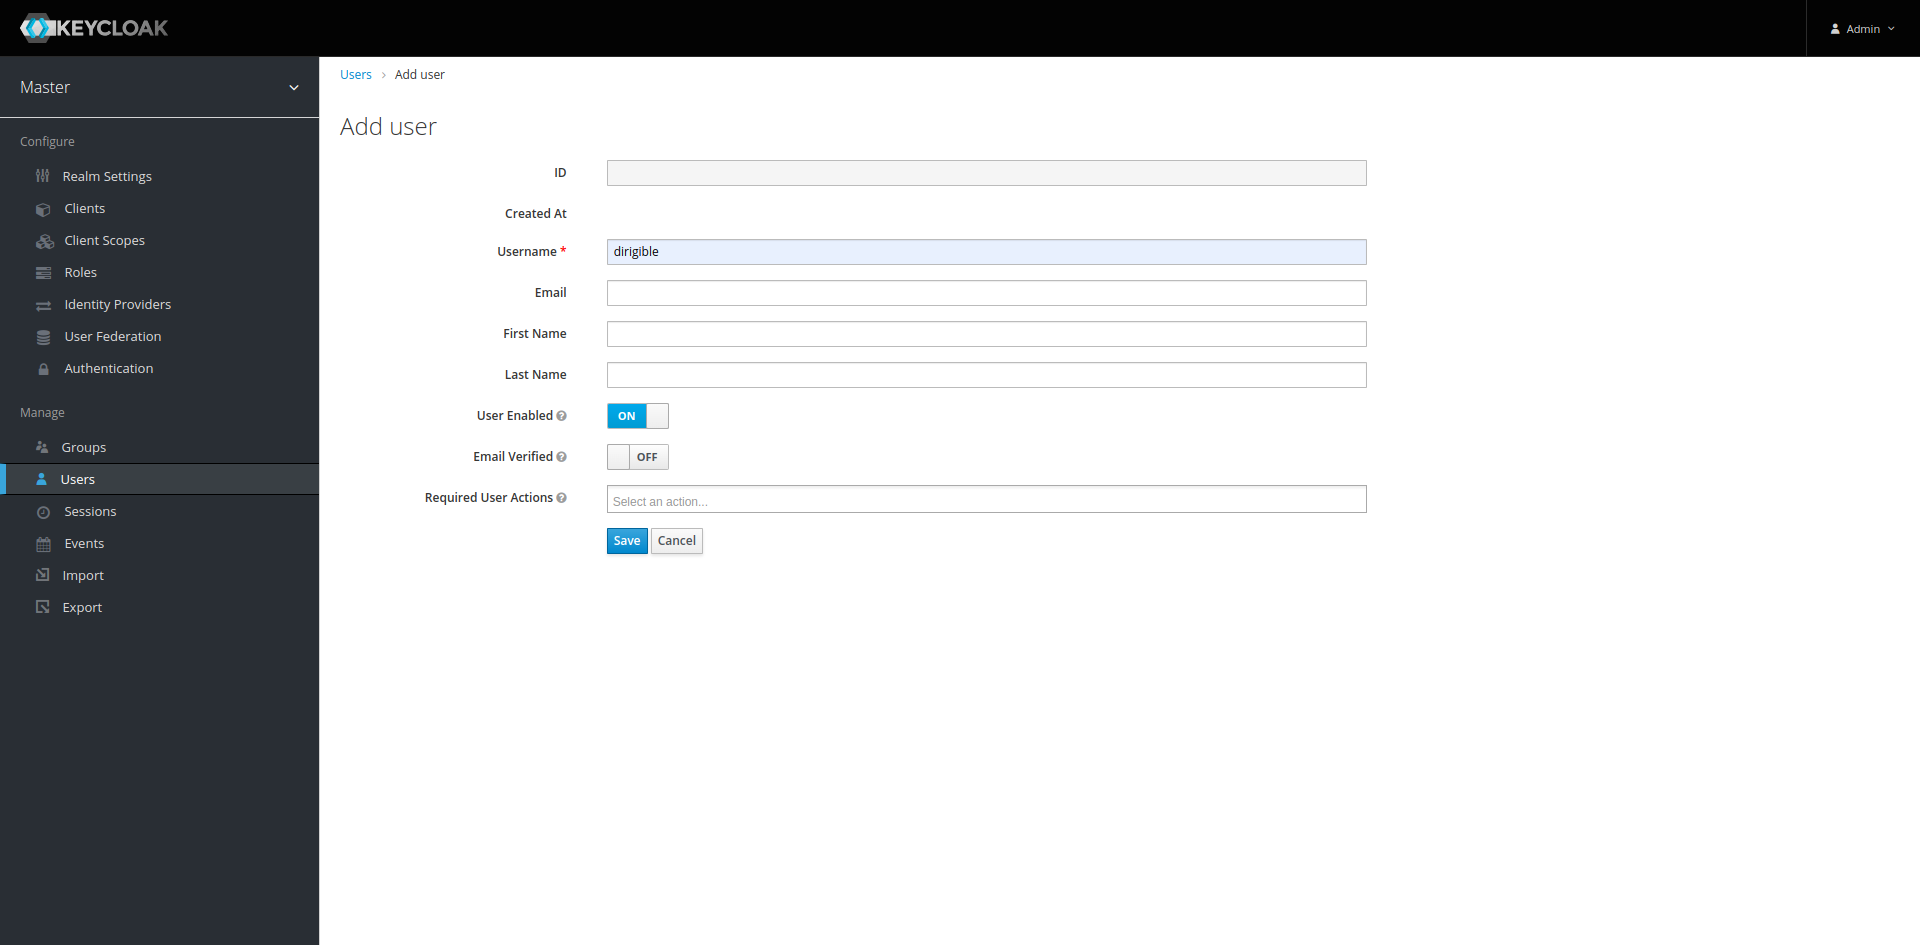
Add User – By default, the new user should have the default roles assigned to it.
Go to page to create the new user.
-
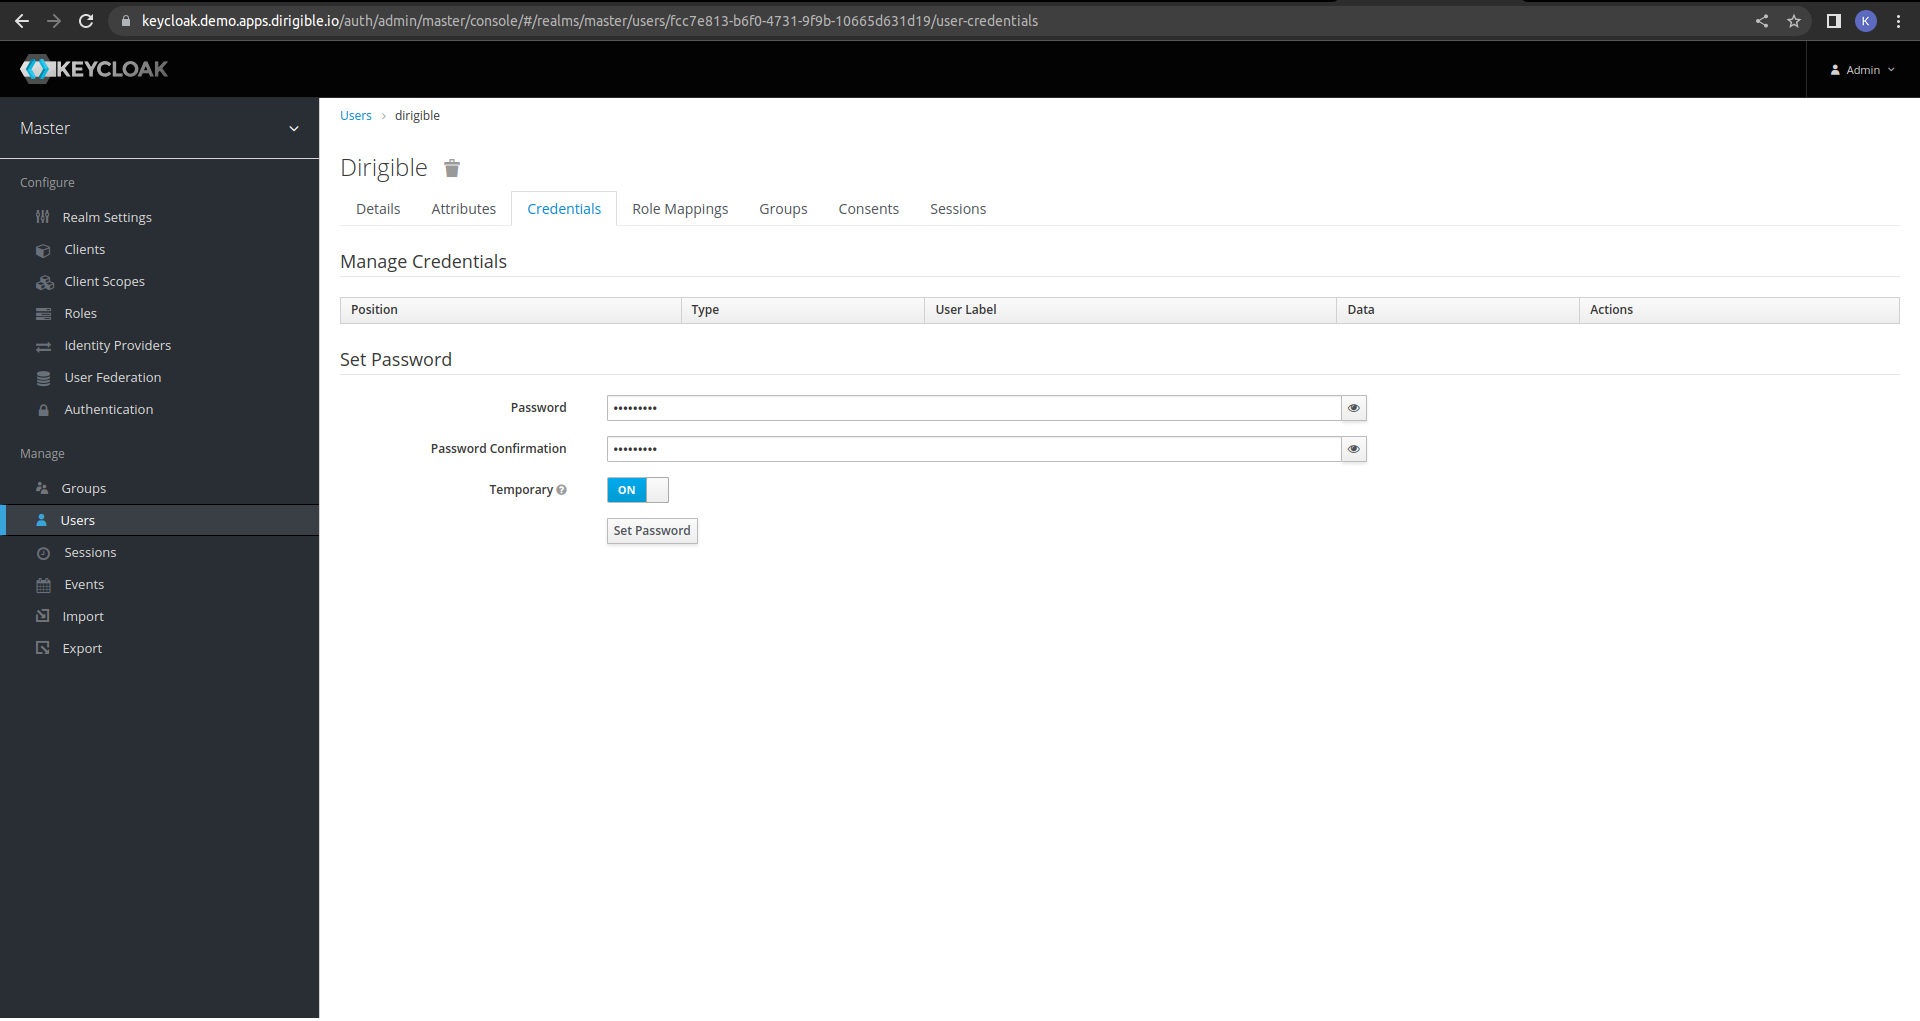
Add a password.
-
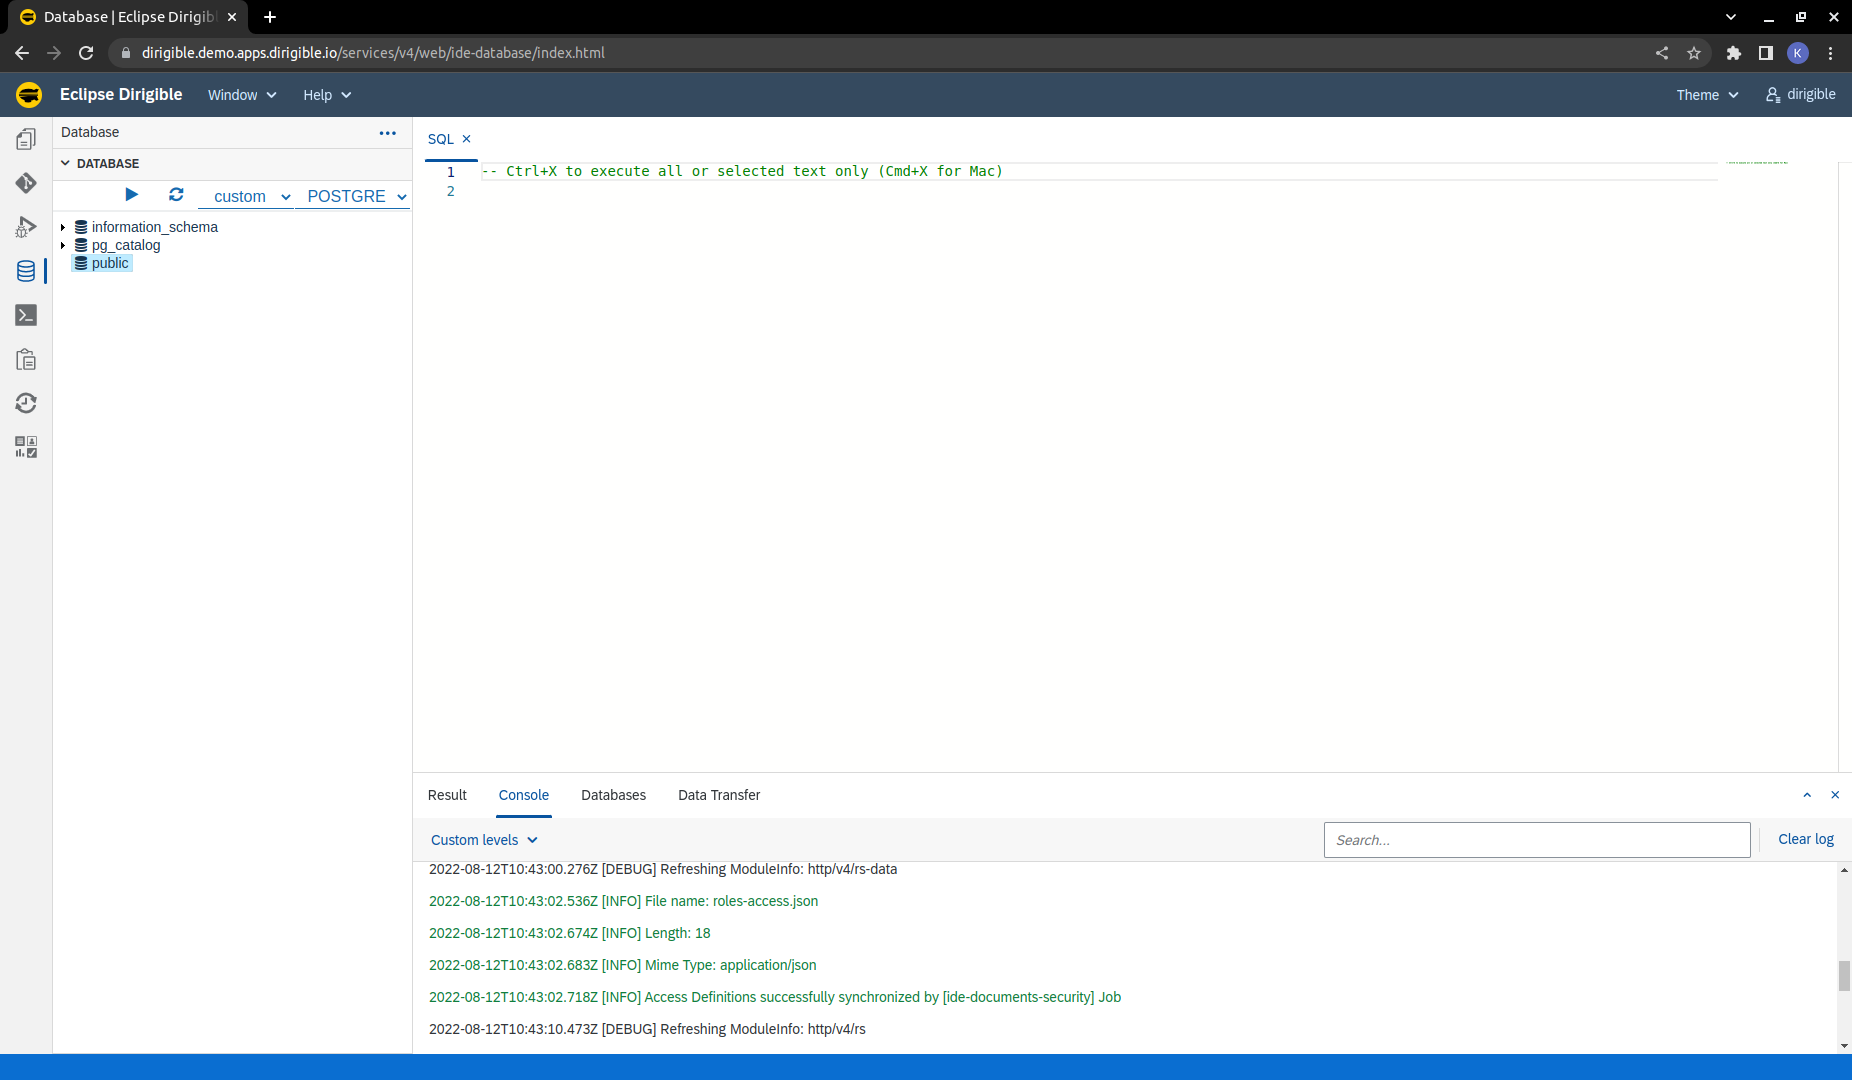
Set a valid redirect URL.
Finally access Dirigible at https://dirigible.demo.apps.dirigible.io and log in with the password that we used for our user password. We can see that we have database connection to Cloud SQL PostgreSQL and we have assigned a certificate.