Getting Started
Overview
This guide explains how to setup an Eclipse Dirigible instance and how to use it to build your very first Hello World service. The references section below points to the documentation with more technical details for the different aspects of the platform and its components and capabilities.
Setup
Trial Environment
In case you are using the shared https://trial.dirigible.io environment, you can skip this section.
Get the binary
- In case you want to use a prebuild package, you can get the one built for your environment from the downloads section.
- To build Eclipse Dirigible from sources by yourself, just follow the instructions in the README.
Choose the environment
- You can choose one of the setup options available to get an Eclipse Dirigible instance depending on your target environment.
- A shared trial instance is also available and can be accessed from here: https://trial.dirigible.io
Environment Variables
There are many configuration options, so you can connect to different databases, use different platforms, choose a specific set of plugins, and many more.
Access the instance
In case of a local setup on your machine, you can access Eclipse Dirigible at the following location: http://localhost:8080
Default Credentials
The default username is admin and the default password is admin. The credentials can be updated, as described in the configuration options.
Hello World Application
Create a Hello World service
Once you have a running Eclipse Dirigible instance, you can start with your project:
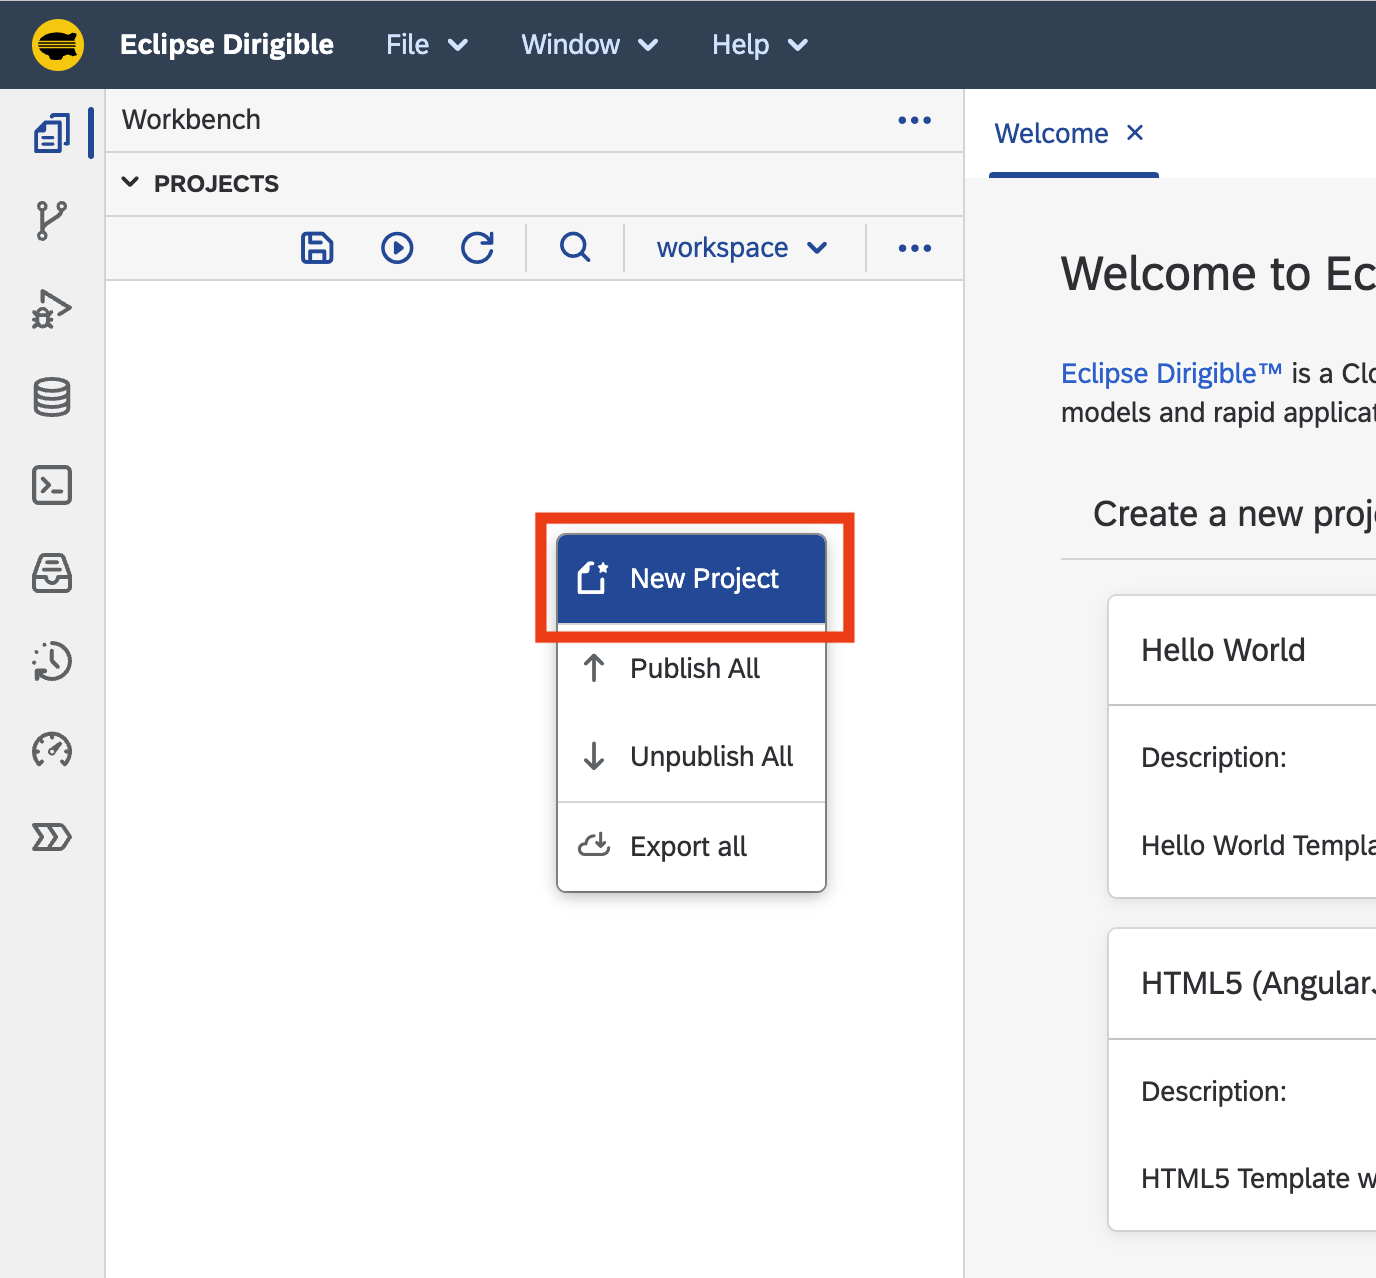
- Right-click inside the
Projectsview. -
From the menu select the New Project option.
-
Enter
hello-worldfor the name of the project and click the Create button.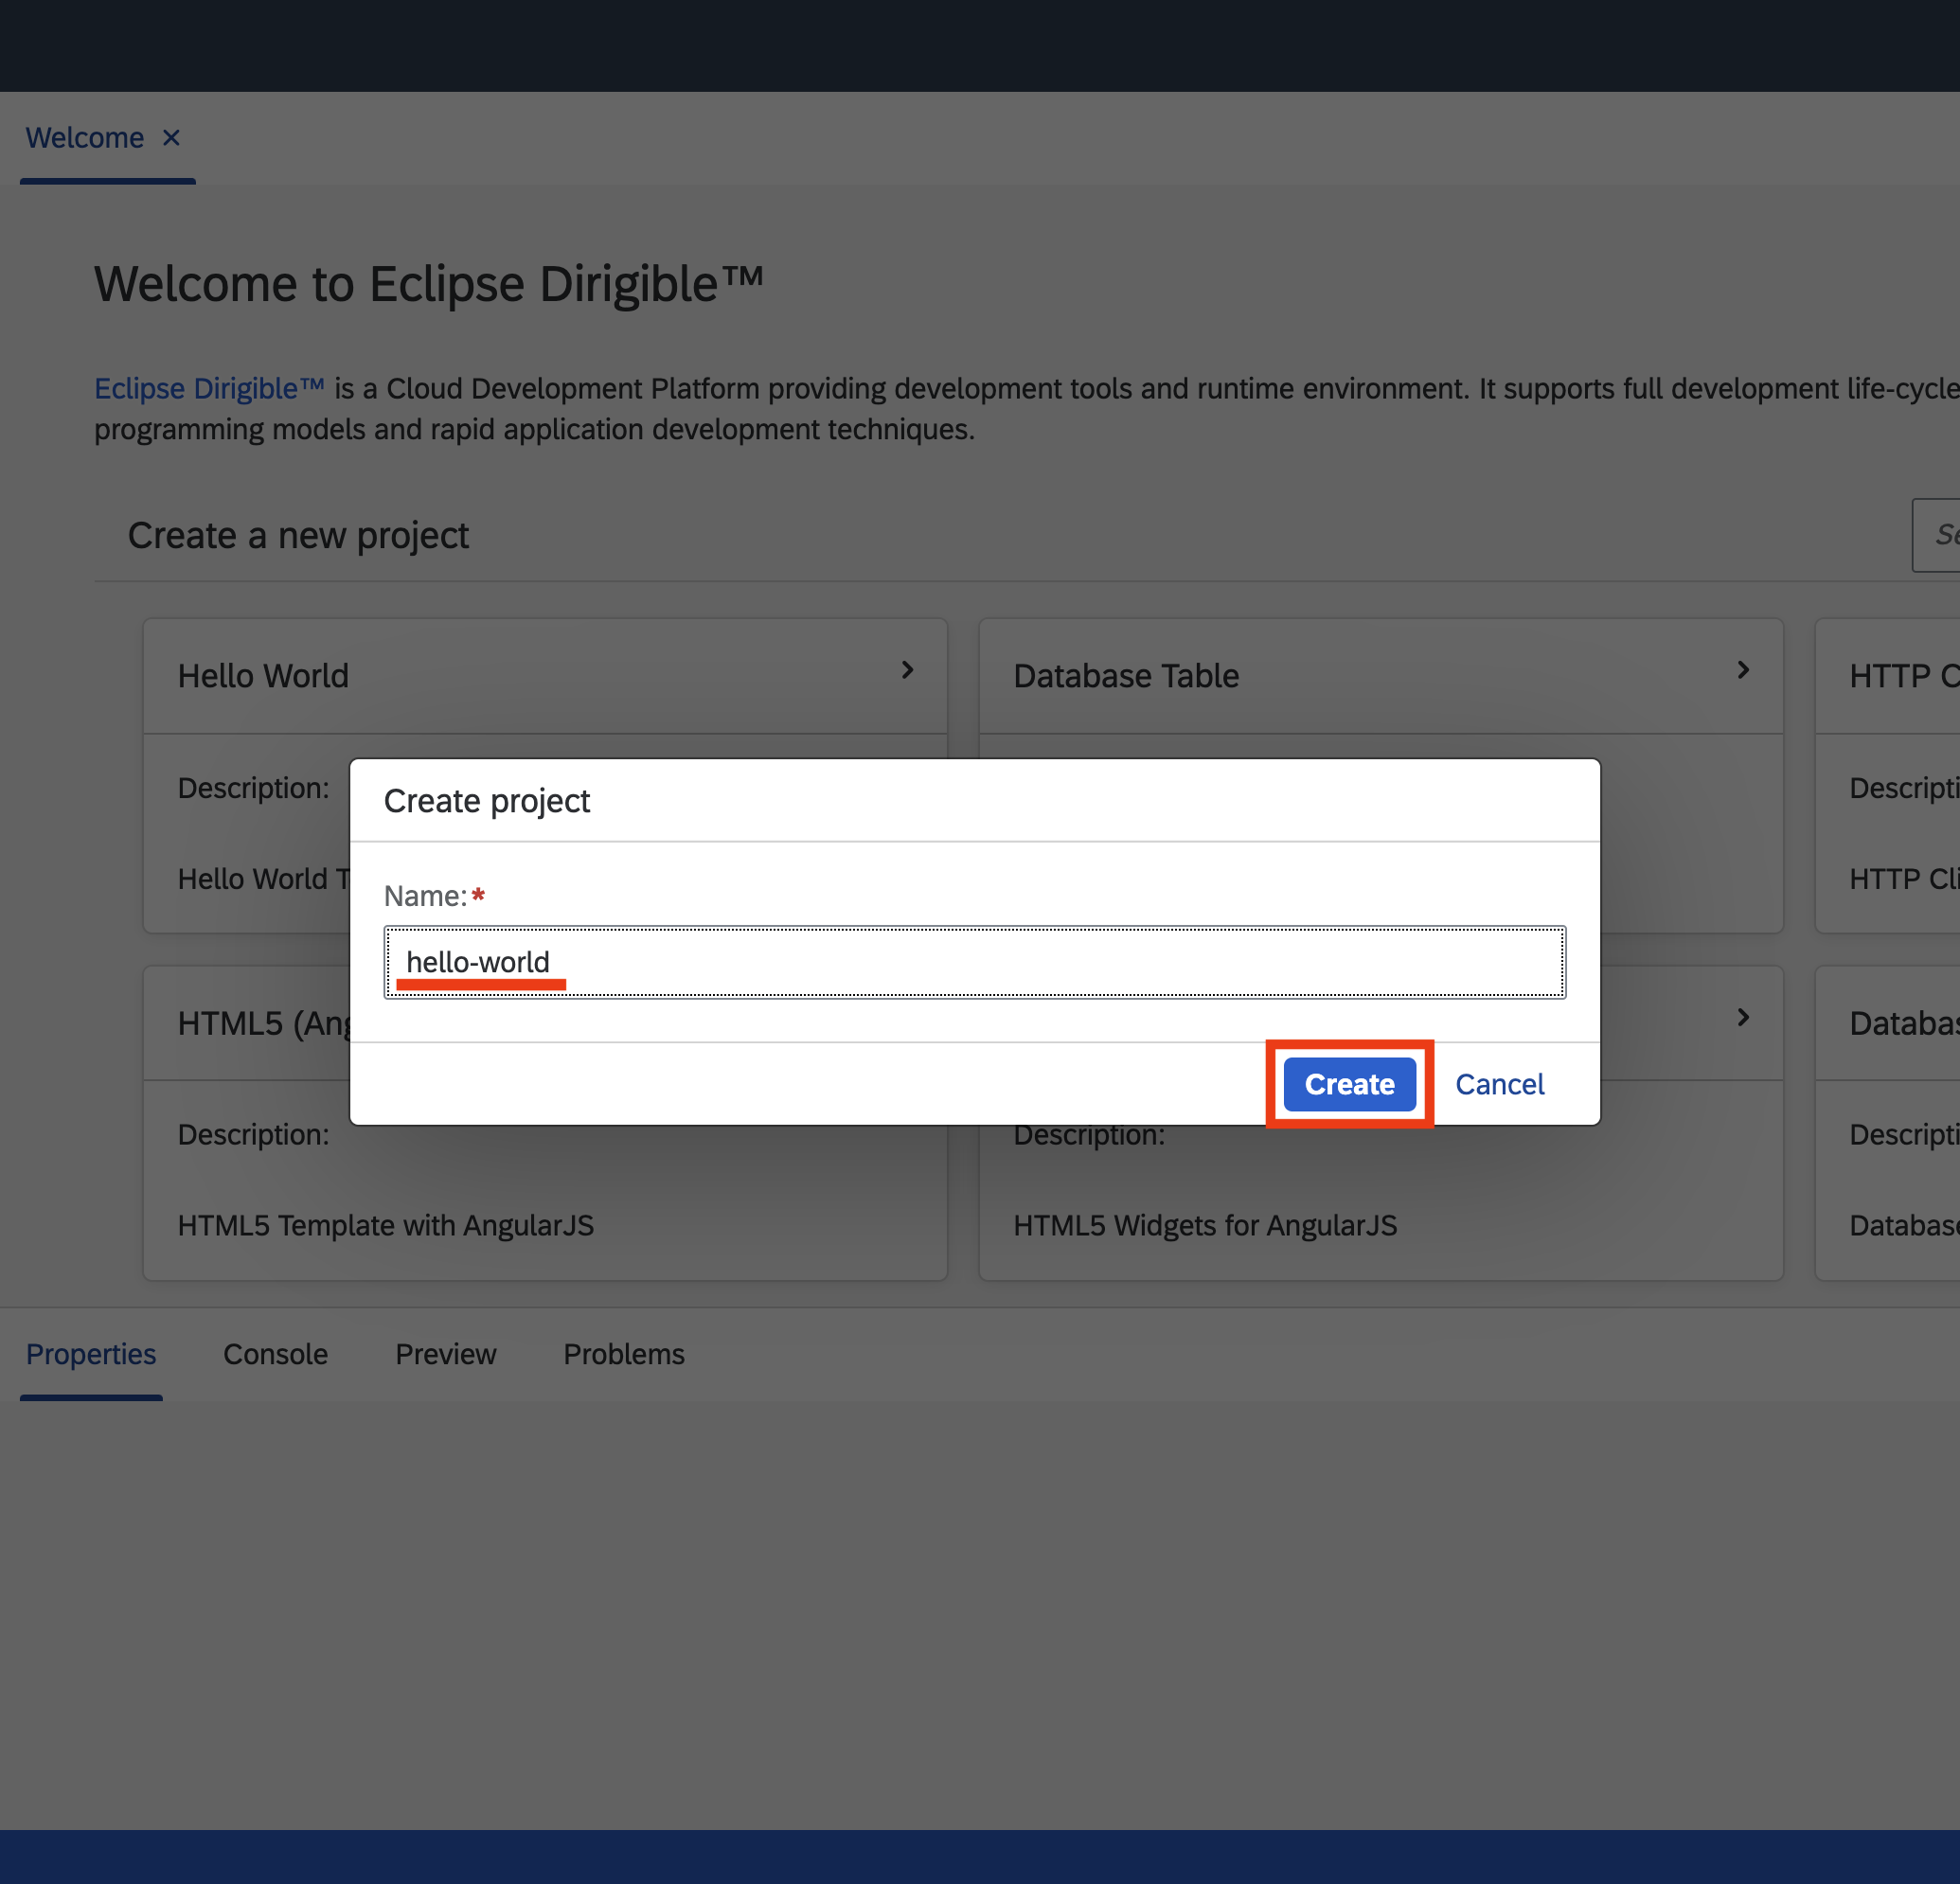
-
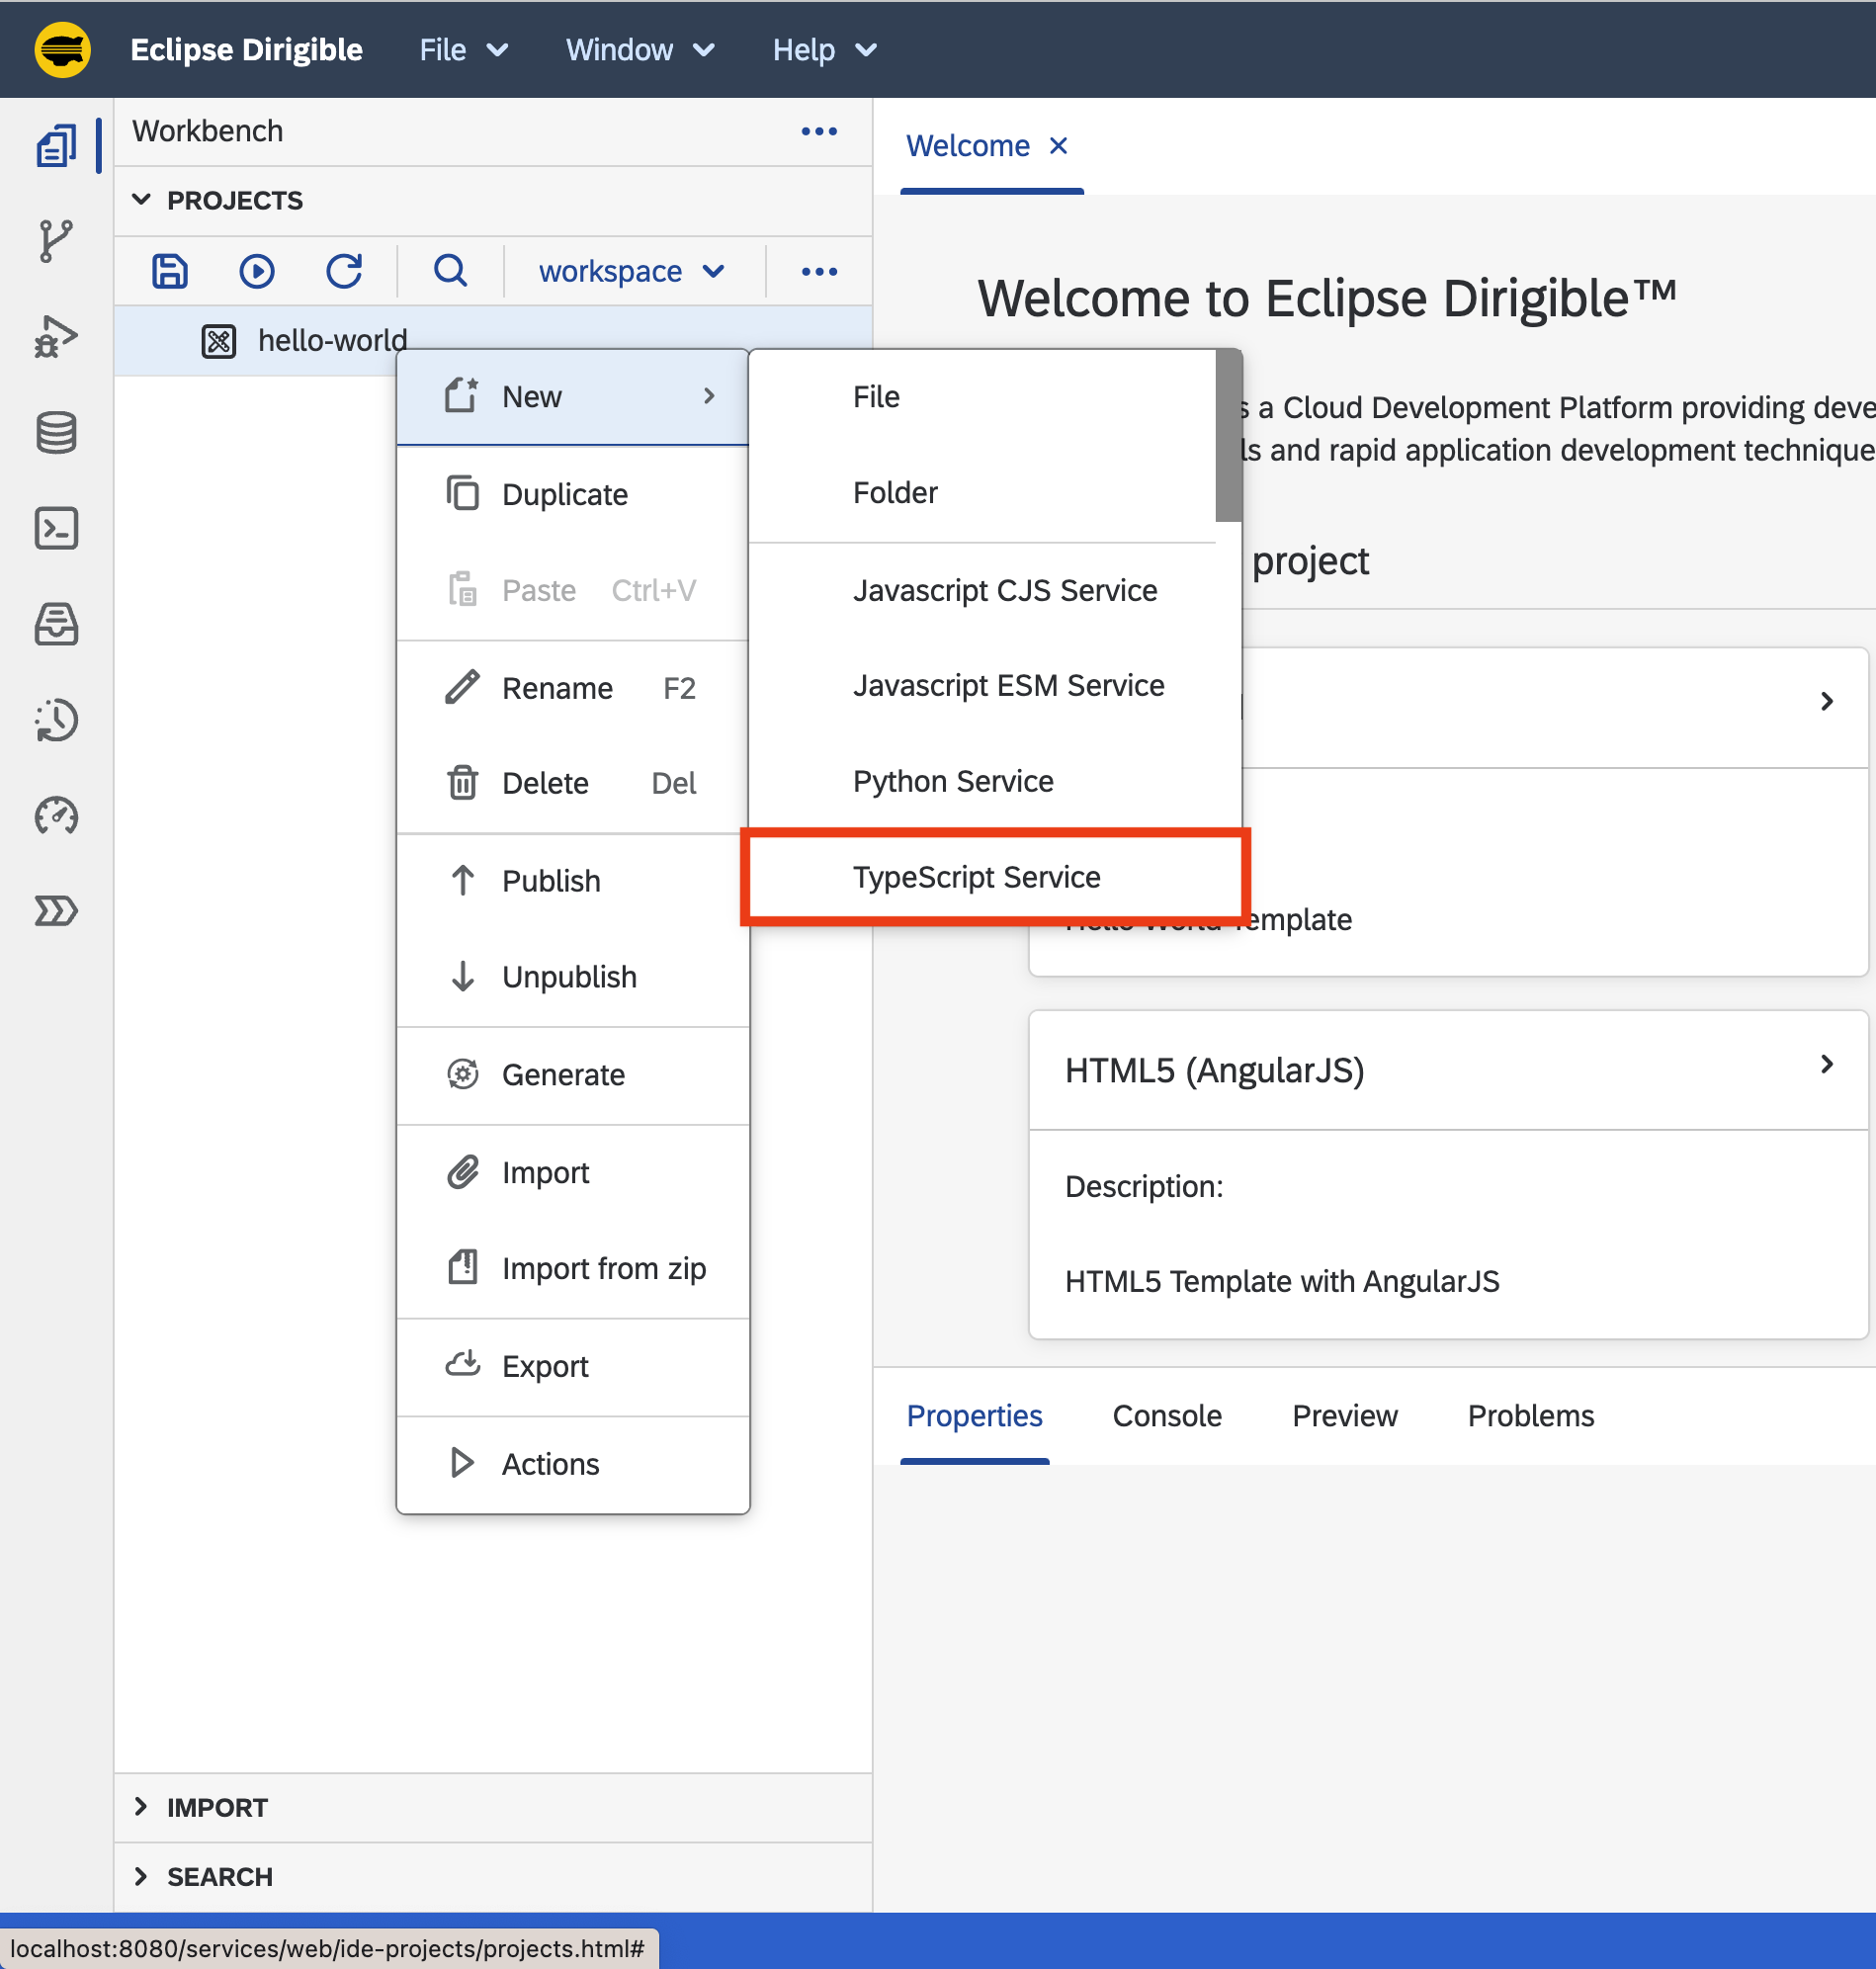
Right-click on the
hello-worldproject in theProjectsview and choose TypeScript or JavaScript ECMA6 service from the New dropdown:-
Select the New → TypeScript Service option:
-
Enter
service.tsfor the name of the TypeScript Service: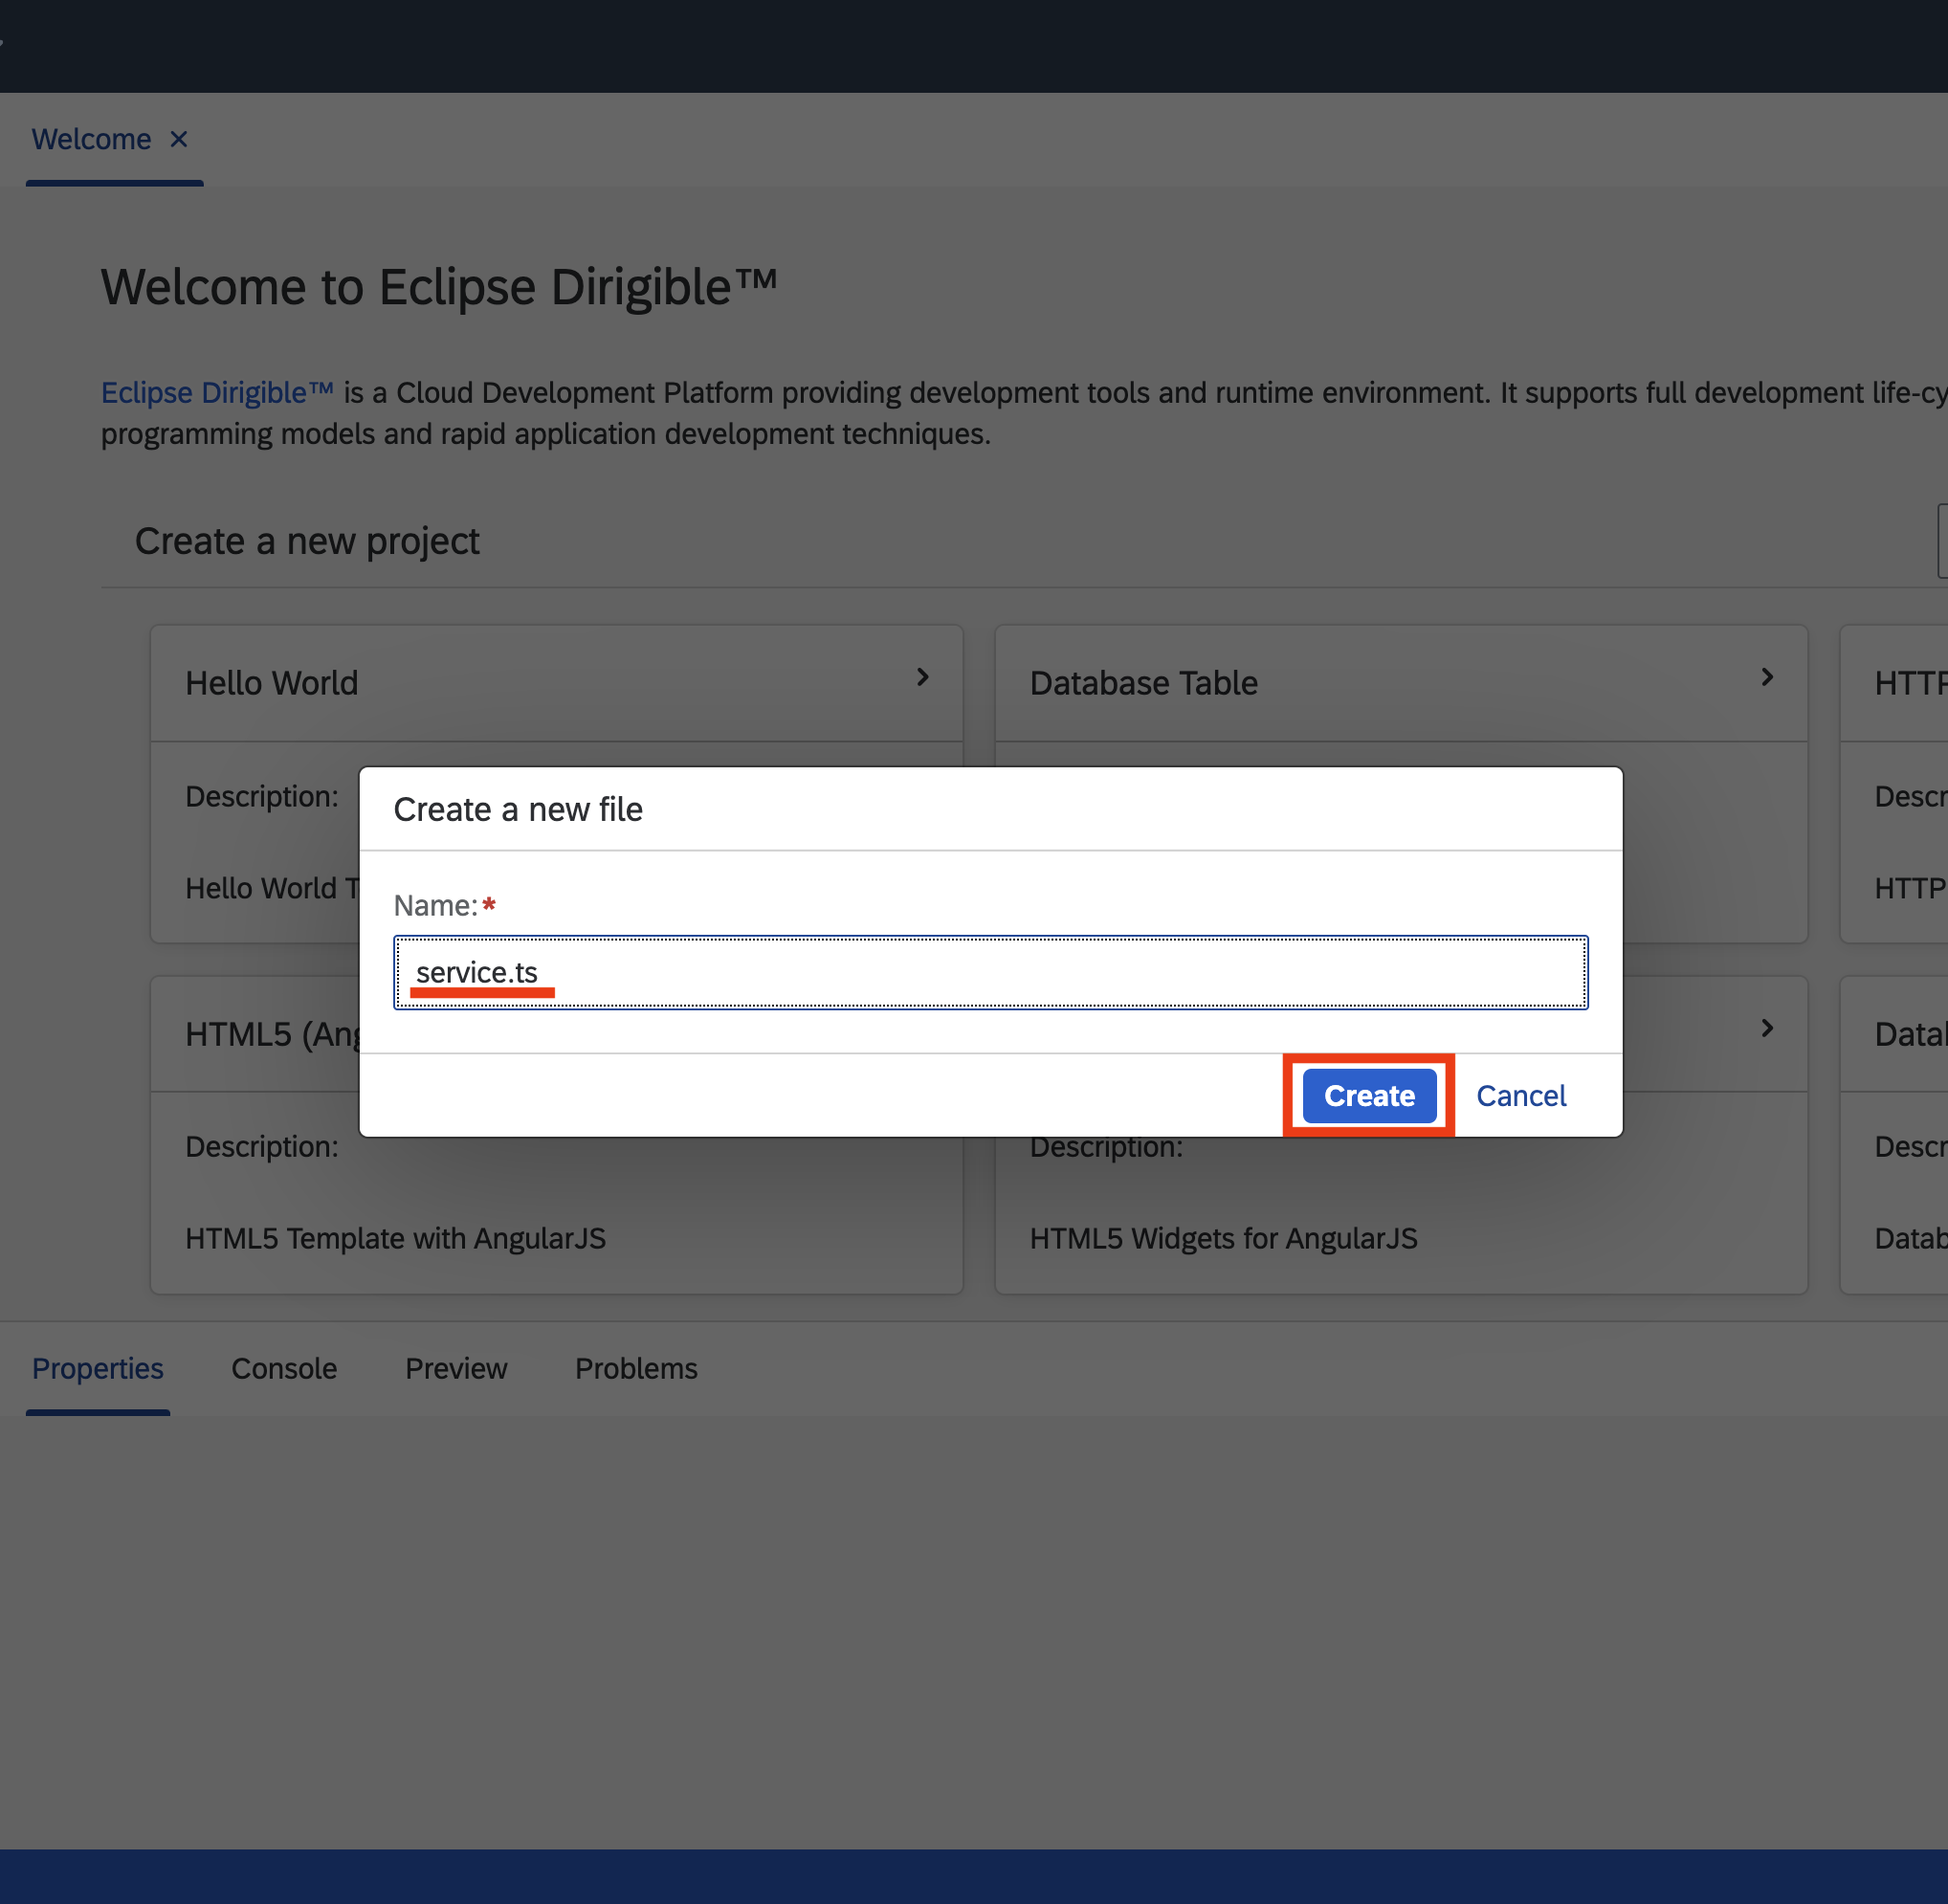
-
Double-click on the
service.tsto open the file in the editor on the right.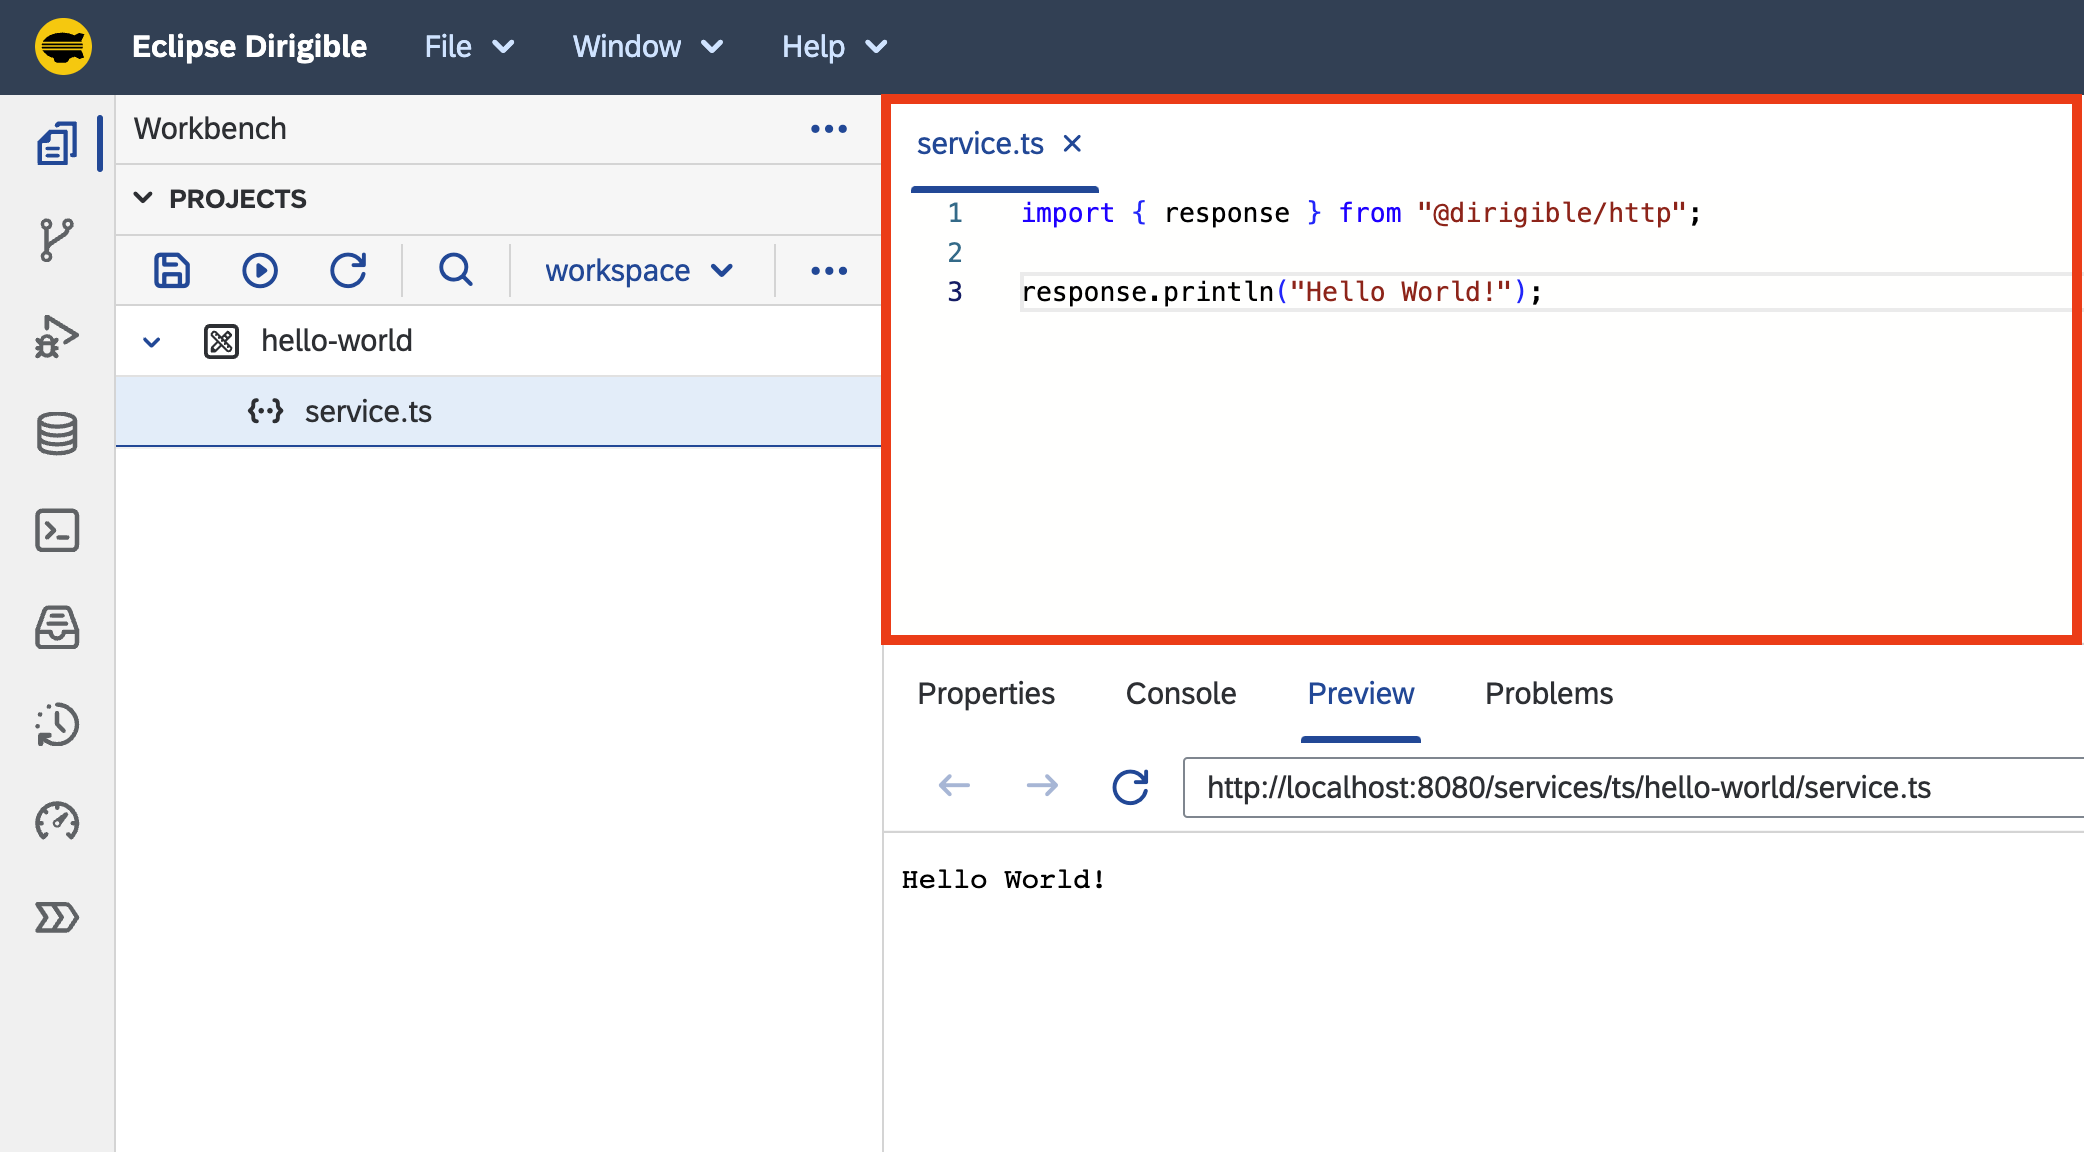
Info
The file already contains a
Hello Worldservice implementation. As it's not specified otherwise, the service can be executed by performing any of the following HTTP methods:GET,POST,PUT,DELETEandPATCH.-
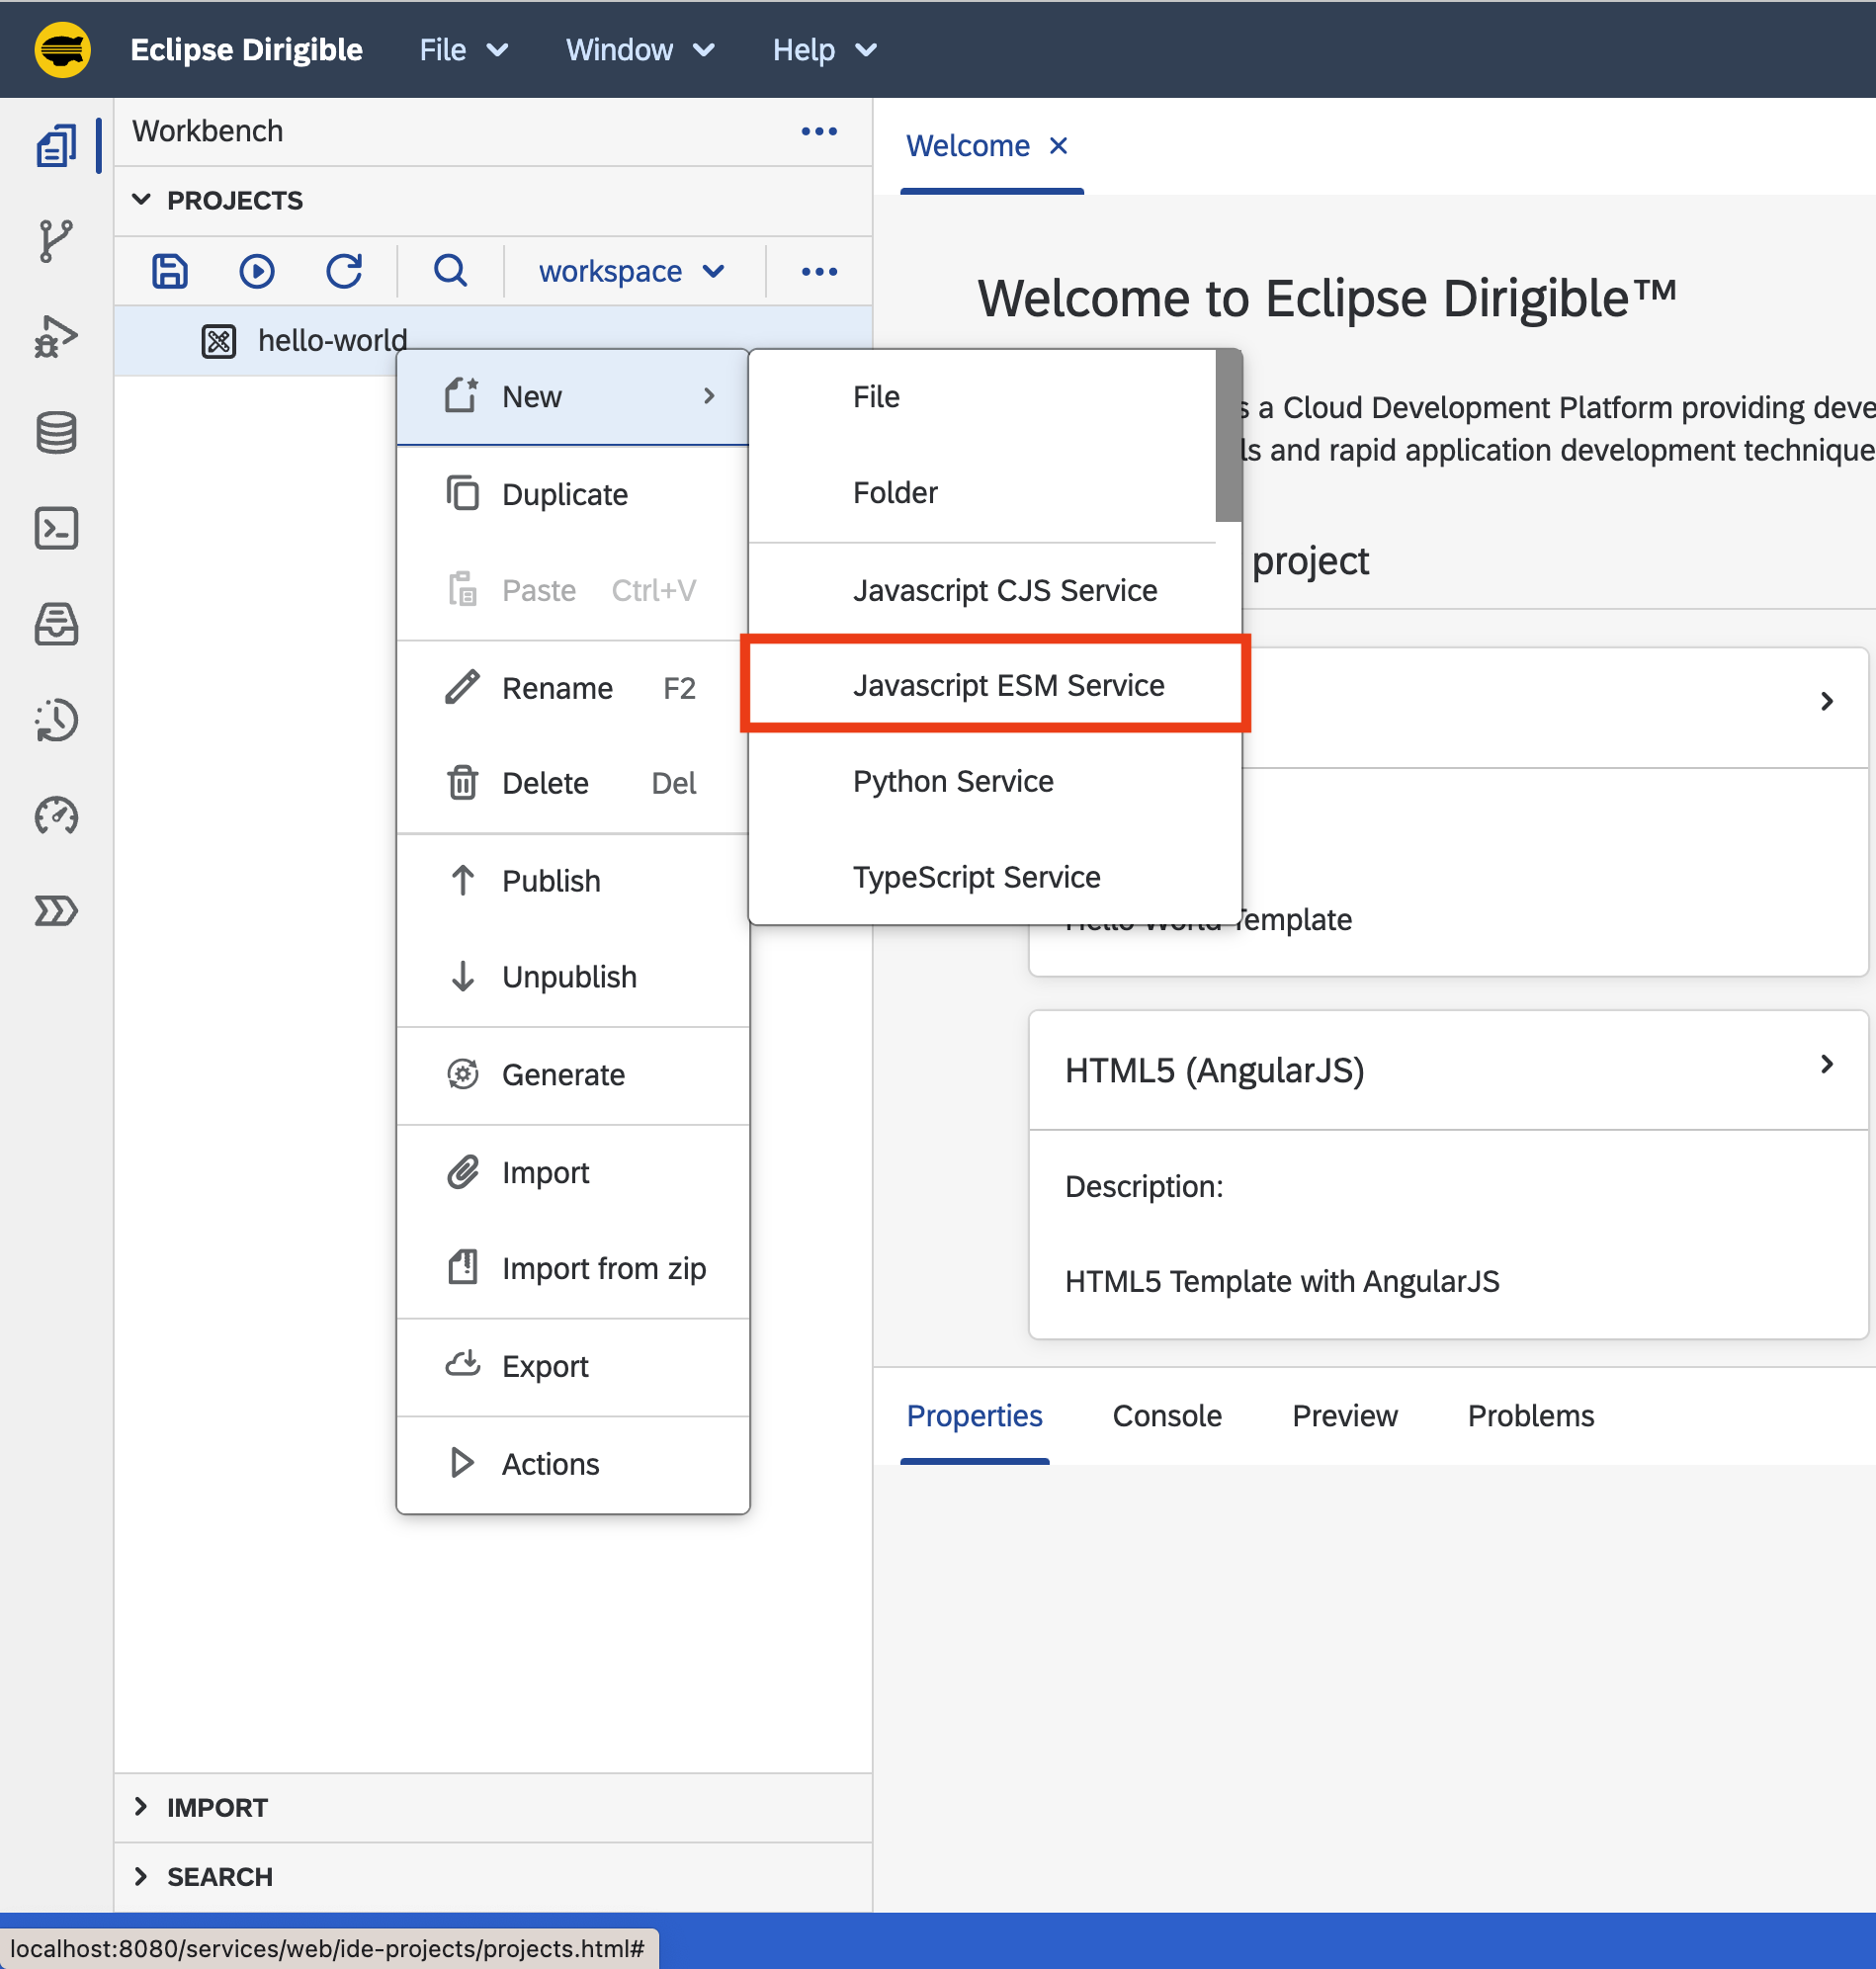
Right-click on the
hello-worldproject and choose Publish option from the menu:
-
With the
service.tsselected in theProjectsview, check the result of the execution of the server-side TypeScript Service in thePreviewview: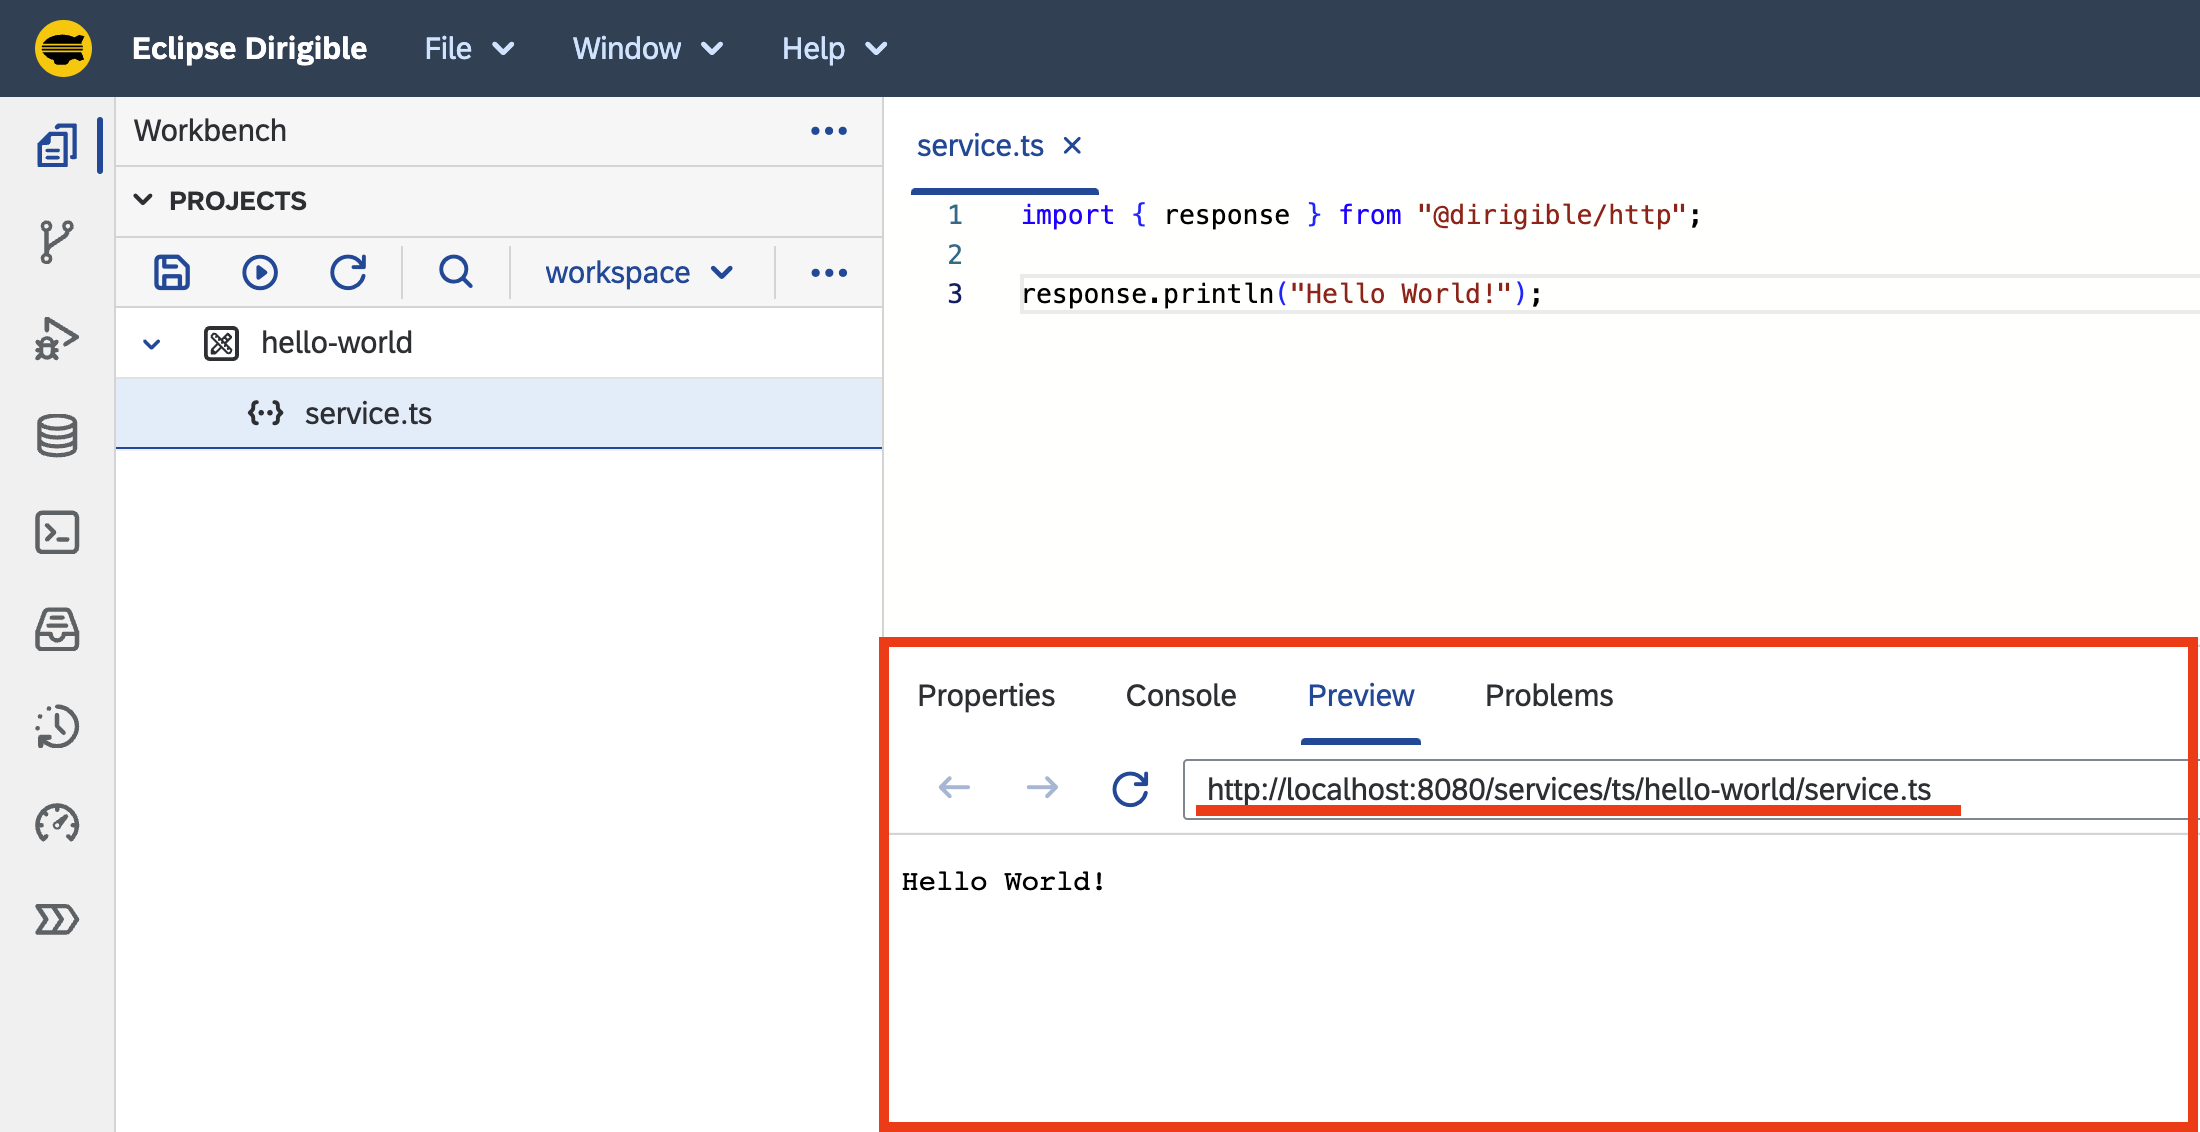
Note
The TypeScript Service is published and available at the http://localhost:8080/services/ts/hello-world/service.ts URL. It can be accessed in a separate browser tab, consumed by a third-party application or API tools like
PostmanorcURL.-
Select the New → JavaScript ESM Service option:
-
Enter
service.mjsfor the name of the JavaScript ESM Service: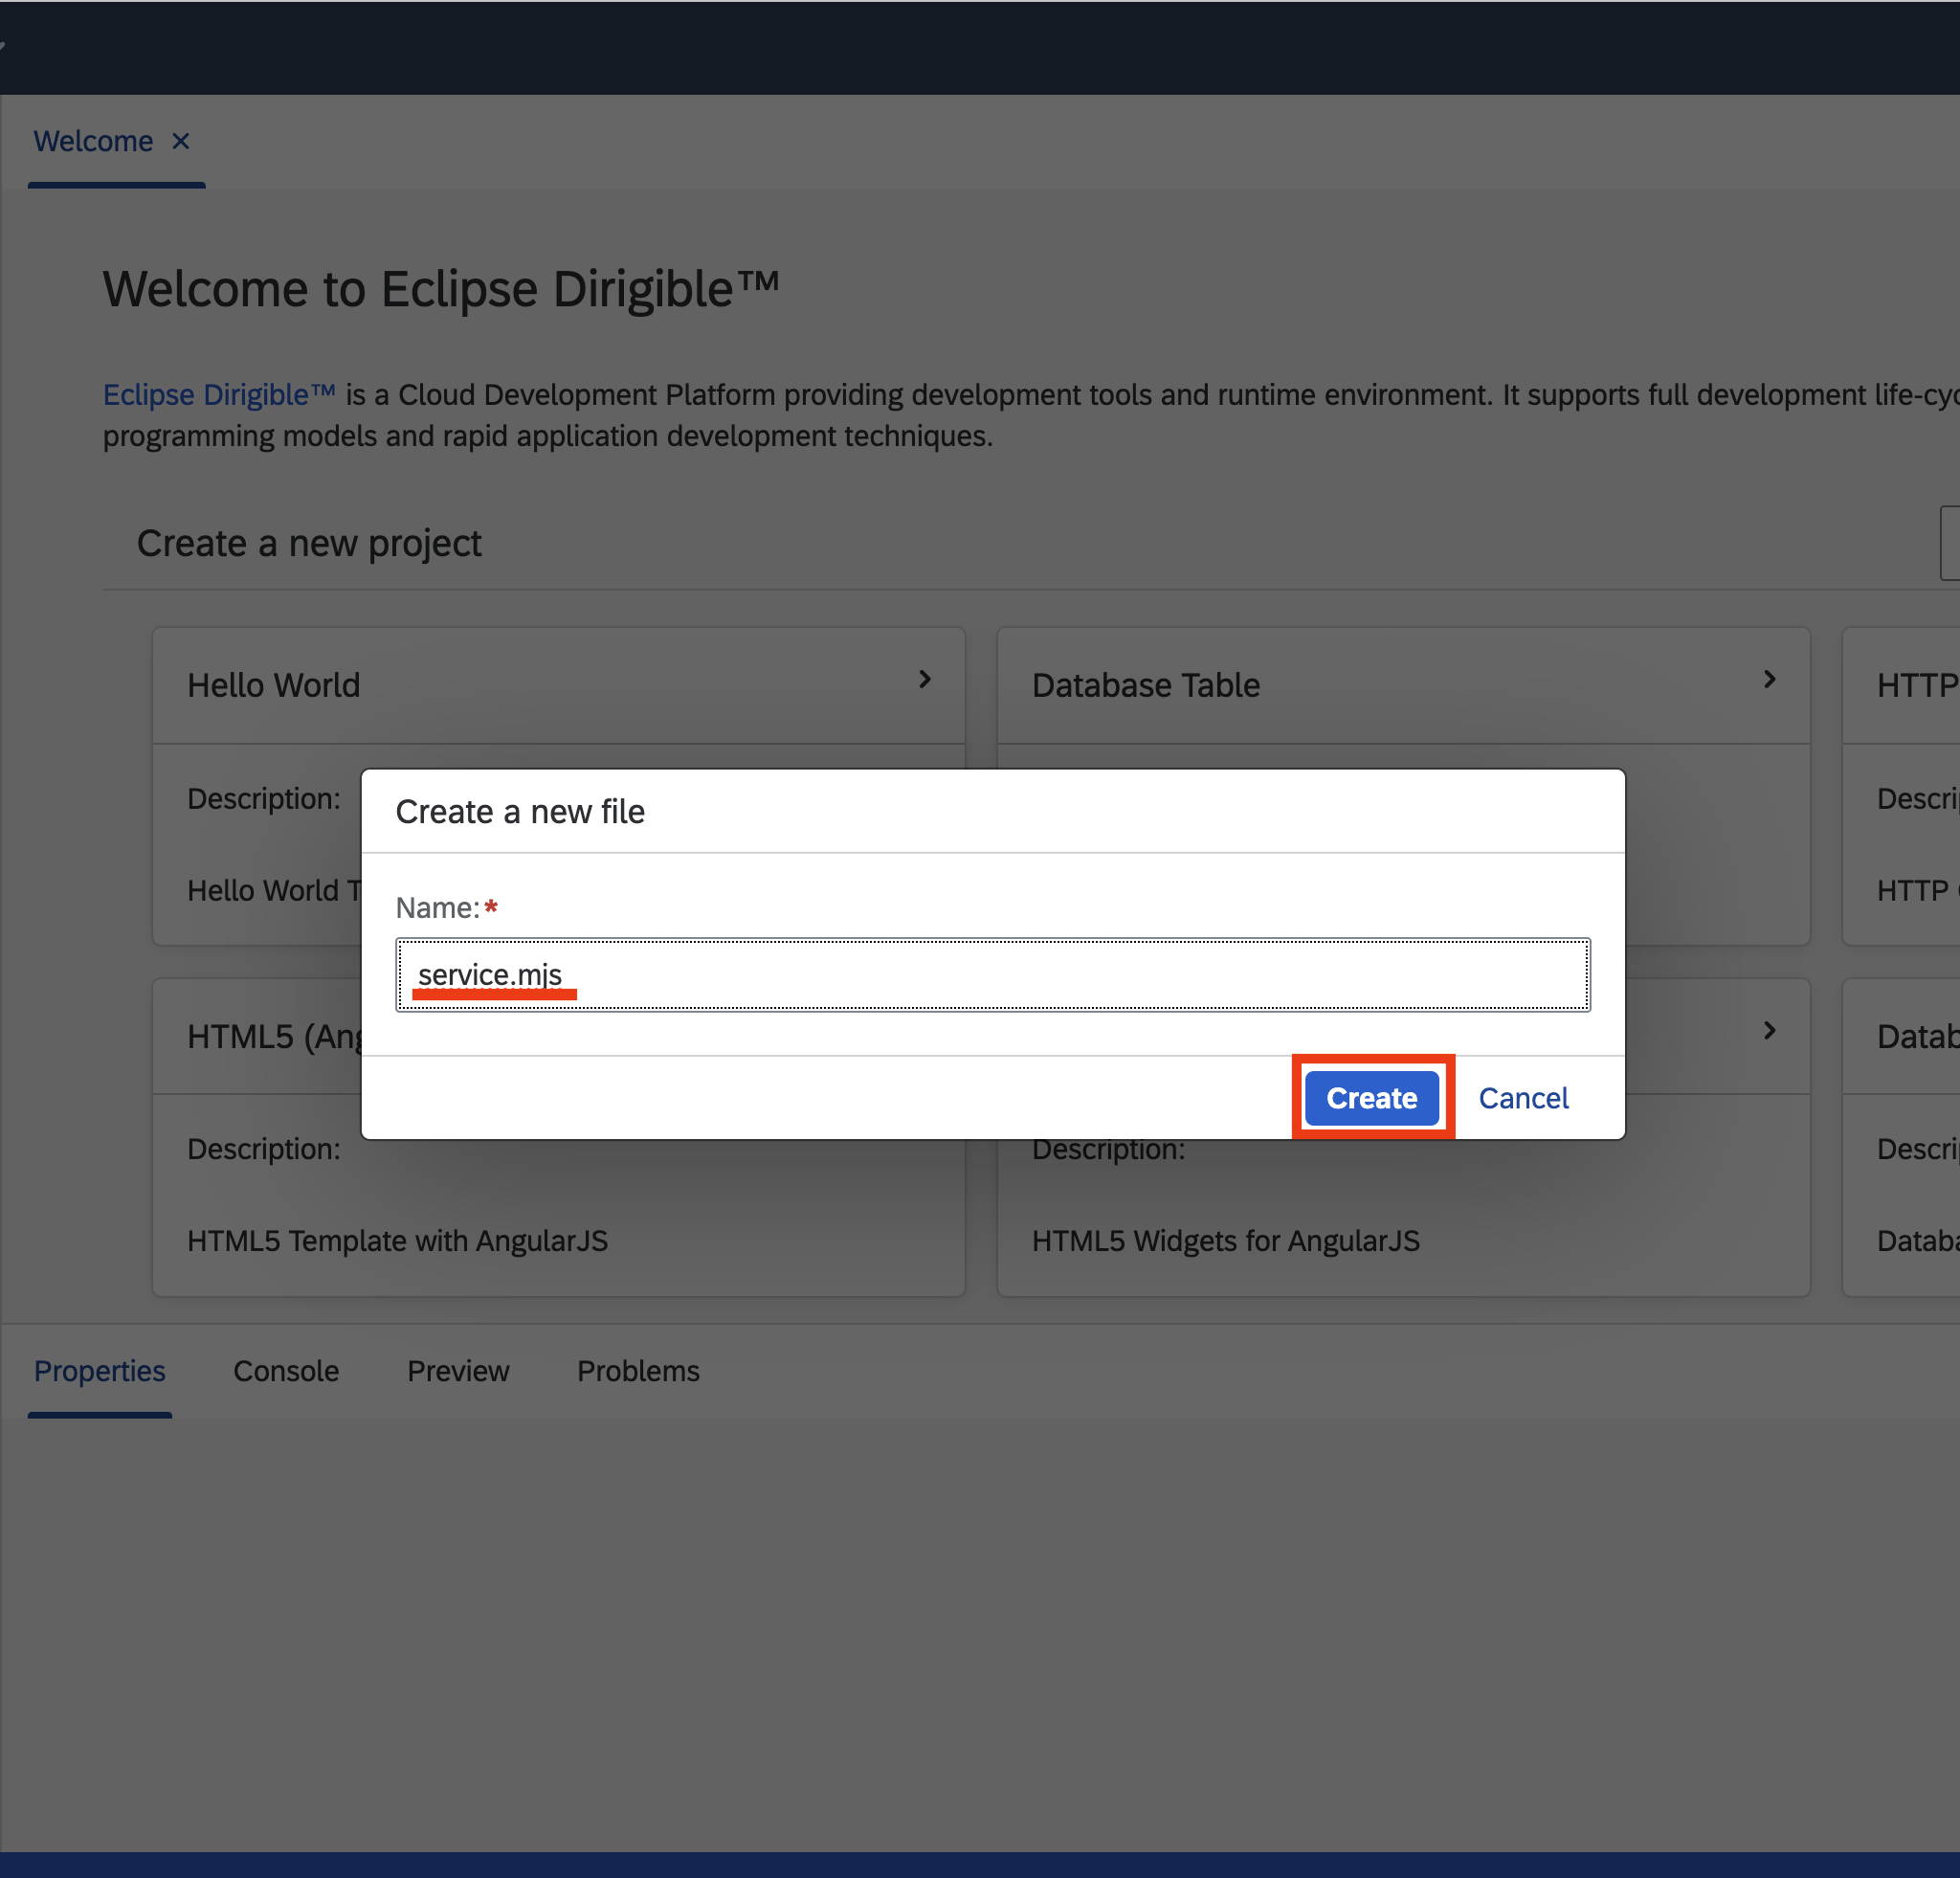
-
Double-click on the
service.mjsto open the file in the editor on the right.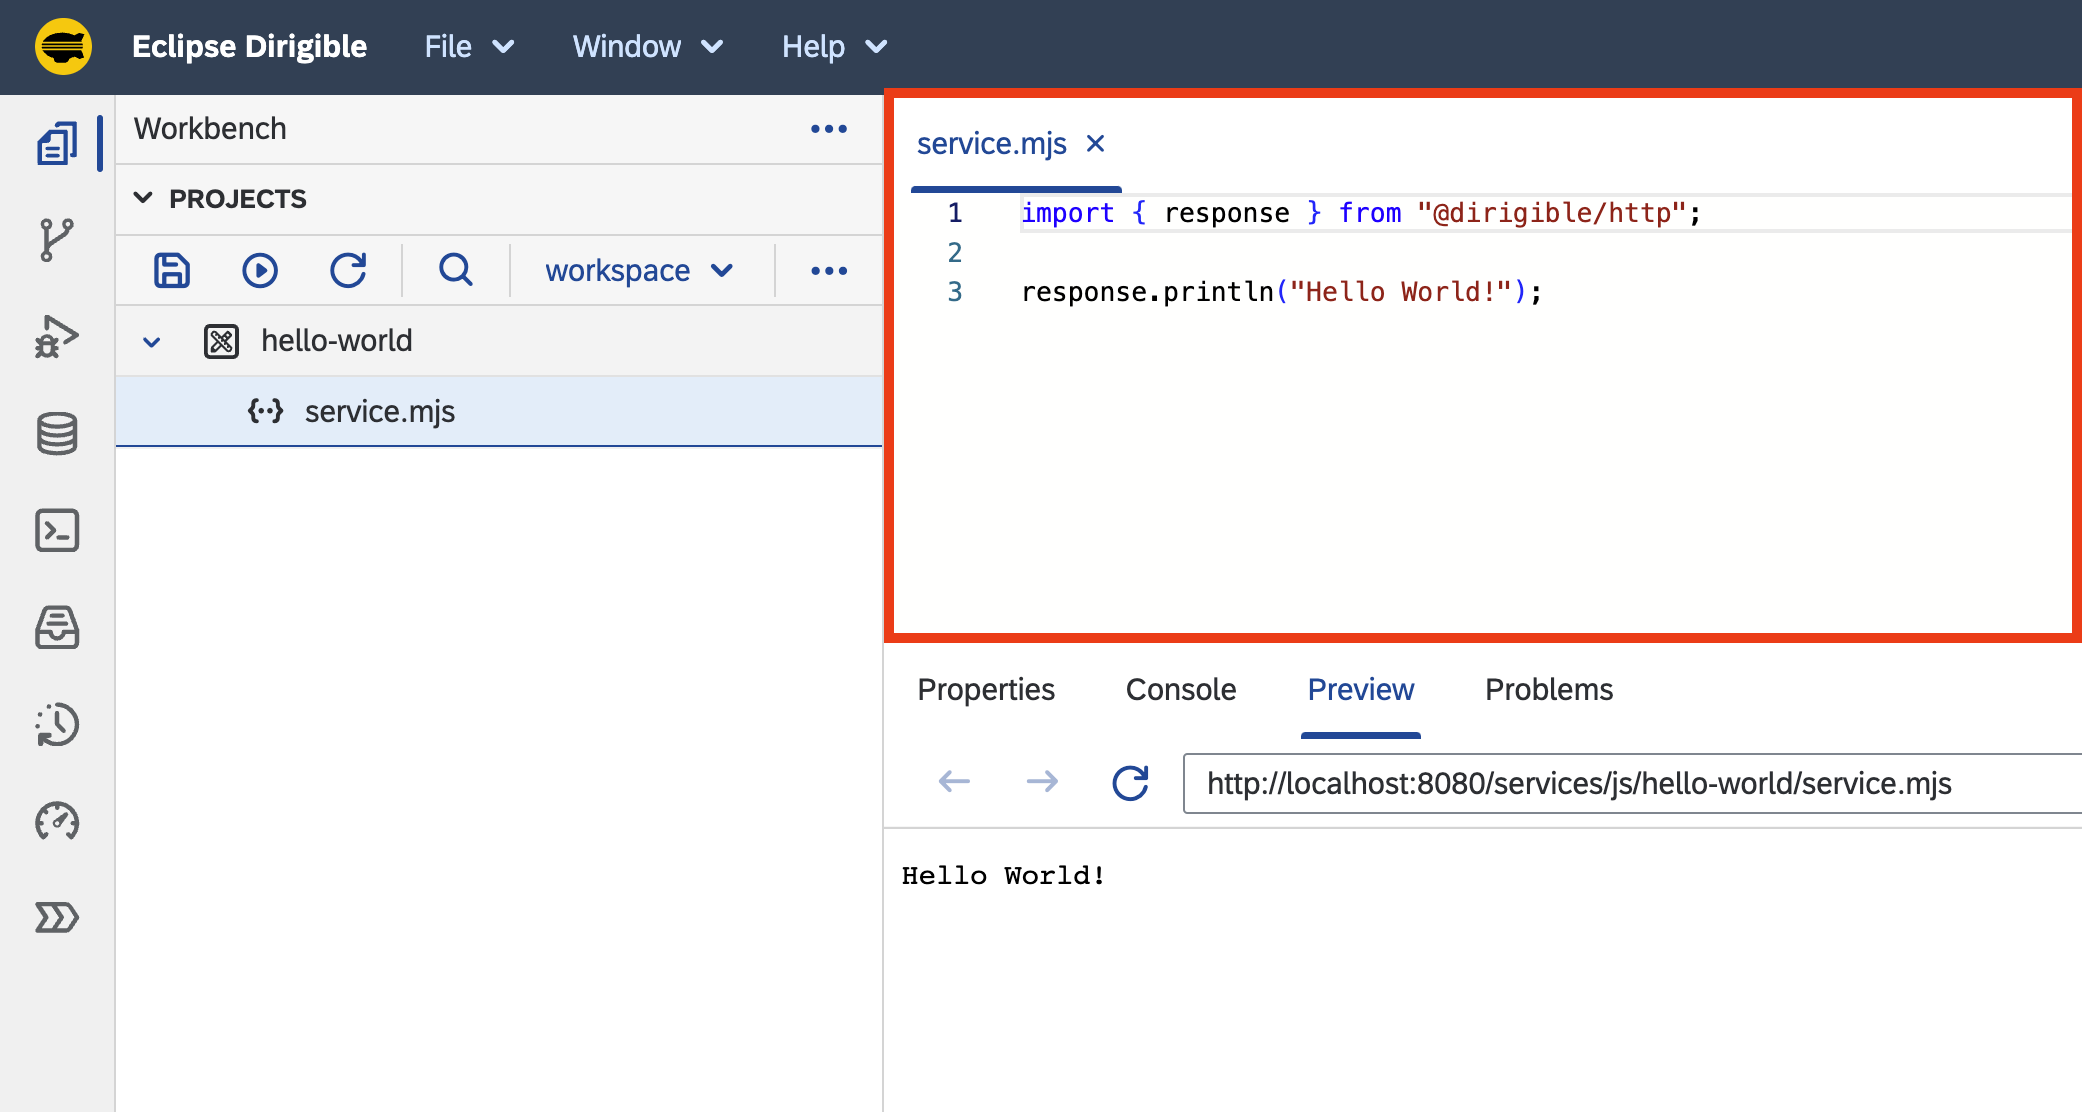
Info
The file already contains a
Hello Worldservice implementation. As it's not specified otherwise, the service can be executed by performing any of the following HTTP methods:GET,POST,PUT,DELETEandPATCH.-
Right-click on the
hello-worldproject and choose Publish option from the menu: -
With the
service.mjsselected in theProjectsview, check the result of the execution of the server-side JavaScript ESM Service in thePreviewview: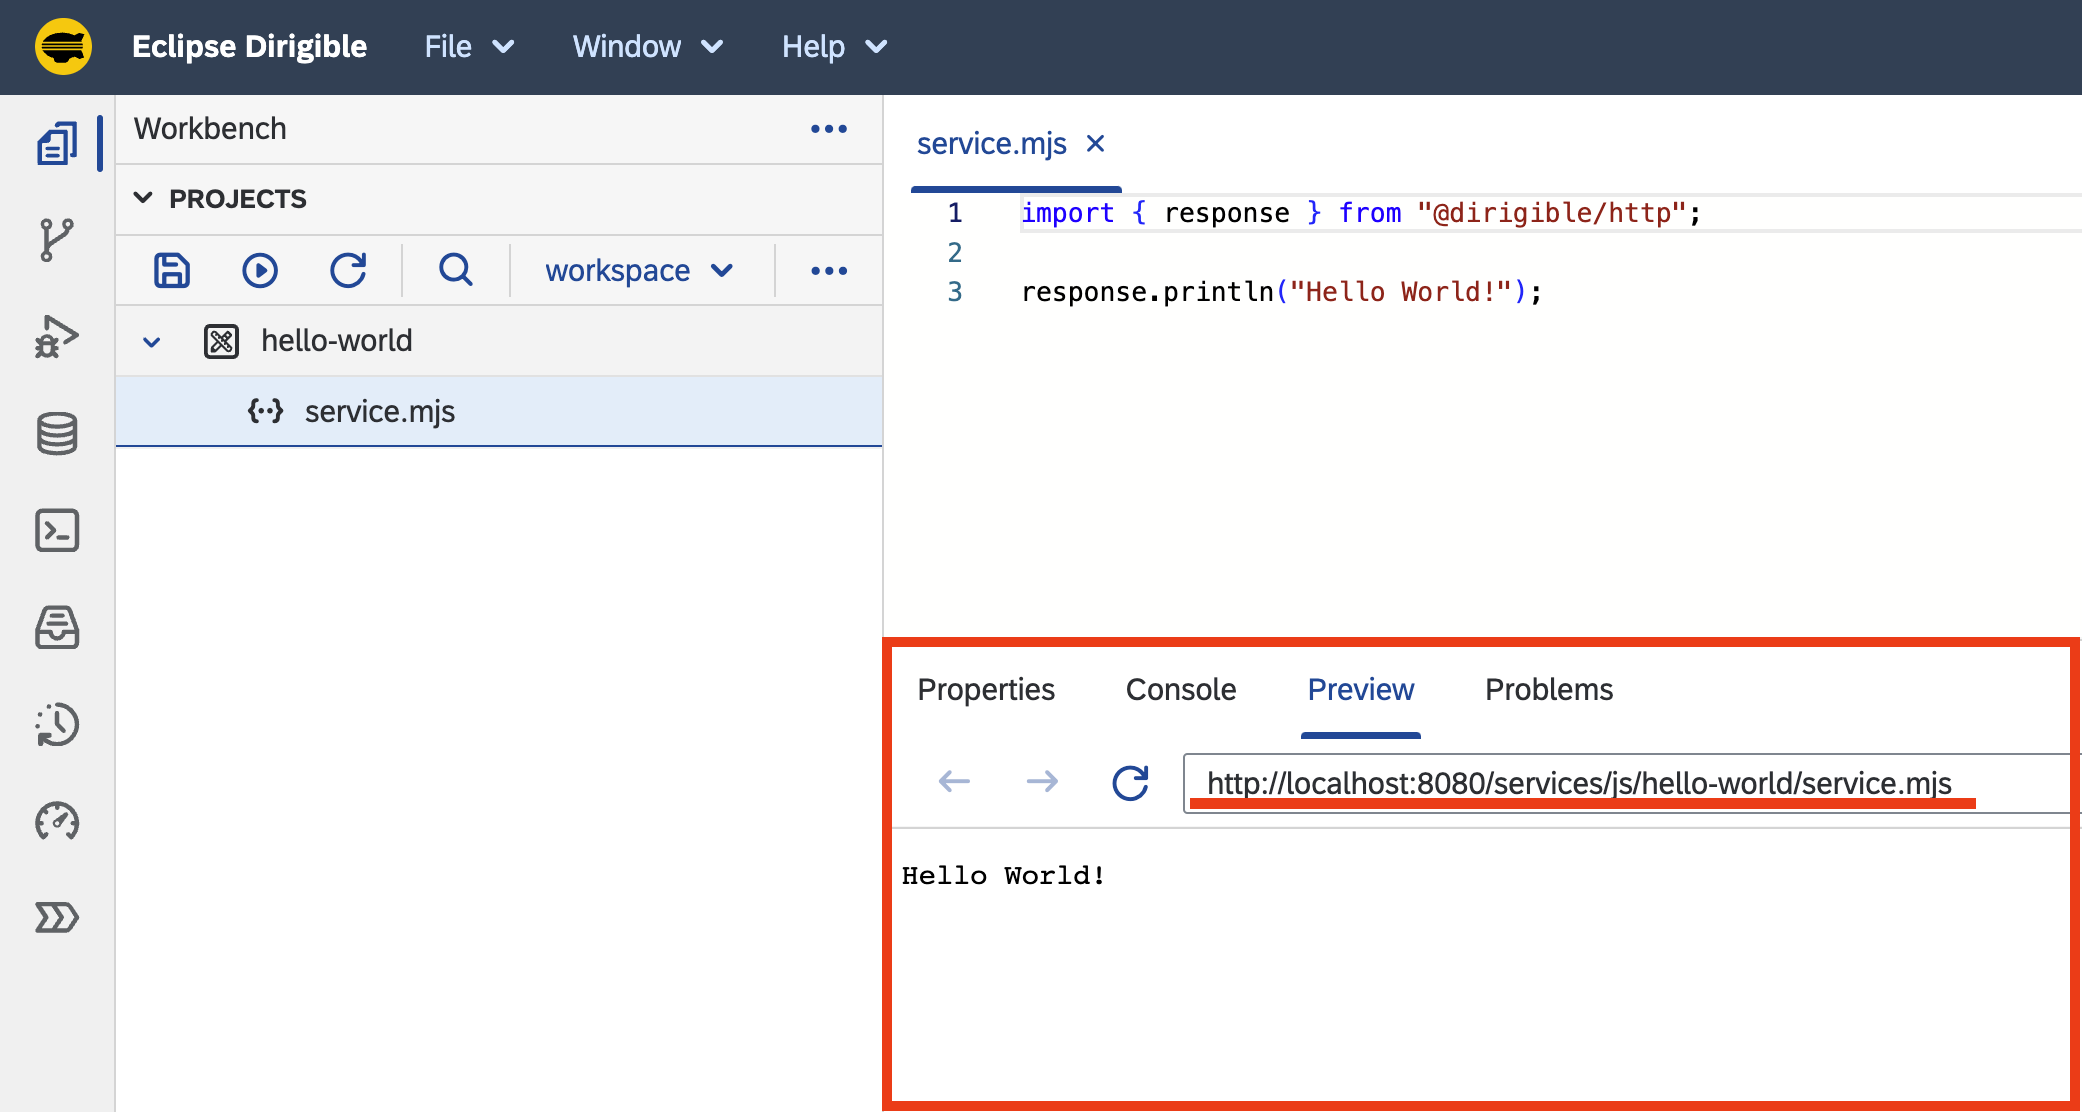
Note
The JavaScript ESM Service is published and available at the http://localhost:8080/services/js/hello-world/service.mjs URL. It can be accessed in a separate browser tab, consumed by a third-party application or API tools like
PostmanorcURL. -
Update the Hello World service
-
Go to line 3 in the editor and change the
Hello World!message toHello Eclipse Dirigible!.import { response } from "sdk/http"; response.println("Hello Eclipse Dirigible!");import { response } from "sdk/http"; response.println("Hello Eclipse Dirigible!"); -
Save the file: Ctrl+S for Windows, Cmd+S for macOS
-
The output in the Preview view changes immediately.
Note
This is due to the default configuration of
auto-publish on save. You can find more about this dynamic behavior in Dynamic Applications.
References
So far we saw how easy it is to create and modify a Hello World RESTful service, but Eclipse Dirigible capabilities goes way beyond that.
References
- You can explore the Tutorials section for more scenarios.
- If you would like to build complex services, you can go to the API section to find more JavaScript APIs that Eclipse Dirigible provides out-of-the-box.
- If you are curious what you can do with Eclipse Dirigible apart from writing server-side JavaScript services, you can have a look at the features section.
- In case you are interested in
ModelingandGenerationwith theLow-Code/No-Codetooling of Eclipse Dirigible, you can read about Entity Data Models and Generation.