Scheduled Job - Job Definition
Overview
This section shows how to create and manage Job Definition for the Scheduled Job application.
Steps
Job Definition
- Right click on the
scheduled-job-projectproject and select New → Scheduled Job. - Enter
log.jobfor the name of the Scheduled Job. - Right click on
log.joband select Open With → Code Editor. -
Replace the content with the following definition:
{ "expression": "0/10 * * * * ?", "group": "defined", "handler": "scheduled-job-project/handler.mjs", "description": "Scheduled Log Job", "parameters": [ { "name": "severity", "type": "choice", "defaultValue": "", "choices": "Info,Warning,Error", "description": "The log severity" }, { "name": "message", "type": "string", "defaultValue": "", "description": "The log message" } ] } -
Double click on
log.jobto open it with theJob Editor.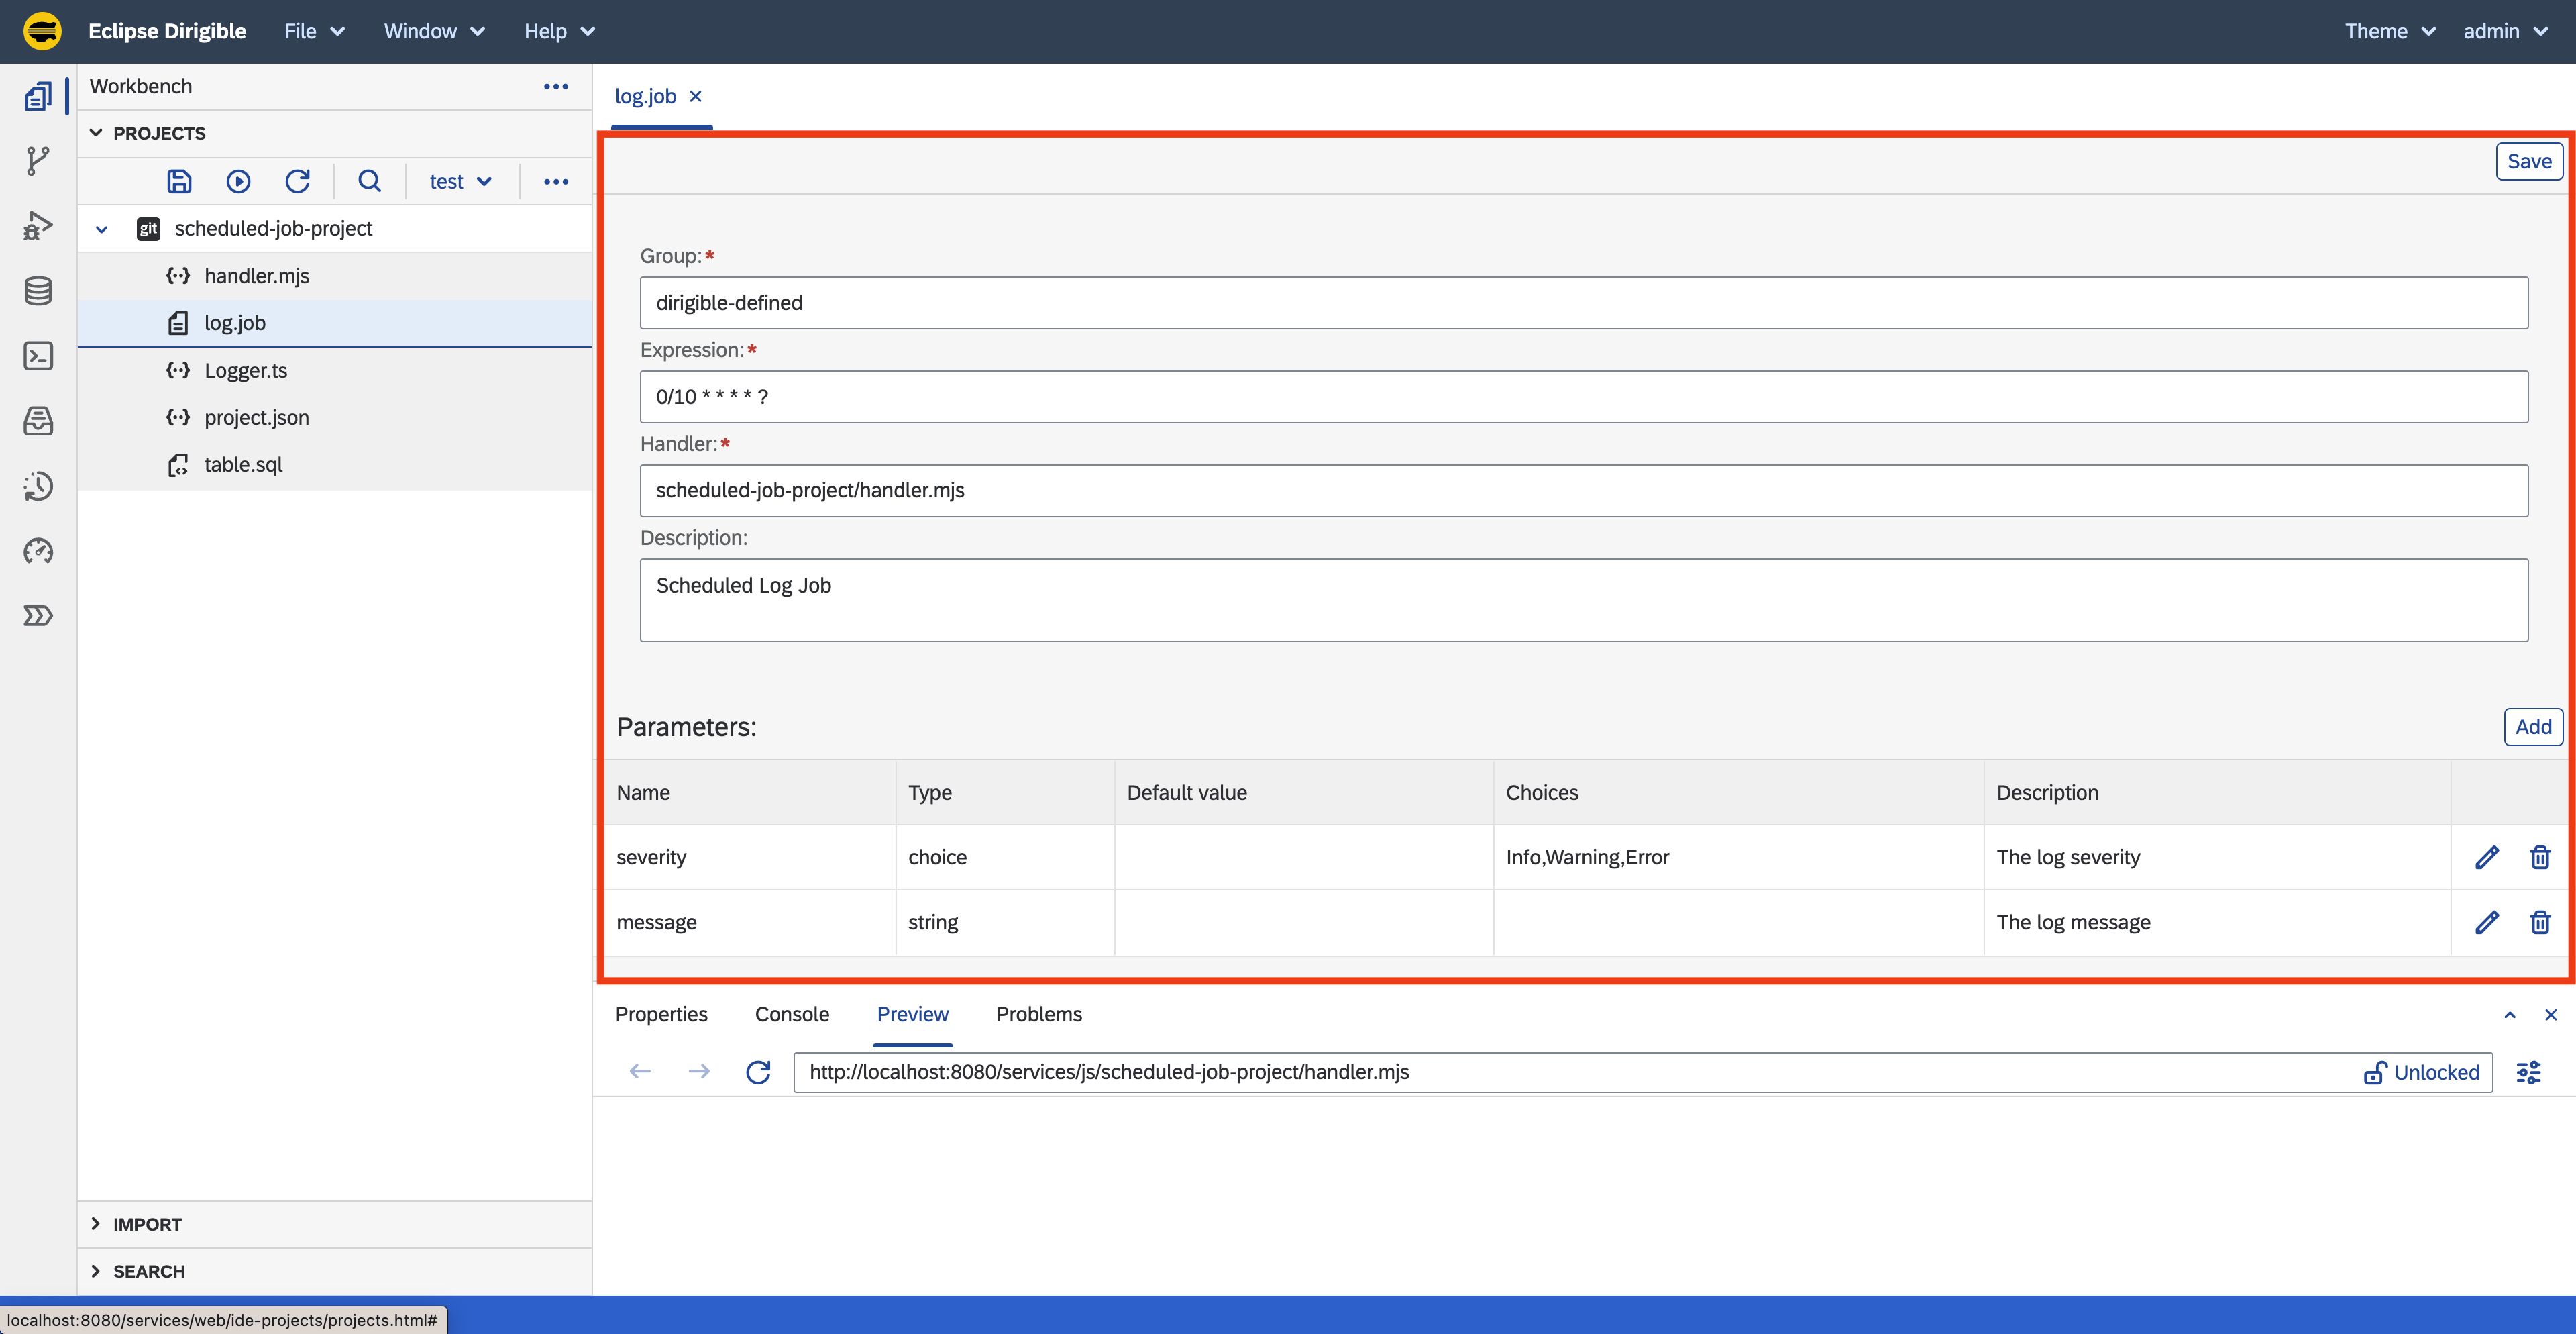
Save & Publish
Saving the file will trigger a Publish action, that would schedule the job. As defined by the expression (0/10 * * * * ?), the job handler would be executed each 10 seconds and data would be insterted into the LOG_EVENTS table.
Log Events Data
- Navigate to the
Database Perspectiveto check that there are new records in theLOG_EVENTStable. -
You can notice in the
LOG_TIMESTAMPcolumn that the last records are 10 seconds apart each.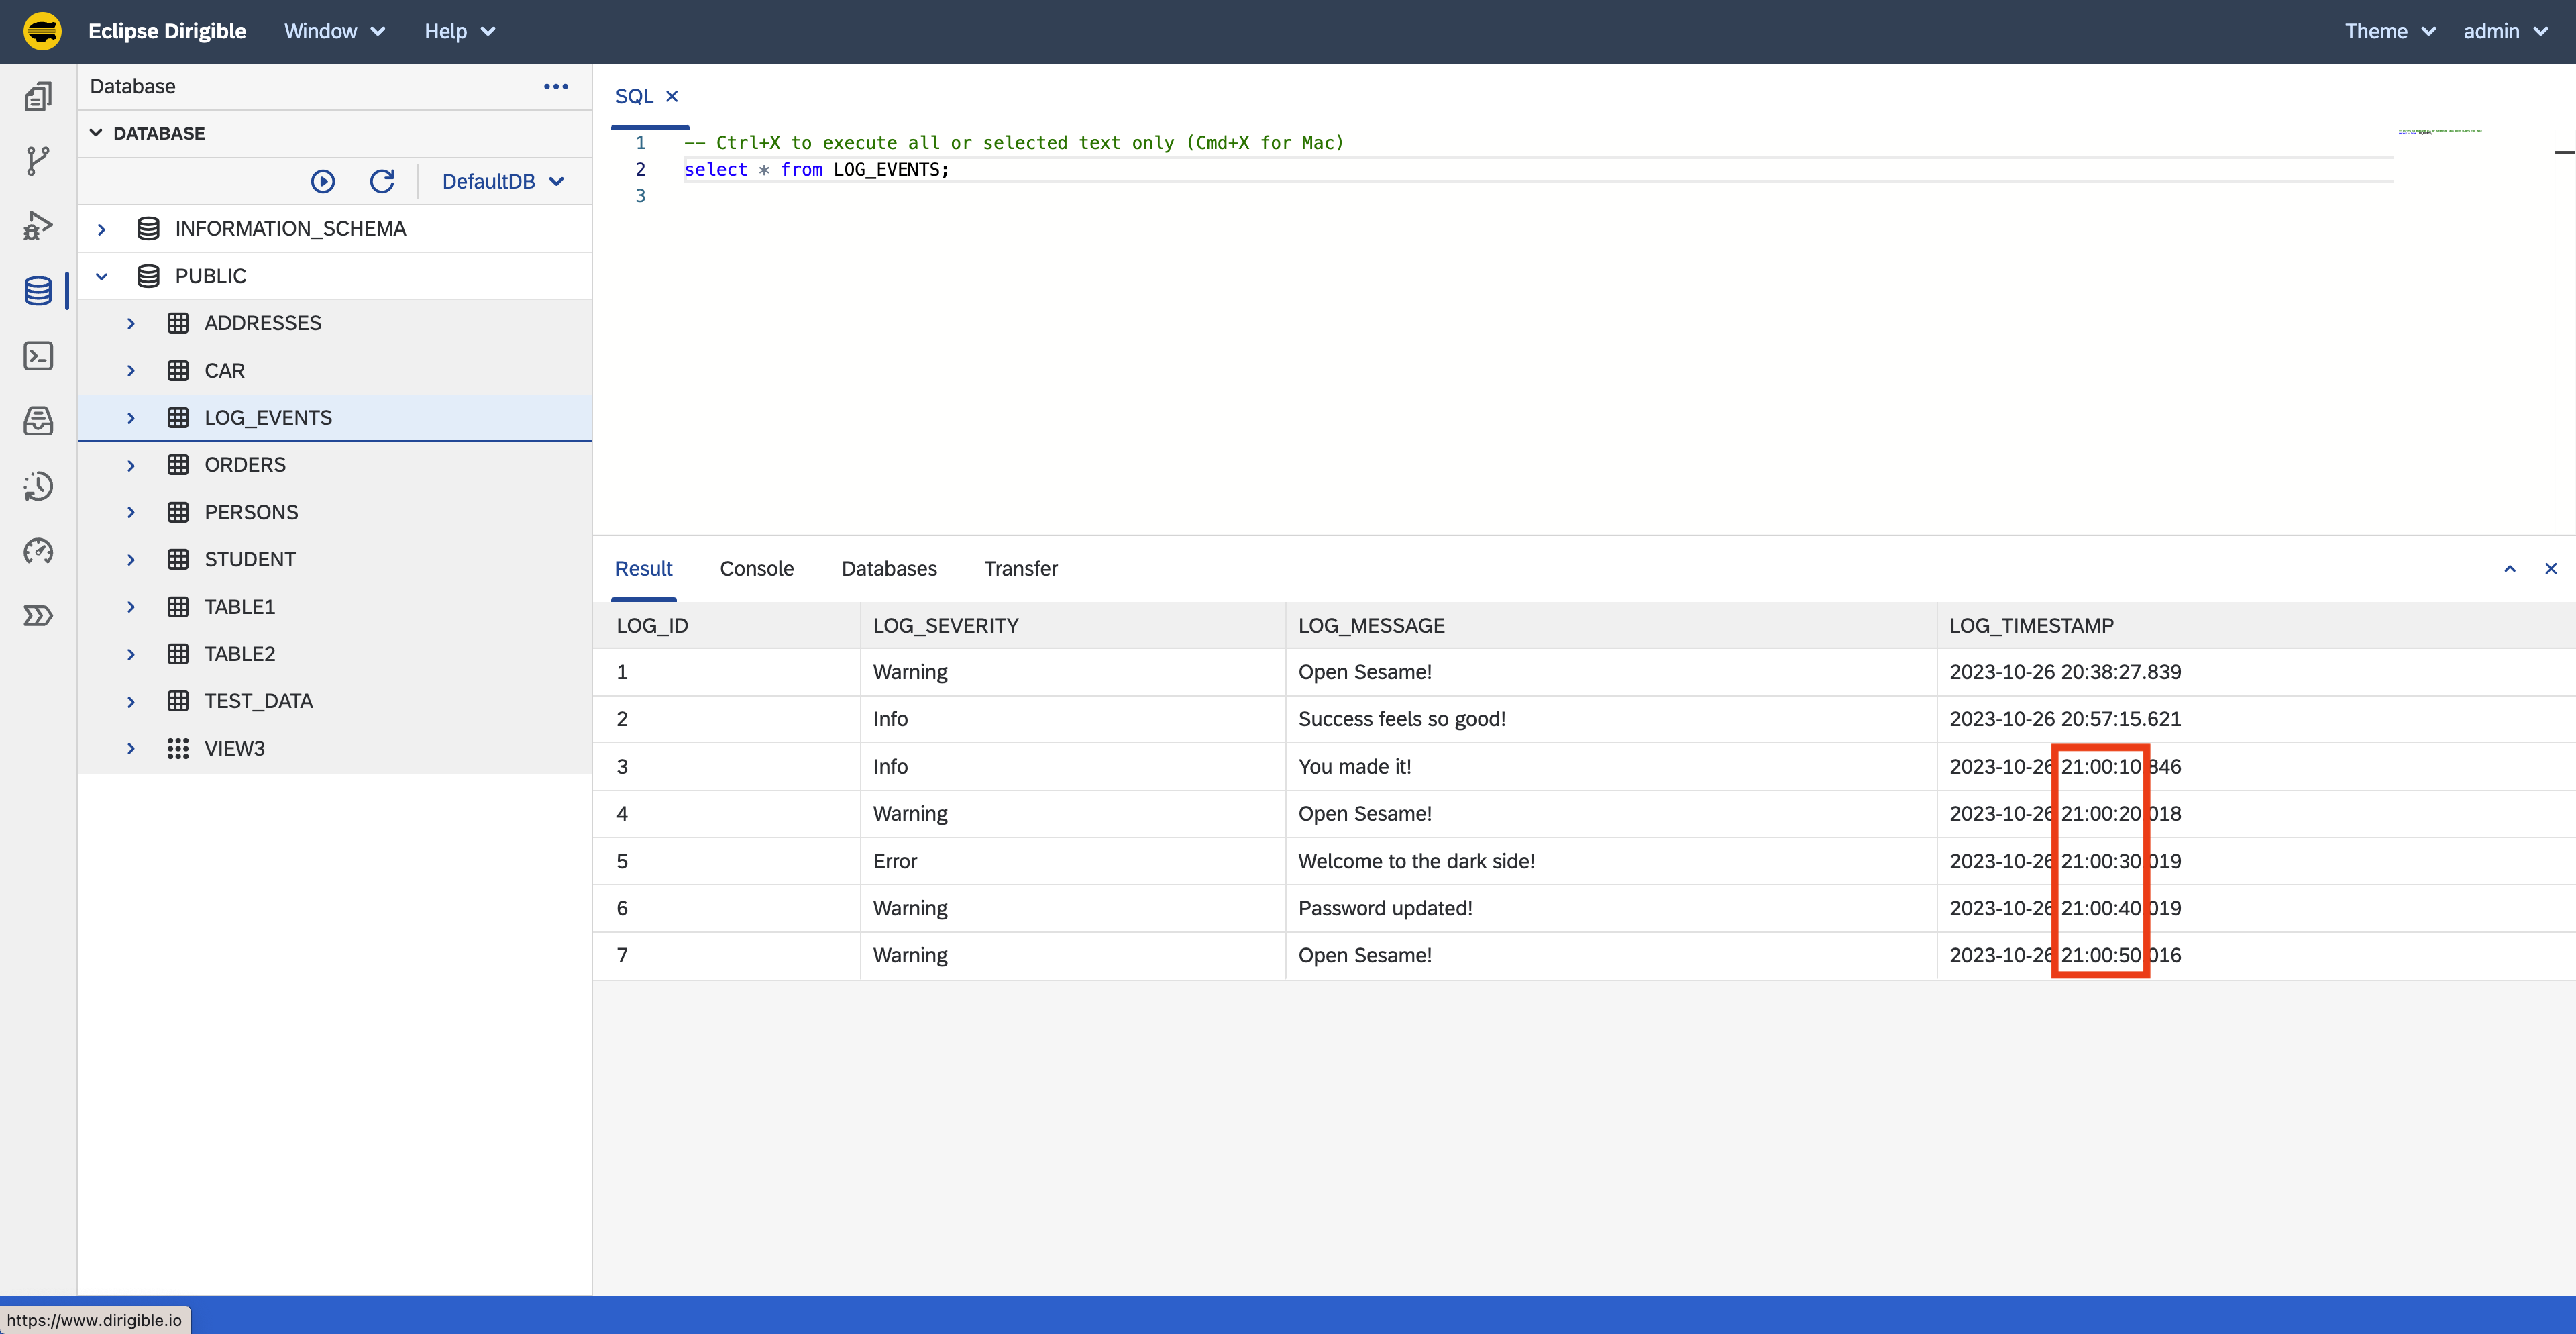
Manage Jobs
- Navigate to the
Jobs Perspectiveto see a list of the Scheduled Jobs on the instance. -
Click on the
Enable/Disableicon to stop thelogScheduled Job.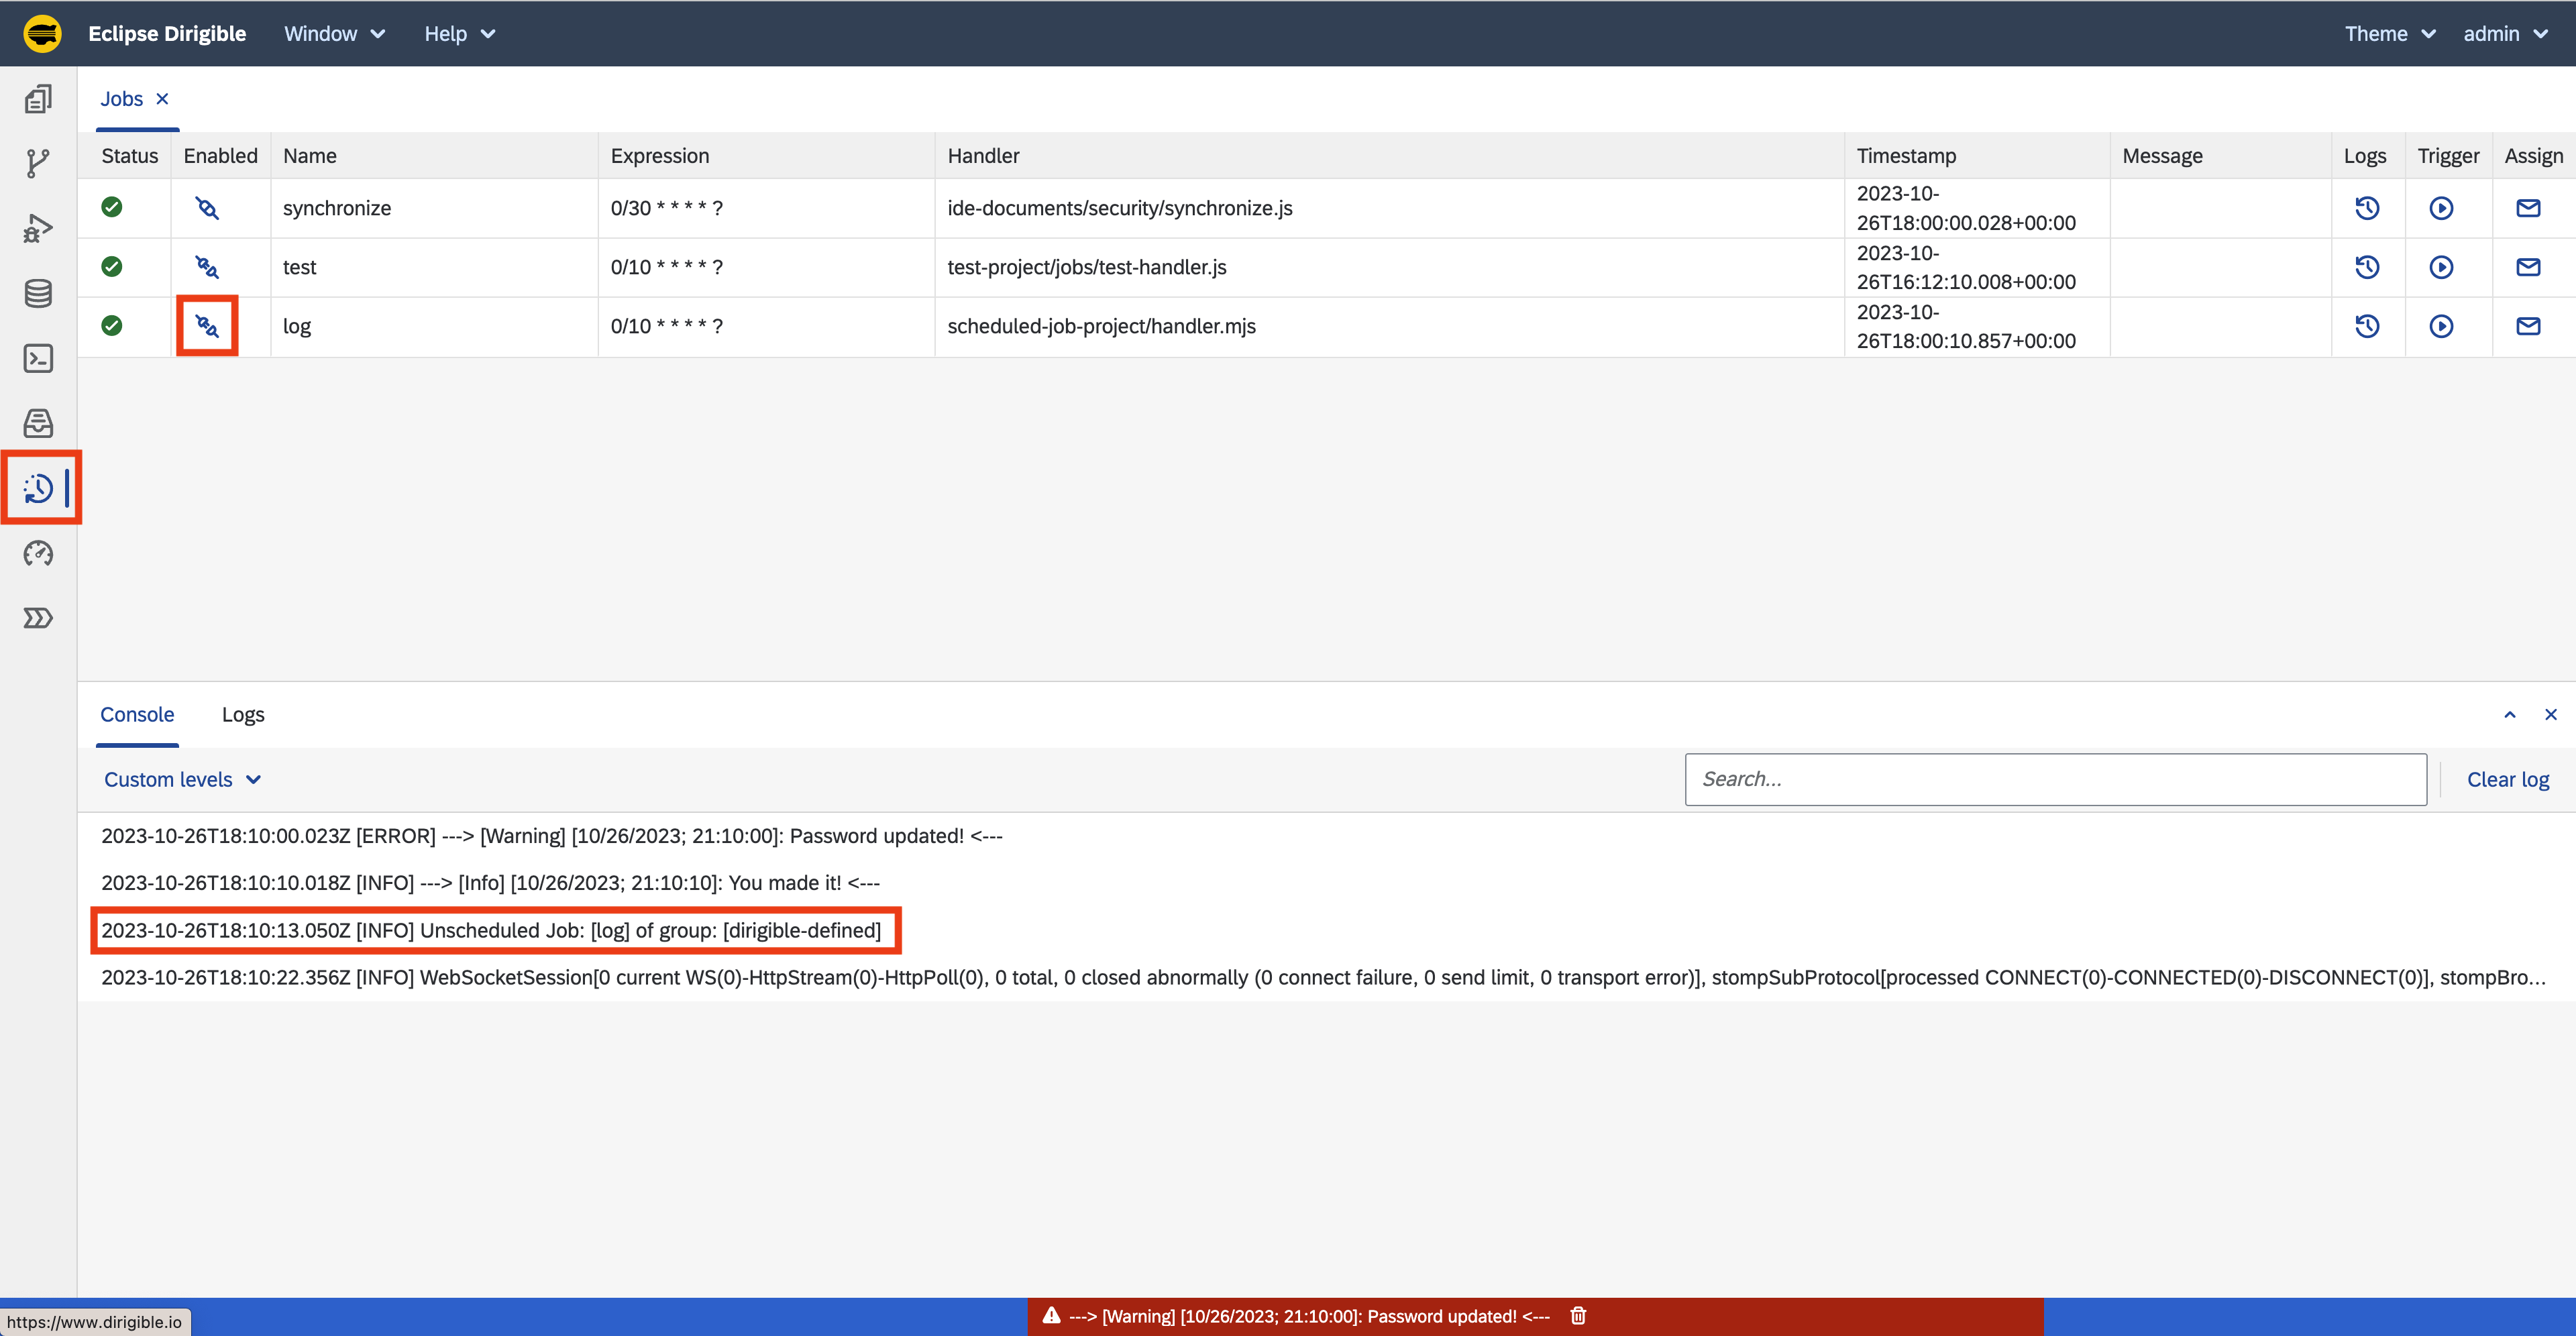
-
Navigate to the
Database Perspectiveto check that there are no new records in theLOG_EVENTStable after the job was disabled. - Go back to the
Jobs Perspective. -
Click on the
Triggericon and then on theTriggerbutton to start newJob Execution.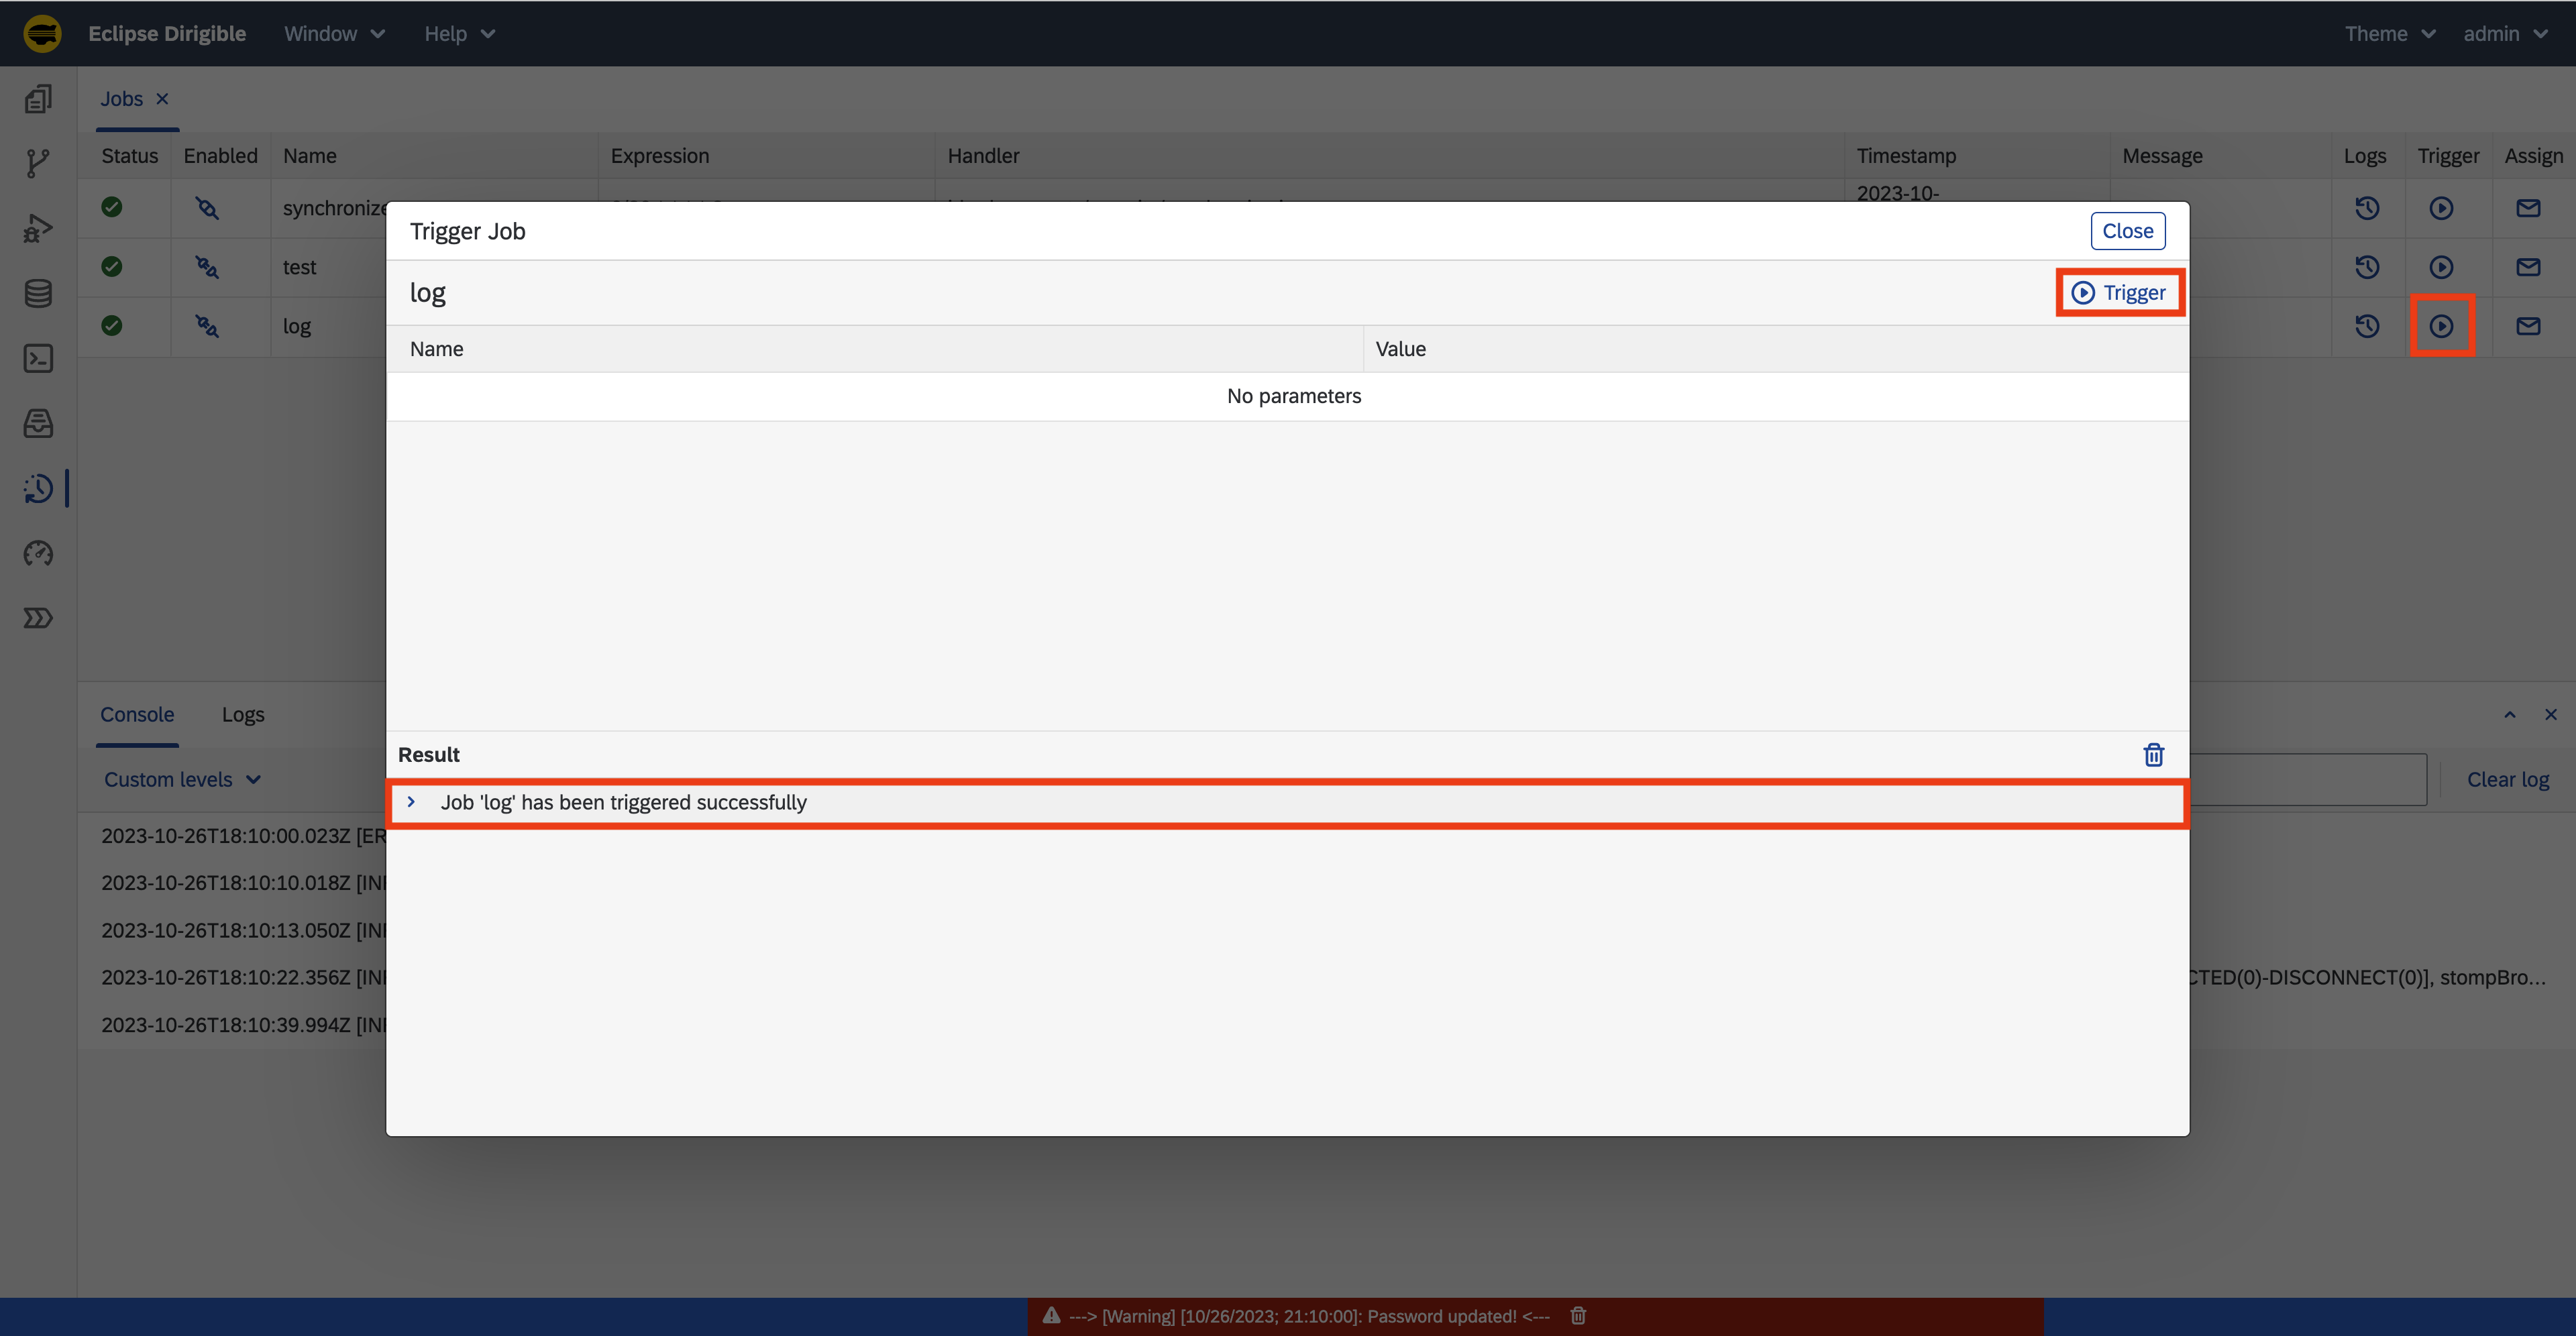
Force Trigger
This action would instantly trigger the
Job Handlerwithout respecting theJob Schedule Expressionor whether theJob Scheduleis enabled or disabled. -
Navigate back to the
Database Perspectiveto check that there was a new record added in theLOG_EVENTStable after the job was disabled.
Summary
Tutorial Completed
After completing all steps in this tutorial, you would:
- Have
Scheduled Job. - New records in the
LOG_EVENTStable. - Experience with the
Jobs Perspective.
Note: The complete content of the Scheduled Job tutorial is available at: https://github.com/dirigiblelabs/tutorial-scheduled-job-project